Showing posts with label 2014 finishes. Show all posts

Thursday, January 1, 2015

2015!

Woo! Another year. But before I jump into that, I want to take a second to remember 2014:

Crafty-Musings 2014 completed projects collage... woo!

I hesitated to make a collage initially, but I am glad I did. It was a rather productive year for me-- and seeing it laid out like this makes me feel pretty proud. There is some good stuff on there! It also reminds me of a couple of things. Like the quilts that aren't on there but that were so close-- one just needing a label; one with a nearly completed binding. I gotta get those finished! And then: I want to make more clothes! My sewing projects this year were really good ones and I learned a lot. I love wearing me-made things, and I need more!

Looking back to my 2014 goals:
  • Use more fabric than I buy.-- Woot! This is a win. And an improvement over last year:

    • Fabric In: 64.417 yards
    • Fabric Used: 94.292 yards

    • Finish at least 2 UFOs.-- My "Harrington & Hannah" quilt is one; and I'm considering using up the roll o' fabric from 2009 a big UFO win as well. Unfortunately, the one project I listed by name, "Bargello Reflections", did not get completed. But technically, I did meet the goal!
    • Finish at least 1 kit quilt.-- Yes! "Vehicles Vroom" is one I consider a kit quilt.
    • Blog once a week.-- Alas. Not so much. But I did manage to blog at least once a month. There's definitely room for improvement here.
    • Lose that last 5 pounds.-- LOL! Not so much here either. I made a conscious decision back in February that for my 40th birthday, I was gonna eat and enjoy it. And I totally did! And it was awesome! And then I couldn't stop. Doh! So I've gained. Not so much that I can't fit in my clothes. But enough so that some of them are not very comfortable at this point.
    My goals for 2015:
    • Use more fabric than I buy.-- Yep. It's good goal, and I'm sticking with it!
    • Finish at least 2 UFOs, including my Bargello Reflections quilt.-- I'm getting hard core here, putting a specific project in the goal.
    • Finish the recent WIPs pile.-- This includes:

      • A little kit quilt that is basted and ready for quilting;
      • An Edyta Sitar wallhanging that is basted and ready for quilting;
      • My Fall 2013 mystery quilt that is ready for basting;
      • My nine-patch quilt that is also ready and waiting for basting.

      Yikes. I'm already kind of feeling overwhelmed by the quilting required here. Hopefully the little baby quilt I just started will kick me into quilting mode and help me get these finished.
    • Complete the 26 Books in 2015 challenge.-- When I saw this challenge, it really spoke to me. I read a fair amount, and love doing it, but I often find myself getting stuck in a rut. I like the idea of pushing myself a bit out of my comfort zone and trying some new book-choosing strategies.
    • Get back on the self-care/fitness train.-- This is going to take some conscious effort. At 3:30 today, January 1, I weigh 175 pounds. Losing 20 would put me back where I was at the beginning of 2014. It seems like a reasonable goal. And I want to feel fit again and comfy in my clothes.
    I think I'm setting a high bar for myself here. But I'm feeling it. It's going to be a good year.

    Happy New Year!!!

    Monday, December 29, 2014

    Holiday gifting

    I hope you have been having a happy holiday season! It has been a crazy couple of weeks here. How do the holidays manage to slip by so quickly??? I haven't done a lot of crafting lately, but I did manage a couple of things.

    Noodlehead Gathered Clutch teacher gift:

    Noodlehead Gathered Clutch, aqua edition

    Love this pattern!

    And another:

    Noodlehead Gathered Clutch, clock edition

    I can't seem to stop making them.

    Emmeline Apron hostess gift:

    Emmeline Apron, holiday version collage

    Having recently made one of these, this one went together very quickly (even the hand-stitching part!). My only complaint this time around has to do with the fabrics. I initially bought some American Made Brand solid in brick for the accent (straps, ties, etc.). But when I went to prewash it, there was bleeding. So I washed again. And again. After the fifth time (and it was still bleeding), I decided to go get some Kona. I've never had a problem with Kona solids bleeding, but sure enough-- when I went to prewash the Kona burgundy, it bled. And bled. And so on. Gah!

    Finally, I took the time to do a little research and learned about Retayne. It is a wash additive that works to set colors and prevent bleeding. I ran to my LQS and picked up a small bottle. I used a couple of teaspoons in a load with both fabrics. After a dry cycle, I washed them both again with just a little detergent. The color catcher came out white. It worked!!!! This stuff is chemical magic! Suffice to say-- after the bleeding stopped, the project went very smoothly. And my friend loved it!

    Iron-on transfer sweatshirt:

    Big Bear wearing his new Rogue Legacy sweatshirt

    Big Bear's favorite video game of late is Rogue Legacy. It is an indie game made by a small company. Unfortunately, because they are so small, they don't sell any cool game-related swag. So I created my own and gave it to my son for Christmas. I purchased a plain navy sweatshirt (it was a 50/50 poly/cotton blend), and then used Avery Dark Fabric Iron-On Transfer Sheets to print out the game title logo. I just followed the instructions with the sheets, and it worked great! My only complaint is that the colors in the transfer definitely dimmed and yellowed a bit in the ironing process. But it still looks okay. And he LOVES it. He has been wearing his new sweatshirt every day. Yay!!!

    In addition to the above, I also gave my boys new pillowcases and gifted the "Serenitea Quilt" to my mother-in-law.

    The projects were all pretty low-stress (excepting the apron... bleeding fabric stresses me out) and I gave myself plenty of time to get them finished (excepting the apron... finished a couple of hours before the event). (Of course, what kind of holiday would it be if there was no stressed-out crafting going on???) Overall, it was a good season for crafty gift giving!

    Wednesday, November 26, 2014

    A hostess gift

    This year we will be spending Thanksgiving with friends at their home. I recently went shopping with the lady of the house and she casually mentioned that she didn't have an apron, but could totally use one. Thus, a hostess gift was born:

    Emmeline Apron, floral side

    This is the fabulous Emmeline Apron from Sew Liberated. I made one up a few years ago for myself and still use and love it. It is feminine without being frilly, practical, and super cute.

    Emmeline Apron, geometric side

    I also love that it is reversible! The floral fabric is a lovely William Morris print from my stash (I think I bought it in 1998... so it's been in there awhile!) and the geometric print is from a recent Moda release, the "Simply Style" collection from V. and Co. The accent is Kona Navy. I think they all work really well together!

    detail view of top-stitching

    The instructions were great. I even did the suggested ladder-stitch this time around (last time, I just whip-stitched it closed) for a super-clean finish along the bodice inside edges. I then went a step further and machine top-stitched around the strap and down along the outside edge of the bodice (pictured above). I just like the finish that gives.

    Happy Thanksgiving!

    Monday, November 17, 2014

    Weekend sewing

    It was a rather productive weekend! First up:

    Noodlehead Gathered Clutch in aqua, collage of front view and inside

    Another Noodlehead Gathered Clutch! I was not totally diggin' the contrast/strap fabric, but I had already cut it and didn't want it to go to waste. So I decided to try some fancy machine stitching on there to give it a little more oomph. I think it ended up being a really nice detail.

    Having made this clutch five times now, I think it is pretty evident that I LOVE this pattern. I also have two more all cut and ready to assemble that I plan to give as gifts this Christmas along with this one.

    Over the last week, I managed to get borders sewn onto three projects-- so that's three quilt tops complete! Woo! That meant it was time to start getting backings ready. This weekend, I put together one for my Heather Spence Designs Fall 2013 Mystery Quilt:


    It took way longer than it probably should have. But, I successfully put it together using stash and I am actually quite happy with the result. So I guess that makes it worth the time. Now I just need to get it basted...

    Thursday, November 6, 2014

    Harrington & Hannah

    "The Adventures of Harrington & Hannah" was a block-of-the-month offered by The Raspberry Rabbits back in 2012 (the quilt is currently offered as a downloadable pattern through Craftsy).

    Harrington and Hannah BOM button

    I finished it over the summer and finally got some pictures of it last week. Woo!

    Bunny Quilt 2, front

    This is the first time I have worked on a quilt that incorporated wool. The wools in this quilt were purchased from The Raspberry Rabbits and were just lovely to work with, as were the gorgeous Valdani embroidery threads used for all of the applique.

    Bunny Quilt 2, block detail

    All of the quilting was completed using Auriful 50/2 thread. Three colors were employed: "Pale Flesh" (#2315) in the blocks, "Sandstone" (#2370) in the sashing, and "Bark" (#1140) in the outer border.

    Bunny Quilt 2, back

    I love how well the quilting shows up on the back!

    Bunny Quilt 2, label

    So while I was making this quilt, I started calling it "The Bunny Quilt." However, I actually already have a quilt by that name. As a result, this is now "The Bunny Quilt (2)." I feel like I should subtitle it "The Reckoning" or something. Ha!

    Bunny Quilt 2, side front

    There is just something about calendar-style quilts that really appeals to me. Love them! And I'm super happy to have this UFO finally completed. Now I just need to figure out where to hang it!

    Monday, November 3, 2014

    Halloween 2014: Venipede!

    Video games are the hotness at our house! Both boys wanted to go as video game characters, Little Bear as a Baby Beefalo from the game "Don't Starve" and Big Bear as a Venipede, a type of Pokémon:

    Venipede image

    While the baby beefalo felt rather straight-forward, it took some time for me to wrap my brain around this insectoid creature.

    Venipede front, side, and back views collage

    For the main body, I went with old standby Kwik Sew 2711 in a size M. But because I didn't want a back opening (since there were the green carapace bits on the back), I used Kwik Sew 3099 to guide me on doing a front zip opening. Worked like a charm!

    From that point, there was lots of customization:
    • Did some color-blocking on the back and arms and machine appliqued the circles onto the back shoulders.
    • The hood I created was influenced by a fabulous hat by StephyDesigns. There was a lot of color-blocking in the hood itself. I handstitched the stuffed antennae. The eyeballs were created with 2.5" styrofoam balls that I cut in half. I then used glue to cover them with fleece and handstitched them to the hood as well.
    • The carapace pieces on the back were each filled with foam cut to fit and then machine stitched to the back. I did some handstitching inbetween the pieces to hold them together vertically.
    • I pieced together the tail and then stuffed it using a combination of decorator foam cut to size as well as polyfil stuffing. After it was inserted in the back I handstitched it to the bottom carapace to stabilize it and keep it pointing outward
    • The "legs" (the fin-like things on the arms and legs of the costume) were filled with decorator foam (helped them to stand away from the body nicely, without too much flopping about).

    Phew! Thankfully, all of the work paid off. Big Bear LOVED his costume.

    Venipede in battle stance

    The Venipede is ready to battle! (And trick-or-treat!)

    Baby Beefalo and Venipede, ready to trick-or-treat!

    The boys had an awesome Halloween with LOTS of candy goodness! Yay, for Halloween costume fun!

    Sunday, November 2, 2014

    Halloween 2014: Baby Beefalo!

    This year for Halloween, Little Bear decided he wanted to be a baby beefalo. What is that, you may be wondering? While it is an actual creature, he specifically wanted to be a baby beefalo from the game "Don't Starve" by Klei Entertainment:

    Baby Beefalo character image from Don't Starve by Klei Entertainment

    I started with a pile of fleece, faux fur and Kwik Sew 2711 (a costume staple for me over the last few years!) in size XXS.

    Baby Beefalo collage with front, back, and side views

    I only had to make a couple of minor adjustments for this costume.

    Baby Beefalo costume, back closure

    The biggest adjustment was with the back closure, pictured above. I wanted the patch of fur on the back to be an unbroken piece, so I layered it on top of the costume opening, stitching half of it down and then securing it with velcro tape on the opposite side. That allowed access to the costume opening, but kept the back furry part pretty clean looking. The downside is it made the costume a little too complicated for Little Bear to put on/take off by himself. But it was otherwise effective.

    The other adjustments included color-blocking the sleeves and legs, creating the tuft on the hood, the tail, and the little horns.

    Baby Beefalo, preparing to charge

    Watch out! Baby beefalo is gonna charge!!!

    Baby Beefalo, looking goofy

    He loved the costume!

    Thursday, October 30, 2014

    Blogger's Quilt Festival Fall 2014

    Finally! A break in the rain and I was finally able to take some pictures of my most recent finish just in time to post for Blogger's Quilt Festival Fall 2014:

    Verum Viridi, front

    This is from the Miss Rosie's Quilt Co. pattern, "True Blue". Since I chose to do mine in greens, I went ahead and named it "Verum Viridi" which, according to Google, is Latin for "True Green."

    Verum Viridi, side-front

    Anyway, there's lots of green in this one! And-- even better-- lots of stash used! The quilt measures about 80" x 80".

    Verum Viridi, back

    Through the center, I quilted leafy branches all over, inspired by the tutorial from A Few Scraps (she has so many awesome tutorials and ideas!!!).

    Verum Viridi, detail back

    Then I went into the first border and did a wavy thing... it is very inconsistent, but as there is so much inconsistency, it kind of looks like it is supposed to be that way. So I figure that works. Ha! The thread used in the center and inner border was Aurifil 50/2 in Light Sand (#2000)-- which was perfect as there was lots of layered stitching in some areas, and it never got too heavy looking.

    Verum Viridi, corner detail

    Finally, in the outer border, I used a darker thread (Aurifil 50/2 in Sandstone #2370) and just did some straight lines to emphasize the piano key piecing action. I did the straight lines free-motion and actually used a ruler to help guide me as I stitched. It worked surprisingly well!

    Verum Viridi, label

    And the label... hoping my Latin is okay! Perhaps I should have gotten my Latin textbook from college out to confirm?

    Verum Viridi, front again

    Thanks so much for stopping by to check out my entry. Have fun exploring all of the entries at Blogger's Quilt Festival!

    Blogger's Quilt Festival Fall 2014 hosted by Amy's Creative Side, button

    Monday, October 13, 2014

    Kitty Check

    In my quest to find my missing mojo, I decided on a quick quilt project to get me going.

    Kitty Check, front

    This is from the Me & My Sister Designs book, Crazy for Baby, and is called "Teething Rings."

    Kitty Check, front detail

    Mine is a little different from the one in the book. I decided to add a couple of blocks to lengthen it a bit. I also had to narrow the borders so I could efficiently manage the directional print in my fabric. The main fabric is a woven plaid embroidered cats. It ended up being tricky dealing with this fabric and ensuring every cut stayed along the design lines (so much for my "quick and easy" project!). But it worked out in the end! And the fabric got super soft after washing .

    Kitty Check, detail of border block

    I quilted the plaid kitty sections with a stipple and then tried to get a little fancier in the block border with some feather-ish action. All the quilting was completed using Aurifil Mako 50/2 in Violet (2520).

    Kitty Check, back texture

    The fabrics all came from stash, including this wild purple print I chose for the backing.

    Kitty Check, back

    My mom is not in good health. She is currently in a care facility and misses home and her cats. And her favorite color is purple. So I gave this quilt to her.

    Kitty Check, label

    Hopefully, it will offer some small comfort. If nothing else, it made me feel good to make it for her. There's lots of love in this little quilt!

    Sunday, September 7, 2014

    V1351: Hemmed and done!

    I finally got some pictures of me wearing my new dress, Vogue 1351!

    V1351, front view

    I sewed a size 16 with no alterations. The dress is designed for flowy wovens, but I opted for a knit-- a ITY jersey knit (92% poly/8% lycra) purchased from Fabric.com in 2011. For the lining, I used a lightweight swimsuit knit (since it had 4-way stretch like my main fabric). I found that others were able to successfully use knits based on a number of reviews posted on PatternReview.com, so I figured I could work it out. But I have to tell you: I stressed!

    V1351, back view

    I knew I could forgo the zipper, but then I wasn't sure exactly what other instructions I should or should not disregard or otherwise adapt. This meant I had to fend for myself, which was kind of scary. But I think it came out alright in the end, so I guess I was successful.

    V1351, neck stabilization

    One of the issues I was most worried about was stabilization in the shoulder, neck and waist areas. After trolling about for information, I finally decided to stabilize the neckline with fusible tricot interfacing. I traced the neckline shape and then cut it out along that edge, making it about 1/2" wide. Then I fused it to the neckline such that it was just into the seamline (I think my picture above better shows what I'm talking about). I did this on the lining front and back necklines as well as the outer back neckline.

    V1351, shoulder stabilization

    I also stabilized the shoulder seam (pictured above). For this, I used a nylon stay tape. In the end, I decided against any waistline stabilization (I have read in a number of places a suggestion to use clear elastic) and opted instead to just follow the directions to handstitch the lining to the outer along the waist seam followed by a regular topstitch. The only issue with this is that I have to be careful when putting the dress on and taking it off so I don't pop the stitches.

    V1351, angled front view

    I love that this dress is lined! And I think it is beautifully finished. The instructions were a bit labor-intensive, and involved some of handwork, but they were effective. As I couldn't think of an easier way to approach it, I went with it. The lining allows for a perfect finish to the draped neckline as well and everything stays in place-- nothing untoward is gonna be popping out of there! I really wanted an invisible hem, but I could not figure out how to execute it with such a lightweight knit (I tried a blindhem and it was completely ineffective). So the hem was finished with my coverstitch machine.

    V1351, hands on hips front view

    I envisioned this as a happy, summery sundress. But it almost feels too fancy for that! Almost. I'm totally going to be wearing this one out and about.

    The last week has involved zero sewing while my machine made its annual visit the Bernina spa. But-- it is back home, and I'm ready to start stitching again! Huzzah!!!

    Wednesday, August 27, 2014

    Last weekend...

    I did some sewing! First up, the last-minute birthday gift for a super-awesome 1-year-old:

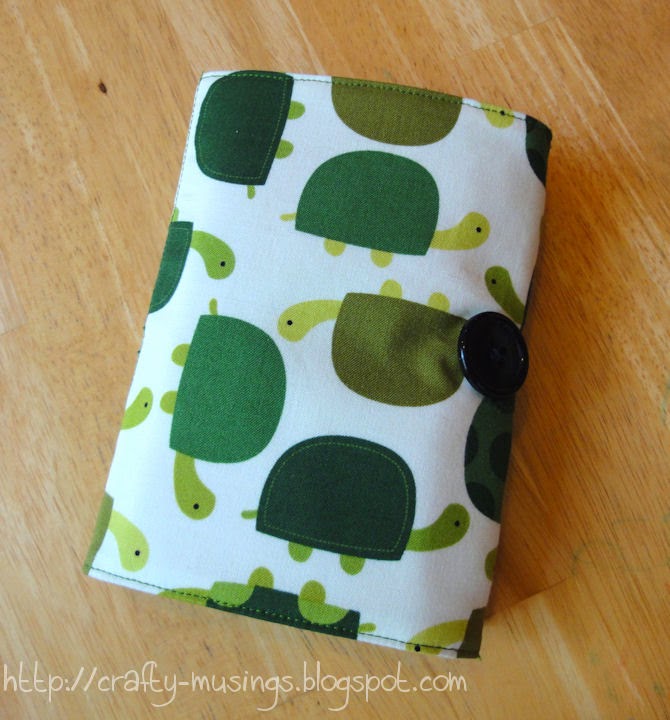
    Turtle coloring wallet, looking cute

    It is the "Child's Coloring Wallet" by JCasa Handmade-- my go-to toddler gift! This little dude is apparently into turtles, so I went with it. Because of its white background, I went ahead and interfaced to give it some additional opacity. As a bonus, it got a little more heft, too! Going forward, I'll probably adding interfacing to the outer every time.

    Turtle coloring wallet, open view

    The inside features a fun Michael Miller bug-in-jars print with some random stash stripes.

    I also finished up a dress:

    V1351, hanging unhemmed

    Here is Vogue 1351 hanging prior to hemming. There will be pics showing it in all of its hemmed glory soon!

    With the dress complete, I was feeling the quilting mojo return:

    getting started with quilting on my green True Blue quilt

    It's a big one, so it is going to take me awhile (quality quilting time is at a premium right now as we're getting ready for back-to-school). But at least it is started. That seems like a big part of the battle for me, just getting the quilting process going.

    Saturday, August 23, 2014

    A KwikSew skirt!

    I finished this skirt, KwikSew 3513, last weekend:

    KwikSew 3513, front view

    This is View A, the longest version using a poly/rayon blend interlock from Fabric.com purchased in 2011. (Woo! More stash usage!). I just love the color.

    KwikSew 3513, back view

    I made it in a size Small(!!!). Here's the thing: the sizing on this is whackadoodle. Thankfully, reading the reviews of the skirt on PatternReview.com prepared me for this and helped me make an informed sizing choice.

    KwikSew 3513, finished waist measurements as printed on pattern

    I looked at the pattern piece for more information, pictured above. As an example, my waist is about 32" which would put me in the Large sizing according to the envelope. But then I looked at the finished waist measurement for the Large and saw it was 35.5". This skirt has no elastic and is dependent on the stretch of the fabric to hold it up. If there is no elastic, I'd be swimming in it at the waist, and it might just pull itself off with the weight of the skirt. So I went ahead and chose a size that had negative ease, meaning it would finish smaller than my waist, so the fabric would have to stretch to fit and thus provide the resistance needed to stay up. I picked the Small, which finishes at 28.5", and it resulted in a good fit for me.

    KwikSew 3513, untucked view

    I LOVE it. It went together quickly and easily. I chose not to hem it because I didn't want to lose any length, and I like the flowy-ness of the skirt without the weight a hem would add. I've already worn it twice!

    I'm keeping my eyes peeled for the perfect striped fabric (I'm just feeling the stripes lately!) to make another one of these skirts!