Yikes! Time flies, right? I'm afraid that back-to-school this year has been a challenge. One in half-day kinder, another in third grade, two different schools... I'm still trying to find a routine that balances me-time with volunteer work (PTA, classroom, HOA, etc.), chores and the have-to-get-dones. While I am getting some crafting time, blogging has had to fall to the wayside. That's why it has taken so long to get to this quilt:
I finished it back in July but didn't manage to gift it until late August. But I'm finally getting it blogged now!
This quilt started from some oops blocks. The blocks were fine, but they just were not working in the quilt for which they were intended so I switched them out. They were kind of a funky size though, so I ended up designing this quilt to make use of them (I couldn't let this cute fabric go to waste!).
Here is the Electric Quilt design image:
Pretty close! Gotta say, EQ is a really helpful design tool.
The quilting is pretty simple: a stipple over most; straight lines in the aqua areas, and a cute orange peel cross in the yellow parts.
I used various coordinating colors of Aurifil 50/2 for the quilting, including white (2024), light turquoise (2805), and medium butter (2130).
Most of the fabric, including the back (pictured above), came from my stash (yay!), though I had to purchase the striped background/border fabric.
This quilt was given to baby Clark.
I have it on good authority that he loves it! Yay!
Showing posts with label design. Show all posts
Wednesday, October 14, 2015
Sunday, May 24, 2015
It doesn't always work.
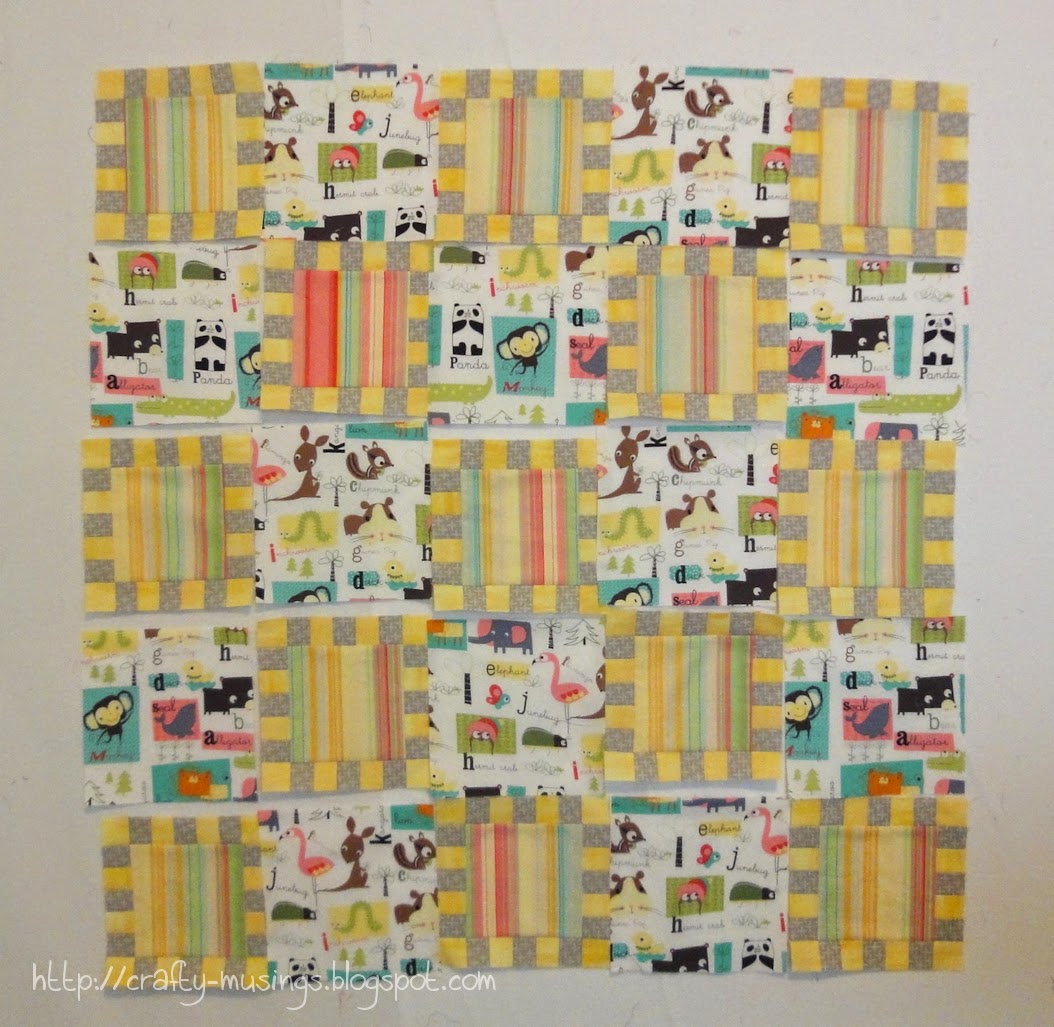
I like to think that I'm pretty good at putting colors/fabrics together. But not everything works the way I think it will. Case in point:
On a whim, I started pulling fabrics from my stash. The colors all worked together. But in this configuration? Not so much. Washed-out weirdness (in person, it is even worse).
Feeling lazy, rather than fixing the "real" problem of the grey/yellow pieced blocks, I decided to try and make them work by finding a new focus fabric.
Still not perfect, but soooo much better with some contrast in there. I think with some borders, this one is going to be okay. And at this point, okay is feeling pretty good to me.
On a whim, I started pulling fabrics from my stash. The colors all worked together. But in this configuration? Not so much. Washed-out weirdness (in person, it is even worse).
Feeling lazy, rather than fixing the "real" problem of the grey/yellow pieced blocks, I decided to try and make them work by finding a new focus fabric.
Still not perfect, but soooo much better with some contrast in there. I think with some borders, this one is going to be okay. And at this point, okay is feeling pretty good to me.
Tuesday, July 8, 2014
Digging out the next UFO
I finished up the top and backing for my triangle quilt and it is ready for basting. I've also got a plan for quilting it up. So I'm feeling ready to tackle something "new."
A few(!) years ago, I joined an online 9-patch swap. As a result, I have this pile of 60 9-patches. I've been thinking about how to go about using them for awhile now and have narrowed it down to two options.
Option 1:
My first thought was to do something pretty straightforward and simple. Classic! I'm definitely thinking navy/dark blue sashing and borders. It would be about 60" square. I might even have enough in my stash to make this one happen.
Option 2:
This, however, is the option I'm leaning toward: an on-point square of sashed 9-patches with setting triangles. It is more interesting to me visually, and would give me some fun quilting space, and be a little bigger, finishing about 80" square. The downside is that I would definitely have to buy some fabric.
Either way, I need a few more 9-patches to make it work, so I dug through my little 2.5" scrap box.
If nothing else, I think I'll be putting together a few of those this week as I ponder the options.
A few(!) years ago, I joined an online 9-patch swap. As a result, I have this pile of 60 9-patches. I've been thinking about how to go about using them for awhile now and have narrowed it down to two options.
Option 1:
My first thought was to do something pretty straightforward and simple. Classic! I'm definitely thinking navy/dark blue sashing and borders. It would be about 60" square. I might even have enough in my stash to make this one happen.
Option 2:
This, however, is the option I'm leaning toward: an on-point square of sashed 9-patches with setting triangles. It is more interesting to me visually, and would give me some fun quilting space, and be a little bigger, finishing about 80" square. The downside is that I would definitely have to buy some fabric.
Either way, I need a few more 9-patches to make it work, so I dug through my little 2.5" scrap box.
If nothing else, I think I'll be putting together a few of those this week as I ponder the options.
Wednesday, April 10, 2013
Baby Quilt is GO!
Baby quilts are a lot of fun. They are an excellent excuse to use super fun fabrics, happy colors, and they usually are quick and easy (if for no other reason than that they are small-ish). I try and create baby quilts with the idea that they are meant to be used and loved (i.e.-- dragged, chewed, and generally beat up) by baby. So I tend to pick designs that are pretty simple.
For this new baby quilt project, I knew I wanted to utilize some of the fat quarters I had from Kellie Wulfsohn's "Peak Hour" collection from Riley Blake Designs. But one of the designs really kind of had to be fussy cut, and I could only get so much from each fat quarter. I didn't think I'd have any luck finding a pattern that would work, so I looked about the interwebs for inspiration and found a happy quilt by Quokka Quilts. With that in mind, I worked out my design:
Simple and fun! So simple that it was a breeze to cut out and sew together. And now I'm even into the quilting...
Woo! I'm feeling the mojo-- and it feels GOOD!
For this new baby quilt project, I knew I wanted to utilize some of the fat quarters I had from Kellie Wulfsohn's "Peak Hour" collection from Riley Blake Designs. But one of the designs really kind of had to be fussy cut, and I could only get so much from each fat quarter. I didn't think I'd have any luck finding a pattern that would work, so I looked about the interwebs for inspiration and found a happy quilt by Quokka Quilts. With that in mind, I worked out my design:
Simple and fun! So simple that it was a breeze to cut out and sew together. And now I'm even into the quilting...
Woo! I'm feeling the mojo-- and it feels GOOD!
Thursday, October 18, 2012
A little bit of process
One of the things I enjoy as I read blogs is learning a little about the process behind a project-- be it fabric decisions, block placement, or design choices. Since I found myself having to make a decision in the design of my wedding quilt, I thought it might be fun to share a little of my process.
At issue: I needed a corner block for the outside border of my wedding quilt. And I knew I wanted more than just a plain square.
In my original design, I had decided on this block, with these fabrics:
I really like the look of the style of block-- it has movement and is a happy starry shape. But it just looks too muddy with the red print on the busy leafy background print. I tried it again:
I used a red batik instead of the red print in the smaller star points. This one is better, but it still doesn't feel like the star stands out enough. It's a detailed design, and I want all that work to really sparkle! So for the third attempt I decided to try out a different background to see how that worked:
The star is shining for sure now! The dark brown batik really allows the yellow and red to pop. Then I looked at it in the quilt:
Hmmm... I'm not diggin' this. The dark brown is just too stark when surrounded by all the leafy print. And now that the star is really visible, it just doesn't seem to fit. It feels a little too stark, angular, and "off" in relation to the rest of the quilt. I went back to the drawing board and came up with this:
I definitely wanted to move in a more simple direction (no more foundation piecing!). I have also been loving Dresden plates/fans lately, so maybe that is why this block called to me. But it also isn't completely different from the original design. It includes the same fabrics (yellow batik, red print, leafy background), but because the fabric pieces are bigger, I don't get the same sense of muddiness. This block also includes points, but they are in a different style than the ones in the original. I slapped it up onto the wall to check it out:
It doesn't have the same movement as the previous iterations; rather, it has a symmetry that I find very appealing in the context of the quilt. It kind of echoes the compass points in the center, but with a different look. I'm feeling good about this one. I declare this block the winner!
It can be very frustrating when I find myself having to rethink a design. But sometimes, a little bit of trial and error is what is needed to get me on a better path. That doesn't mean I like it though. Trial and error kind of sucks-- so much wasted effort. On one level, I realize it is not actually wasted because it does get me where I need to go and one of the challenges of design is that it really can be a process; but even with that understanding, on another level, it still feels wasted (and there's a bit of bitterness in there too). It occurs to me that maybe this frustration is part of why this project sat languishing in the closet for the last 10 years. Maybe I needed a break, some fresh perspective, to be able to come to terms with the mistakes and be able to make some changes? I can't even remember. But at least I'm making progress now!
At issue: I needed a corner block for the outside border of my wedding quilt. And I knew I wanted more than just a plain square.
In my original design, I had decided on this block, with these fabrics:
I really like the look of the style of block-- it has movement and is a happy starry shape. But it just looks too muddy with the red print on the busy leafy background print. I tried it again:
I used a red batik instead of the red print in the smaller star points. This one is better, but it still doesn't feel like the star stands out enough. It's a detailed design, and I want all that work to really sparkle! So for the third attempt I decided to try out a different background to see how that worked:
The star is shining for sure now! The dark brown batik really allows the yellow and red to pop. Then I looked at it in the quilt:
Hmmm... I'm not diggin' this. The dark brown is just too stark when surrounded by all the leafy print. And now that the star is really visible, it just doesn't seem to fit. It feels a little too stark, angular, and "off" in relation to the rest of the quilt. I went back to the drawing board and came up with this:
I definitely wanted to move in a more simple direction (no more foundation piecing!). I have also been loving Dresden plates/fans lately, so maybe that is why this block called to me. But it also isn't completely different from the original design. It includes the same fabrics (yellow batik, red print, leafy background), but because the fabric pieces are bigger, I don't get the same sense of muddiness. This block also includes points, but they are in a different style than the ones in the original. I slapped it up onto the wall to check it out:
It doesn't have the same movement as the previous iterations; rather, it has a symmetry that I find very appealing in the context of the quilt. It kind of echoes the compass points in the center, but with a different look. I'm feeling good about this one. I declare this block the winner!
It can be very frustrating when I find myself having to rethink a design. But sometimes, a little bit of trial and error is what is needed to get me on a better path. That doesn't mean I like it though. Trial and error kind of sucks-- so much wasted effort. On one level, I realize it is not actually wasted because it does get me where I need to go and one of the challenges of design is that it really can be a process; but even with that understanding, on another level, it still feels wasted (and there's a bit of bitterness in there too). It occurs to me that maybe this frustration is part of why this project sat languishing in the closet for the last 10 years. Maybe I needed a break, some fresh perspective, to be able to come to terms with the mistakes and be able to make some changes? I can't even remember. But at least I'm making progress now!
Thursday, May 19, 2011
A little something
I've had a little bit of time to start working on my Criss Cross Quilt and ran into an unexpected, but fun, challenge. The Whimsy charm packs included 4 squares of a creamy near-solid print that I had to figure out how deal with. I decided that they would be perfect for a little bit of embroidery.

I went ahead and pieced the blocks first (a la Little Miss Shabby).
Then I looked to the fabric for inspiration for my designs.

Initially, I was thinking that I'd just grab a couple of the designs and embroider them. But then I noticed this print:

The words that are colored are the ones that are featured in the fabric drawings. But then there are all of those other words... why not use them to inspire my own drawings? So I looked to the Internet for some visual inspiration to get me going, did some sketching (LOTS of trial and error was involved for each... I was trying really hard to kind of keep the vintage flavor of the drawings in the fabric) and now I have my designs all set:

I'm excited because I think these will really add a little something to the quilt and make it special.
Time to do some embroidery!

I went ahead and pieced the blocks first (a la Little Miss Shabby).
Then I looked to the fabric for inspiration for my designs.

Initially, I was thinking that I'd just grab a couple of the designs and embroider them. But then I noticed this print:

The words that are colored are the ones that are featured in the fabric drawings. But then there are all of those other words... why not use them to inspire my own drawings? So I looked to the Internet for some visual inspiration to get me going, did some sketching (LOTS of trial and error was involved for each... I was trying really hard to kind of keep the vintage flavor of the drawings in the fabric) and now I have my designs all set:

I'm excited because I think these will really add a little something to the quilt and make it special.
Time to do some embroidery!
Subscribe to:
Posts (Atom)