Showing posts with label Bloggers Quilt Festival. Show all posts
Showing posts with label Bloggers Quilt Festival. Show all posts
Tuesday, May 19, 2015
Sunrise Coins - Blogger's Quilt Festival, Spring 2015!
It's Bloggers' Quilt Festival time again! I'm excited that I have something new to share for this one...
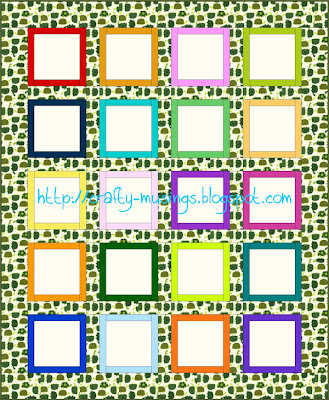
Every so often, I am compelled to make a quilt "just because." No recipient in mind, no real need, but just because I really want to make it. Such is the case with this fun design by Julie Herman of Jaybird Quilts:
It is called "Framed Coins" and can be found in the (incredibly awesome) book, Skip the Borders. This is actually the third project I have completed from the book. I am a fan.
Can't say as I was horribly original with this one. I pretty much did the exact same thing as in the book, just with red/oranges instead of greens (thus I've given it the name "Sunrise Coins"). But-- it was all from my stash! Woo!
It measures 72" x 72" so I have entered it in the ,"Large Quilts" category.
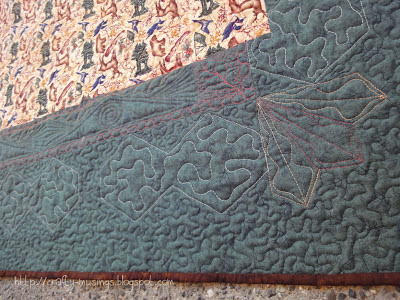
I had fun with the quilting though! Aurfil Mako 50/2 thread was used throughout. I started by stitching in the ditch around the colored frames and each group of coins (2370, "Taupe"). Then inside the coin sections, I used a grey thread (2600, "Dove") and did a flame-y all-over type thing (inspired by the "Allover Leaves" design found in the book, Free-Motion Quilting with Angela Walters-- another awesome book!). Then for the colored areas, I used contrasting thread and free-motioned the straight(ish)-line frames. In the red, I used orange (2150, "Golden Poppy"). In the orange, I used red (2250, "Red"). In the peach I used coral (2255, "Dark Texas Orange"). In the coral, I used peach (2220, "Salmon"). I was really pleased with how it all came together!
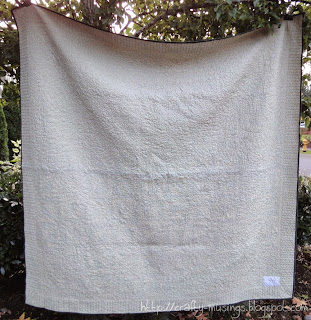
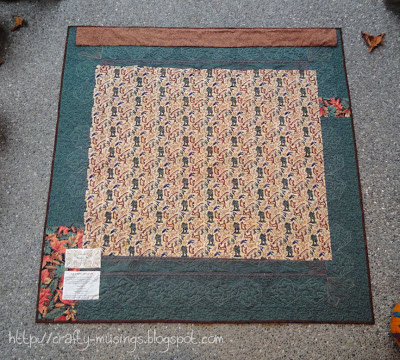
The back is a fabric I've had in my stash since about 2000. It is such a beautiful print and it just seems to work so well with this quilt. I am also proud of having tried something new with the binding on this one. Most of the binding is black and white polka-dot. But there are two sections where I changed colors of binding to match the adjacent blocks. It was fun trying something new, and I think it looks pretty snazzy too.
It almost feels kind of cheater to call this one a 2015 finish as all but the binding was done last July (and I was too lazy to re-do the label). But the last stitches didn't go in until this year, so 2015 it is!
Thanks so much for stopping by and checking out my quilt. Have fun enjoying all of the other fabulous entries!
Thursday, October 30, 2014
Blogger's Quilt Festival Fall 2014
Finally! A break in the rain and I was finally able to take some pictures of my most recent finish just in time to post for Blogger's Quilt Festival Fall 2014:
This is from the Miss Rosie's Quilt Co. pattern, "True Blue". Since I chose to do mine in greens, I went ahead and named it "Verum Viridi" which, according to Google, is Latin for "True Green."
Anyway, there's lots of green in this one! And-- even better-- lots of stash used! The quilt measures about 80" x 80".
Through the center, I quilted leafy branches all over, inspired by the tutorial from A Few Scraps (she has so many awesome tutorials and ideas!!!).
Then I went into the first border and did a wavy thing... it is very inconsistent, but as there is so much inconsistency, it kind of looks like it is supposed to be that way. So I figure that works. Ha! The thread used in the center and inner border was Aurifil 50/2 in Light Sand (#2000)-- which was perfect as there was lots of layered stitching in some areas, and it never got too heavy looking.
Finally, in the outer border, I used a darker thread (Aurifil 50/2 in Sandstone #2370) and just did some straight lines to emphasize the piano key piecing action. I did the straight lines free-motion and actually used a ruler to help guide me as I stitched. It worked surprisingly well!
And the label... hoping my Latin is okay! Perhaps I should have gotten my Latin textbook from college out to confirm?
Thanks so much for stopping by to check out my entry. Have fun exploring all of the entries at Blogger's Quilt Festival!
Saturday, May 18, 2013
Blogger's Quilt Festival, Spring 2013: Haiku Quilt
For this edition of the Blogger's Quilt Festival, I am entering my latest finish into the Bed Quilts category:
The quilt is a gift for a recently wed couple, Kevin and Colby. We went to visit them today and were finally able to give them their wedding gift. Yay!
The design is inspired by the quilts in the Judy Sisneros book, 9-Patch Pizzazz. I used her methodology to create my version. The largest blocks are 24" square. The nine-patches are 6" square. The finished quilt is about 96" square.
I had a lot of fun quilting this one too! I quilted it all with my Bernina 440QE. In the center, I imagined a breezy wind blowing and quilted a horizontal wavy design using a creamy variegated Superior Threads King Tut thread, #920, "Sands of Time." For the inner border, I used a dark brown Aurifil Mako 50/2, #1140, and quilted linked chain squares, a design I found in Angela Walters's fabulous book, Free-Moton Quilting. Finally, for the outer border, I stitched Elizabeth Hartman's dogwood quitling pattern in a 2" grid using Aurifil Mako 50/2 #2326, a taupe-y gold color.
I love how all of the various quilting designs work together in this quilt. And I am flippin' proud of the work I've done! My one regret is that I used too much pressure as I marked my gridlines in the outer border (I used a Sewline pencil), and some of the lines remain-- I just could not get them out (scrubbing; fabric eraser; multiple washes). On the bright side, they aren't really visible unless you know to look for them as they kind of blend in with all of the quilting lines. Also, after being washed for the third time, they are finally disappearing. So over time, I think they will all be gone. Eventually.
I went into this quilt not really knowing exactly how much I'd need of each fabric. So I just bought a couple of yards of each. I was able to use all of the leftovers in the back (plus a couple of others).
I've taken to calling this the "Haiku Quilt." I'm not normally very creative when it comes to naming, but in this instance, I felt inspired. I wrote a haiku which serves as the name of the quilt and that is written on the label:
Petals and leaves atremble,
Cranes fly joyously.
And I have to give many thanks to my quilt photo shoot helper:
Every time we walk by that park (which is daily), he asks when can we go and do another quilt picture? Apparently, I need to get quilting!
The stats:
Quilt Measurements: 96" x 96"I hope you are getting the chance to check out lots of other quilts in the Spring 2013 Blogger's Quilt Festival. It never fails to inspire me, and I find myself looking forward to the event each spring and fall when I can gaze at all of the shared happy eye candy and fabulous creativity.
Special Techniques used: none
Quilted by: Robin Zaback (me!)
Thanks so much for stopping by!
Friday, October 26, 2012
Blogger's Quilt Festival -- Fall 2012
October 26th is a special day at my house. It is the day my husband and I were married-- and this year marks our 10th anniversary! At our wedding, instead of a guest book, we had guest blocks-- blank quilt blocks for our guests to write any well-wishes (or whatever else) they had for us. At left is a picture of our "block signing station" at the wedding.
After the wedding, I designed a quilt to feature those blocks. I even started the quilt. But then, for whatever reason (I can't even remember why), the project got set aside... Until now! I finished our wedding quilt just in time for our anniversary. Woo!
I created the design using Electric Quilt and then I went out and shopped for fabrics. That beautiful leafy print just called to me, and I pulled all of the other colors from that.
The compass was created using paper foundation piecing. Setting it onto the background was one of my early attempts at hand applique. I try not to look too closely at the stitching. Ha! But I am pleased with the quilting. It isn't perfect, but I think it manages to add to the look of the compass in a positive way.
I drew the pieced border onto freezer paper and then cut it apart to create paper templates. The templates were used to cut the fabric, and then I pieced it all together.
I love the little fans in the corners! I was seriously stressed out about those corners and what to do with them. Eventually I stumbled into the fan idea, and I'm so glad I did. They make me happy.
Here is a view of the same corner from the back where the quilting is much more visible. Overall, I'm really proud of my quilting on this project! I used Hobbs Tuscany Wool batting for this quilt. I was actually really worried that it might result in the quilt being too poofy looking. But I'm glad I went for it. It is not too poofy, and it forced me to quilt more than I otherwise would have as the wool batting has denser quilting requirements than I'm used to. It really made me think about the type of quilting I wanted to do and how to deal with every space on the quilt.
The woodsy print in the center of the back was purchased when we went on our honeymoon to Maine. When I bought it I knew I wanted to use it on the back of this quilt. So even the back of this quilt has special memories attached to it.
I vaguely recall creating the embroidery design back when I first got my sewing/embroidery machine. I think my intention was to use it in a block on the front. But, coming back to the project many years later, I couldn't figure out a way to make it work. So I put it on the back with the label.
I am so glad that I finally finished this! Just picking up the project again, reading all of the wonderful words our friends and family wrote for us... it is a very special quilt, and it truly reminds me how blessed my husband and I are and I am so excited to continue our journey together!
Not only did I complete this quilt in time for my anniversary, I am thrilled that I've finished it in time to share in the Fall 2012 Blogger's Quilt Festival hosted by Amy's Creative Side.
Here are some stats for my quilt:
Finished size: 53" x 53"
Pieced and Quilted by: Robin Zaback (me!)
Best Categories: Home Machine Quilted Quilt; Wall Hanging
Thanks so much for stopping by and I hope you enjoy your Blogger's Quilt Festival adventures! So many beautiful quilts; so much fabulous inspiration!!!
Sunday, May 20, 2012
Bloggers' Quilt Festival: Handprint Quilt
Lately, nearly all of my crafty time has been focused on completing an end-of-year gift for my son's preschool teacher. As it was a surprise, I had to stay quiet about the project here until it was presented to her at preschool graduation. As graduation was yesterday, I'm excited that I can finally share this project here. And I'm just in time for Spring 2012 Bloggers' Quilt Festival! Woo!
A couple months ago, the families of the "graduating" preschoolers (those who are moving on to Kindergarten next year) started discussing various options for an end-of-year gift for our fabulous teacher. Someone suggested a quilt. I ran with that idea and came up with a simple design using Electric Quilt and volunteered to make it.
After sharing the design, everyone agreed that it would be the perfect gift.
We started by having each graduating kiddo made a block that included his/her handprint and name. Since there were only 17 graduates, I used the remaining three blocks to feature the school's name, the class info, and the school mascot (a cute little turtle which I hand appliqued and embroidered).
Then I put together kits with instructions and asked for volunteers to help me sew the borders on the blocks. Once I got those back, I stitched the top together. As our school mascot is a turtle, the turtle print (from Anne Kelle's Urban Zoologie collection for Robert Kaufman) seemed perfect for the sashing and borders. Once the top and back were complete, I hosted a basting party. I invited everyone to come on over and baste (assuring them that no sewing experience was required). It was a Monday night, so there wasn't a huge response (or maybe they found out that it involved crawling around on the floor with safety pins?), but even with just four of us, we made quick work of the basting. And I discovered that basting is a LOT more fun with friends!
Next came the quilting. I just did an all-over stipple over it with some outline stitching around the handprints and applique. You can see the quilting really well (maybe too well!) from the back as the off-white thread shows up very strongly against the dark green print (so maybe that wasn't the best plan there-- but I was trying to use what I had).
Finally, I stitched the binding and added the label. It finished at about 54" x 68"-- a nice lap-sized quilt that she can snuggle with on the couch (but I added a hanging sleeve too, on the off chance she'd rather have it on the wall).
I found the poem online (author unknown?) and tweaked it a tiny bit to make it work.
Yesterday, after the graduation ceremony, we presented the quilt to Teacher Dorothy. There were tears involved (hers and quite a few others, I think). She loved it. Yay!
This was such a fun and meaningful project for me. I loved making something so personal for a woman who has been such an important part of my son's life in our four years of preschool. I am also so glad I took the time to try and involve the other families in the process. It was tricky and there was some stress involved as there was not a lot of time to work with (from start to finish, we had about a month to get it done). But it was worth it. I really enjoyed working with the other moms (and grandmas!) and having the opportunity to get to know them better as we worked on this project. And I know some of them really appreciated being able to contribute to the process. It just made the project that much more special.
Friday, October 28, 2011
Bloggers' Quilt Festival, Fall 2011: A Quilt for Finn
I'm excited to have something new to share for this fall's Bloggers' Quilt Festival! I call this quilt "Gone Fishin'":

The design is adapted from "Sea Views" by Kate Conklin Designs. The print fabrics are all from the "Storyboek" collection by Jay-Cyn Designs for Birch Fabrics, and then I also chose a few coordinating Kona solids.

I really love the design with all of it's wonderful, flowy curves. But I really wanted to take advantage of the larger panel prints of the fabric. So I mixed in some of those as "plain" blocks. And then I embroidered the recipient's name in one of them.

As much as I love the design, the pattern was a little bit challenging. Cutting it all was easy-peasy. But sewing all those curves back together again resulted in some serious wonkiness. To get them to work, I ended up having to trim my blocks smaller than her suggested sizes. And almost none of them laid flat (despite repeated attacks with the full-on steam iron). But all ended up working in the end once everything was quilted. Yay!

The pieced back is fun too, I think.

And the finishing touch. I love making labels for my quilts. Not only can I easily personalize them for the recipient, but I can include some care instructions and information about the making of the quilt. I think of it as more than just a label-- it's also a sort of memory.

This quilt is for a baby boy named Finn. Hopefully he'll have lots of fun snuggling in it!

The design is adapted from "Sea Views" by Kate Conklin Designs. The print fabrics are all from the "Storyboek" collection by Jay-Cyn Designs for Birch Fabrics, and then I also chose a few coordinating Kona solids.

I really love the design with all of it's wonderful, flowy curves. But I really wanted to take advantage of the larger panel prints of the fabric. So I mixed in some of those as "plain" blocks. And then I embroidered the recipient's name in one of them.

As much as I love the design, the pattern was a little bit challenging. Cutting it all was easy-peasy. But sewing all those curves back together again resulted in some serious wonkiness. To get them to work, I ended up having to trim my blocks smaller than her suggested sizes. And almost none of them laid flat (despite repeated attacks with the full-on steam iron). But all ended up working in the end once everything was quilted. Yay!

The pieced back is fun too, I think.

And the finishing touch. I love making labels for my quilts. Not only can I easily personalize them for the recipient, but I can include some care instructions and information about the making of the quilt. I think of it as more than just a label-- it's also a sort of memory.

This quilt is for a baby boy named Finn. Hopefully he'll have lots of fun snuggling in it!
Friday, October 29, 2010
Blogger's Quilt Festival: Autumn House
Last month, I finally completed "Autumn House," a BOM quilt from Bunny Hill Designs! Woo hoo! I've been super excited to share the finished quilt with y'all, but decided to wait until Blogger's Quilt Festival for the big "reveal."
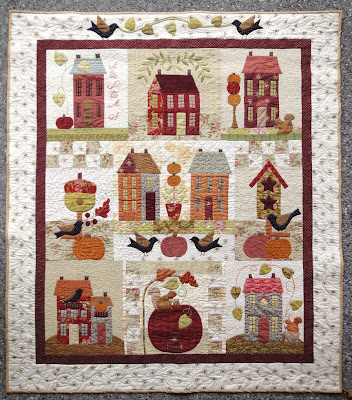
The BOM subscription from Shabby Fabrics was a Christmas gift from my awesome husband. I started as soon as the first block arrived in January 2009. All of the blocks are hand appliqued. The top was finished in January 2010. But I didn't manage to quilt it until last month.
This is my first completed hand applique quilt, and I was really, really nervous about messing it up by quilting it. I spent a long time working out a quilting plan. I spent some time practicing. Then I finally just took a deep breath and did it.

I started with straight lines, outlining the blocks and the borders. Then I outlined all of the appliques. Next I focused on all of the details in the appliques (the pumpkins, doors, roofs, etc.). I did the background quilting next, starting with cross-hatching in the center block.

I was initially going to cross-hatch 5 blocks, but after finishing the center block (shown above), I was done. Holy cow, not only was it time consuming, but it was hard! So, I tried a couple other things with the remaining blocks.

In blocks 1, 3 (shown above), 7, and 9, I used a curly-cue motif.

In blocks 2, 4, 6, and 8 (shown above), I did the leafy-viney motif.

Lastly, I completed the borders. I quilted the inner border with a leaf pattern. Then I did the outer border with vines and a little pumpkin at the bottom that was inspired by Lynn's beautiful quilting.
Almost all of the quilting (straight lines, outlining, backgrounds, borders) was done using King Tut 40 weight thread in a pretty variegated color, "Sands of Time." I quilted the details with Mettler 50 weight in colors to match the area I was quilting.

And, here's the label I created for it. There's a peek at the backing too. It is an old Moda print I had in my stash.
I am so proud of this quilt. Thanks so much for taking time to visit and letting me share it with you!
Subscribe to:
Posts (Atom)


