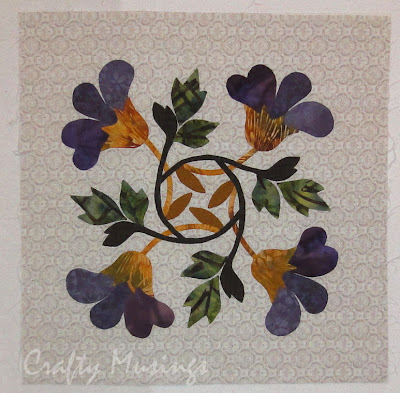
It took a couple of years, but I have finally completed my Edyta Sitar wallhanging, from her book, Seasonal Silhouettes.
This is the April design. Hand applique, with a bit of embroidery (the centers of the purple flowers) and one bead (for the robin's eye). My only other change to the pattern was to piece the background. The completed wallhanging is about 18" x 22".
I really need to find myself another applique project. I do love applique.
I machine quilted it using Aurifil thread in a couple different colors... I can't remember which ones though. Doh! (The perils of waiting so long to blog about a project!)
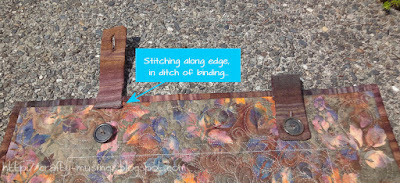
I finished quilting and binding it last fall. The label reflects that date. I put it on before I realized I forgot the hanging tabs. Oops!
So, it sat around for a few months until I got motivated last week and added the hanging tabs and buttons. I took a strip of fabric, folded it lengthwise (right sides together) and stitched around one short edge and the long edge. Then I turned it right-side-out, added a buttonhole on the finished end, and then stitched it to the back of the quilt, trying to keep my stitching right in the ditch of the binding.
Since I couldn't actually use it until I got the hanging tabs on there, I am calling this one a 2016 finish.
"Spring Showers" now resides in my hallway. At least, it does for now... I still have visions of having a lovely collection of seasonal wallhangings to switch out. :)
Showing posts with label applique. Show all posts
Showing posts with label applique. Show all posts
Tuesday, May 24, 2016
Monday, August 4, 2014
In progress - a spring wallhanging
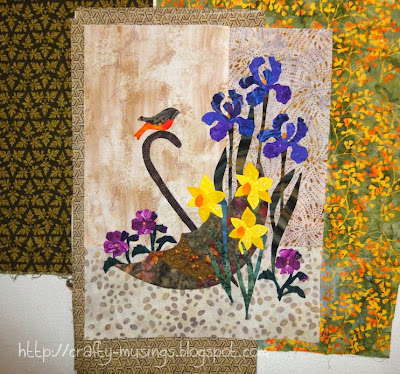
I started this piece back in May (or maybe late April?) and finally completed the applique over the weekend. It took me awhile as I am waaay out of practice and had to take it pretty slowly.
The design is by Edyta Sitar and can be found in her book, Seasonal Silhouettes. This is the "April" block. Bonus: I didn't have to reverse the pattern for hand applique! Included in the book are full-size placement diagrams, so I was able to trace all of my pieces from that.
In the picture above, you can see a couple of the fabrics I'm auditioning for borders. I'm not quite ready to decide, so I'll muse a bit longer. I plan to finish this up and hang it in my entryway. I think this will work as a "generic" wallhanging so now it won't just be Christmas/Easter/Halloween all year! My ultimate goal is to try and have a nice collection of seasonal wallhangings to display through the year.
Sunday, November 3, 2013
Applique with Karen Kay Buckley!
One of the classes I took last week at Quilt Festival was "Garden Medley Applique," taught by Karen Kay Buckley. I have been a huge fan of her work and her glorious Perfect Circles for quite some time, so it was a super treat to actually take a class with her. And it was a great class! I came out feeling so inspired and confident with some great new techniques.
Our class project was a little flower.
We didn't have enough time to really make a lot of progress on it, but we did have the opportunity to practice the various techniques required to complete it, with the main focus on preparing the applique pieces.
While I still love me some needleturn applique, there are times when I want to have stronger consistency in the look of my applique from piece to piece. Her method, using heat-resistant template material and starch, really results in crisp, consistent pieces that also make the actual applique part of the process a breeze.
I'm so excited about really applying what I've learned that I've dug out a kit I bought back in 2008 from SewBatik for the "Blooms All Around" quilt (a pattern by The Rabbit Factory).
All of those flowers in the border offer a great opportunity to really put all of the techniques she shared to work, including marking placement, using Perfect Stems, preparing curved shapes, and getting consistent pointy-points (which has always been my applique nemesis!).
My fabric is ready to go and my templates are made, so I'm gonna start prepping some applique fun!!!
Tuesday, July 2, 2013
Continuing with UFOs...
Ack! Poor, neglected blog. I just haven't been in a writing mood lately. The moments I have when I could sit down and blog have been leaning toward actually making stuff instead. So I guess I don't feel too guilty. And I have been dipping my toes into the world of microblogging via Instagram and Twitter-- which is actually a lot of fun! If you want to check it out:
My Twitter: https://twitter.com/CraftyMusings
My Instagram: http://instagram.com/furicious
So-- last time I posted, I was musing on the question of whether to start something new or work on another UFO. I decided to dig out a UFO:
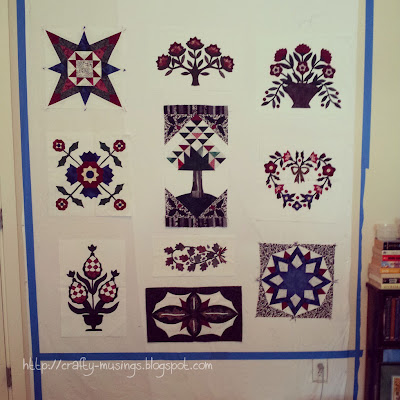
The blocks are from "Grandma's Country Album II" by Robert Callaham. I started this one in 1999(!!!) when the series pattern began appearing in McCall's Quilting. I think I made the first block (the center tree) in April that year (it includes my first-ever attempts at machine applique!). The most recent block was completed in March 2009 (the heart). Looking at these blocks recently, I finally decided I am done. I'm not really feeling the project anymore, so I don't foresee myself making any more of the blocks. So I stuck them up on the wall and worked out a layout that I thought would work for the blocks that were completed, and then I started putting them together.
Not all of the seams are sewn yet, but you get the idea. I'm liking how it is coming together!
Meanwhile, a friend of ours just turned 3. I decided she needed a special pillow. Again, I used the Kimberbell Kids "Personalized Name Pillow" pattern.
Can you guess her favorite color?
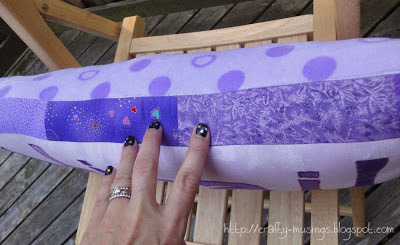
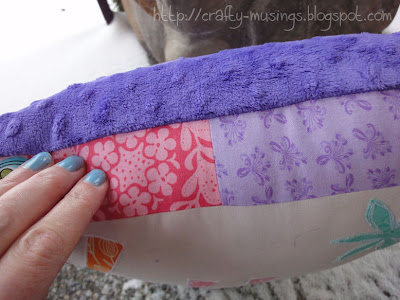
Here you can get a peek of the back-- a super soft minkee with circles and dots that was perfect for this project.
She loved it!
And now I am heading back into the UFO mines...
Monday, July 9, 2012
One Thing, One Week Challenge: Catch-up edition
This last week, Amy at Amy's Creative Side hosted another One Thing, One Week Challenge, and I decided to take the plunge and commit.
This time, my goal was to catch up on my Adventures of Harrington & Hannah block-of-the-month.
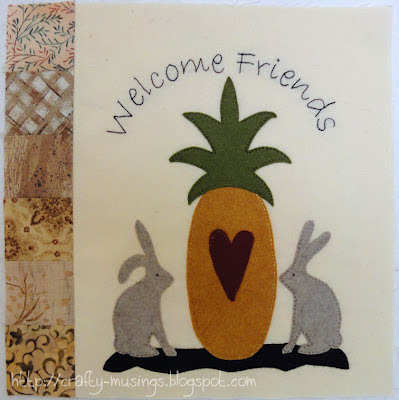
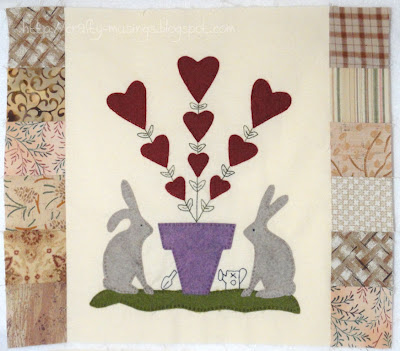
I needed to finish April, and then complete May and June. That worked out to about 2.25 blocks (because April was all done but for the sashing). And I did it!
April:
May:
June:
I really wanted to be caught up before the next block is posted, so this challenge came at a really good time. And I love that I've finally been feelin' the handwork again lately. Woo!
If you have the chance, check out some of the other inspiring challenge finishes for the week over at Amy's Creative Side!
Monday, May 7, 2012
More bunnies!
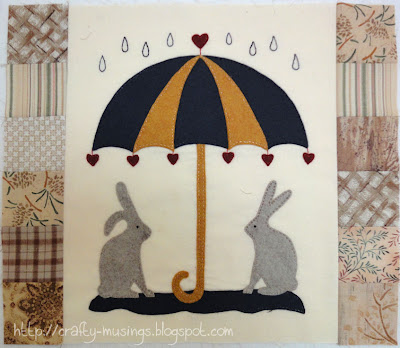
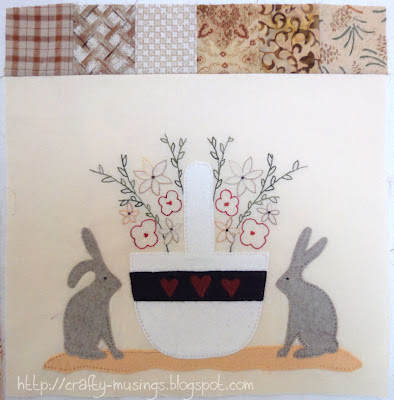
I've completed a couple more blocks in the happy "Adventures of Harrington & Hannah" BOM from The Raspberry Rabbits. This is such a fun project.
February:
March:
And I have April's all prepped and ready to go! Now I just need to find some time for a little bit of handwork.
February:
March:
And I have April's all prepped and ready to go! Now I just need to find some time for a little bit of handwork.
Monday, February 27, 2012
A new project!
A couple of weeks ago, I celebrated my 38th birthday. Woo! And there were presents. Double woo! The one I am most excited about though is this one:
My husband ordered the wool and Valdani floss kits for me from The Raspberry Rabbits shop so that I can participate in their new (free!) block-of-the-month program, Harrington and Hannah! After taking a wonderful wool applique class last fall, I've had my eye out for projects that incorporate wool, and this is one that I'm really excited about. The first two blocks have been posted so far, and they are so cute!
I immediately got to work on my first block, and put the finishing touches on it today:
This is a little different from the techniques I learned for wool applique in my class. This project suggests fusible web and a running stitch. I found it challenging (especially on the layered areas) to actually stitch all the way through the background fabric (the wool is thick!). Hopefully I caught the background fabric sufficiently that the pieces will all be secure. Between the stitches and the fusible web, it's probably fine. In wool applique quilts, does one usually quilt over the wool too? I'll need to start paying attention to the quilting when I see wool quilts in shows/shops.
I'm looking forward to block two!
Wednesday, February 1, 2012
Playtime: the bowling pins
The final block of my American Jane Playtime quilt is the bowling pins:
Though I usually prefer needleturn, for this block I actually took the time to do freezer paper/starch prep on every single piece. As it is a set of pins, I wanted them to be as close to identical as possible. Doing the prep also gave me a little more confidence with the spacing of everything as it allowed me to lay it all out before I started stitching. The pattern has the pins plain, but once I finished all of the applique, the block felt like it just wasn't finished. So I went back and embroidered a face onto each pin. It just felt like the right thing to do. And I think they turned out pretty cute. Certainly, they have more personality than plain pins would have!
Once I finished the block, I could not help myself from just putting the whole dang thing together:
Woo! After having worked on this project for three years now, I do have an inkling of a quilting plan in mind, but it needs a bit more work before I'll feel comfortable taking the plunge. Regardless, it is going to be a little while before it gets quilted as there are a couple of other tops that have higher priority. So I've got some time to figure it out.
Again, I say, Woo! :)
Monday, January 23, 2012
A change of pace
After putting all of those quarter-square triangles together for Hop to It, I decided I needed to take a break from the machine and do a little bit of handwork.
Playtime is back!
Playtime is back!
Wednesday, January 18, 2012
Pillow party!
Recently, Stacy Sews reviewed the Personalized Name Pillow pattern from Kimberbell Kids. Hers turned out so cute that I decided to go ahead and pick up the pattern for myself.
The pattern is good-- the instructions are very clear and there are lots of photos throughout to illustrate the steps. It is true that this project is not rocket science, and I didn't really need a pattern to tell me how to go about making one. However the pattern also includes an alphabet-- capital and lower case letters, perfectly sized and already reversed for fusible applique-- making it more than worth its $6.95 price tag. (I don't even want to think about how long it would take me to accomplish the whole sizing/reversing thing... ugh!)
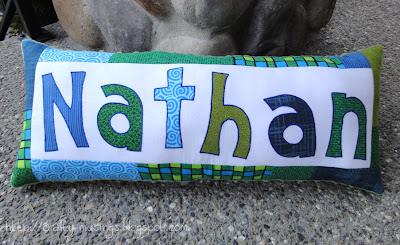
I've made two pillows so far, both for preschool friends of Big Bear. First up was Nathan:
The only deviation I made from the pattern on this one was to use the minkee dimple dot fabric on the back (so I also used 1/2" seam allowances when I sewed the front and back together).
It ended up about 12" high and 21" wide.
For Kyra, I got a little more creative:
I decided to go for a more square look and use diagonal letters mostly because her name is so short, it would have resulted in a pretty tiny pillow otherwise. Then I added the flowers to just fill in some of the open space.
Again, I used dimple dot micro-fleece on the back. This one ended up about 15" high and 14" wide.
Making these pillows is quick, easy, and a lot of fun (and a great way to use some scraps!)! And the kids seem to like them too!
Labels:
2012 finishes,
applique,
name pillows,
scraps,
sewing
Tuesday, December 13, 2011
Hop to It: "Garden Grace"
I couldn't help myself. I've been on such a roll lately with these Hop to It blocks that I just had to keep going and finish up the last one.
Block 9, "Garden Grace":
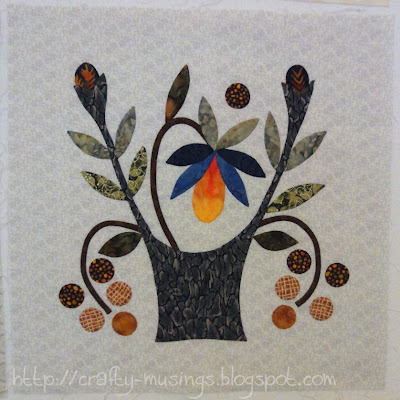
Techniques used:

All the blocks are complete! Woo hoo!!! Now I just need to figure out sashing. Here's hoping I don't fall into my recent pattern of finishing the applique and then stalling out on putting it all together (ahem... I'm talking about you, Greenpiece!).
Block 9, "Garden Grace":

Techniques used:
- Bias bars for the stems;
- Karen Kay Buckley's Perfect Circles for the berries;
- Needleturn with freezer paper on top for everything else.

All the blocks are complete! Woo hoo!!! Now I just need to figure out sashing. Here's hoping I don't fall into my recent pattern of finishing the applique and then stalling out on putting it all together (ahem... I'm talking about you, Greenpiece!).
Monday, December 12, 2011
Hop to It: "Rose Hip Wreath"
Block 12 of Edyta Sitar's Hop to It quilt, "Rose Hip Wreath":

Techniques used:

Techniques used:
- Bias bars for the stems;
- Needleturn with freezer paper on top for the leaves and buds;
- Freezer paper on bottom and starch for the ovals;
- Karen Kay Buckley's Perfect Circles for the flower centers.
Tuesday, December 6, 2011
Hop to It: "Enchanted Garden"
Another Hop to It block:
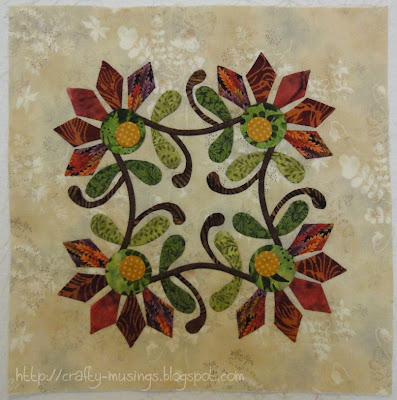
This is block ten, "Enchanted Garden." I think this one turned out really beautifully. I love the background fabric; so much so that I bought some in another colorway to make a skirt (not made yet, but it's on the list!).
Techniques used:

This is block ten, "Enchanted Garden." I think this one turned out really beautifully. I love the background fabric; so much so that I bought some in another colorway to make a skirt (not made yet, but it's on the list!).
Techniques used:
- Bias bars for the stems;
- Karen Kay Buckley's Perfect Circles for the flowers;
- Needleturn with freezer paper on top for everything else.
Saturday, December 3, 2011
Hop to It: "Batik Beauty"
October was so busy that I once again fell behind on my Hop to It project. So I've been trying to take some time for applique in the evenings and finally finished block seven, "Batik Beauty."

Techniques used:
I'm loving this project! *happy sigh*

Techniques used:
- Bias bars for the stems;
- Karen Kay Buckley's Perfect Circles for the flower centers;
- Needleturn with freezer paper on top for everything else.
I'm loving this project! *happy sigh*
Friday, September 16, 2011
Hop to It: "Buds in Bloom"
Oh, my! Long time, no post. Time just slipped away. It has been a busy couple of weeks, what with the boys (yes, both of them!) starting preschool and getting used to the new routine. Crafting has slid a little by the wayside, but I've managed to eek out a little bit of applique in the evenings and have another Hop to It block completed. Yay! This is block six, "Buds in Bloom."
It feels kind of mellow to me. But I do like the purple/yellow combo. I used a variety of techniques on this one:
It feels kind of mellow to me. But I do like the purple/yellow combo. I used a variety of techniques on this one:
- Bias bars for the stems
- Needleturn with freezer paper on top for the leaves
- Freezer paper on bottom and starch for the ovals (I don't use this technique very often-- but I really wanted my ovals to be consistently oval-shaped, so I thought the additional prep this required was worth it)
- Karen Kay Buckley's Perfect Circles for the flower centers
Sunday, August 14, 2011
Hop to It: "Spring Breezes"
Since I'm not really going in any order, I skipped along to block 11 for this month. This might be my favorite Hop to It block thus far:

I just love the weaving vines and leaves, the flowing design, the lovely background, and the colors... oh, the colors! Somehow, I just lucked out on this one in picking fabrics. Happy!
All of the usual techniques prevailed in this one... bias bars for the stems, Perfect Circles for the berries, and needleturn with freezer paper on top for everything else. I had a few problems with placement of the dark green leaves (they should have been placed a little further down on their respective stems), but I managed to make it work without having to tear anything out. So I count that as a success.
I'm now caught back up to where I'm supposed to be block-wise on this project. Woo hoo!
Monday, August 8, 2011
Hop to It: Lily Dreams
Slowly but surely, I'm getting caught up on my Edyta Sitar Hop to It blocks. Here is block 8, "Lily Dreams":
The big challenges in this one were getting the overlapping designs placed correctly as well as appliqueing the skinny stems that had leaves at the end (the dark stems). On those stems, I initially tried using the bias bars on the long part, leaving a larger piece of fabric for the leaves which I thought I could needleturn. But that approach just didn't work at all. It ended up being a wonky mess. So I just did plain ol' needleturn with freezer paper on top for the entirety of those pieces, stem to leaf. Frankly, I was a little surprised when it worked. But I'll take it!
Overall, another happy block. I'm really enjoying this project so far.
Wednesday, July 27, 2011
Hop to It: "Spring Reel"
It has been a busy couple of weeks! My husband had three weeks off from work and so we've been getting to spend lots of family time together. We did some hiking, took a family vacation to the peninsula (visiting the beautiful town of Sequim), celebrated my husband's birthday, and generally just had a great time being together. The boys have been in heaven getting to spend so much time with papa!
There hasn't been much crafting during this time, but I'm starting to get back into some evening stitching and I finally have another Hop to It block to share. Yay!
This is block four, "Spring Reel":

It was pretty straightforward. I needleturned everything but the little circle in the center (go, go Perfect Circles-- LOVE that tool!). It's taken a couple of years, but I'm finally feeling more confident about my pointy-points. I'm definitely managing to make them more consistent and more pointy these days. Just so long as they don't need to be too pointy-- then they kind of stress me out still.
It feels good to be getting back into the saddle on this project and do a little bit of catch up. With this block is complete, I'm now only two behind schedule.
There hasn't been much crafting during this time, but I'm starting to get back into some evening stitching and I finally have another Hop to It block to share. Yay!
This is block four, "Spring Reel":

It was pretty straightforward. I needleturned everything but the little circle in the center (go, go Perfect Circles-- LOVE that tool!). It's taken a couple of years, but I'm finally feeling more confident about my pointy-points. I'm definitely managing to make them more consistent and more pointy these days. Just so long as they don't need to be too pointy-- then they kind of stress me out still.
It feels good to be getting back into the saddle on this project and do a little bit of catch up. With this block is complete, I'm now only two behind schedule.
Monday, July 4, 2011
Applique adventure!
For the latest round of Once 'Round the Country, the online round robin bee I'm participating in, I had the privilege to work on Anne's quilt. I knew almost as soon as I saw her center block that I wanted to do some applique.

I don't have the earliest design drawings, but these were the last ones. My goals:

I did it on freezer paper since that was the only paper I had that was big enough. Once I had it all drawn out, I used it to trace freezer paper templates for all of the leaf and flower shapes. I also created lots of bias tape to use for the vines. This was my first time trying out a continuous bias creation technique (I used a tutorial from Make It Modern and a video tutorial at Erin Compton Design as my guides-- both were super-helpful). It was a little bit labor-intensive, but it worked really well and I didn't have to cut a large diagonal swath from Anne's fabric-- I only had to cut off a small chunk (I think I used 1/3 yard). And there is a ton of bias left over (whoops!). So I guess if anyone else decides they want to do vines, some will be ready for them!

I started by reverse appliqueing the centers of the bulb-flowers.
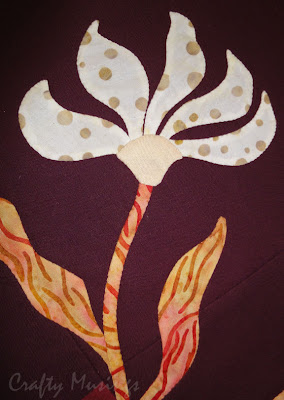
Then I needleturned all of the leaves and the other flowers to the background. Next I added the vines. Lastly, I added the base of the white flower and the bulb-flowers at the ends of each vine.
This was my first time designing and executing an applique border and I definitely learned a couple things.
And the big reveal:
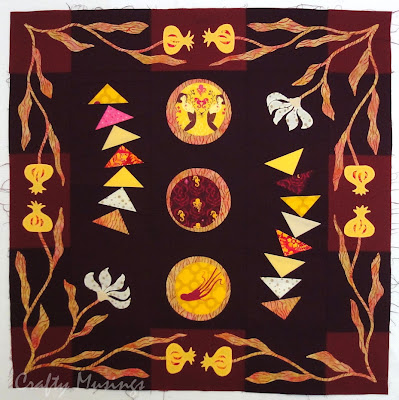
Yay! I think it turned out pretty cool. Hopefully, Anne will like it too.

I don't have the earliest design drawings, but these were the last ones. My goals:
- Echo the organic symmetry of the print fabric (which was also captured so beautifully by Kris in her flying geese border).
- Use the designs of the print fabrics to inspire the shapes that I would use.
- Utilize some of the open space left in Kris's border to help create a sense of flow from hers to mine.
- Make it look cool.

I did it on freezer paper since that was the only paper I had that was big enough. Once I had it all drawn out, I used it to trace freezer paper templates for all of the leaf and flower shapes. I also created lots of bias tape to use for the vines. This was my first time trying out a continuous bias creation technique (I used a tutorial from Make It Modern and a video tutorial at Erin Compton Design as my guides-- both were super-helpful). It was a little bit labor-intensive, but it worked really well and I didn't have to cut a large diagonal swath from Anne's fabric-- I only had to cut off a small chunk (I think I used 1/3 yard). And there is a ton of bias left over (whoops!). So I guess if anyone else decides they want to do vines, some will be ready for them!

I started by reverse appliqueing the centers of the bulb-flowers.

Then I needleturned all of the leaves and the other flowers to the background. Next I added the vines. Lastly, I added the base of the white flower and the bulb-flowers at the ends of each vine.
This was my first time designing and executing an applique border and I definitely learned a couple things.
- Don't use so many points! There were a lot of pointy-points in my design-- the leaves, the ends of the bulb-flowers, the petals on the white flowers... I'm not sure what I was thinking there as I'm not very good at executing pointy points. But, they got done (albeit, they maybe aren't as pointy as I'd originally intended).
- Create the border wider than needed and then trim down after completing the applique. I didn't do that, and my border is a little wavy because I pulled the fabric a little tight at some spots as I worked. It shouldn't cause a problem for Zonnah (who is adding the next border and has mad skillz), but I'll definitely keep it in mind for future projects.
And the big reveal:

Yay! I think it turned out pretty cool. Hopefully, Anne will like it too.
Thursday, June 16, 2011
Hop to It: "Rose of Sharon Wreath"
I'm a little bit behind on my Hop to It project, so it feels extra good to actually finish a block. Hopefully next month I'll have time to make two blocks and get myself caught up again.

It's so strange... whenever I'm picking fabrics for my blocks, I feel like I'm picking a nice array (varying scales, a range of light to dark, different colors)-- but then I finish the blocks and they end up feeling kind of dark. Don't get me wrong. I still think they are very pretty, just darker than I expected. That's okay though. At least I'm consistent so the blocks all go well together. It was just a kind of weird realization.
Anyway, this was a fun block to work on. I was a little worried about getting the curves to all work together and look similar, but tracing a very light line on my background fabric in pencil to use as a placement guide worked well.
I also came to a decision on this block. This quilt has a number of blocks wherein there are a number of symmetrical elements. This block kind of had that in the repeating motif around the wreath, but in other blocks it is even more pronounced. With this in mind, I was kind of thinking it would be good to do some prep work to make sure all of the like pieces stayed exactly alike. This put me in a dilemma because what I really enjoy doing is needleturn, which I've learned, for me, is not conducive to exactitude. Then while working on this block, it occurred to me that there is nothing wrong with imperfect symmetry. It is okay to have a more organic look to my blocks if that's what I'm into. And I am into that. So that's what I'm going to do.
It's cheesy, but I kind of felt like a little weight had been lifted off my shoulders concerning this project and that made working on this block even more fun. Now I'm really looking forward to tackling the next block and seeing how it comes together.
Subscribe to:
Posts (Atom)


