Sunday, February 28, 2010

Jane Stickle Quilt: I-11

Jane Stickle block I-11Block number/name: I-11 “Coyote Chase”

Date completed: February 27, 2010

Number of pieces: 12

Notes on block: So tired… All this week, I’ve been grappling with lack of energy. It was nice to finally feel focused enough be able to work on this block! On this one I pieced the background and then appliquéd the outer diamonds by needleturn with freezer paper on top. Finger-pressing the edges of the diamonds really helped to keep my edges straight and made placement much easier.

Recently, I've received a few comments asking about how I put together my progress chart, so I thought I'd address that here. I have the Dear Jane software and was able to export a snapshot of the original quilt layout into my photo editing software (I use Corel Paintshop Pro Photo X2). Then I converted the image to black and white and saved it. As I complete blocks, I take my block photos, crop them off the seam allowances, and then copy them as a new layer into the quilt image. Finally, I reposition and resize the block so that it fits over the appropriate spot in the quilt image and then I save it. I add to it as I finish more blocks. So, at this point, I have my quilt image + 177 layers.

Since there are so many image software programs out there, and I am only familiar with Paint Shop Pro, I don't know that being more specific would be helpful (since I don't know how they work). But hopefully, you can kind of get the idea. If you have more specific questions, feel free to comment or email me directly at rzaback {at} gmail {dot} com. Just keep in mind that I can't respond to commenters that are set to no-reply (if it helps, here's a nice, simple tutorial on how to change the settings so that bloggers can respond to your comments).

Friday, February 26, 2010

House party!

The theme Kris chose for her Snip.Sew.Send. blocks this month is tiny houses. She requested 12.5" blocks with small houses (2"-4") centered in them. She sent the background fabric and requested we use our own scraps/stash for the rest.

Going in, I was a little worried because this kind of block is just so not my style (or so I thought) and rather out of my comfort zone. I knew I wanted to make some trees (because every neighborhood could use trees!). But then I was stuck. Fortunately, the deadline loomed ever closer helping me to get off my duff and just do it.

neighborhood blocks for Kris
These were so much fun to do!!! I actually ended up making 3 blocks (well, nearly 3... I ran out of background to frame out the tree blocks-- hopefully Kris won't mind finishing them up). I'm sorely tempted to keep the little house, I'm so happy with how it worked out.

Here's a close-up of one of the trees:

kitty tree
I think the little kitty may have spied a birdie up there!

Based on the blocks I've seen so far, this is going to be a really fun quilt. I can't wait to see how they all come together.

I hope you enjoy your blocks, Kris!

Thursday, February 25, 2010

Slowing down

Soooo tired! That's been my week so far. Not a lot of craftiness thus far. Just a lot of sitting about with no energy. But, I'm hopeful that this is just a temporary setback and I'll be back on the productivity bandwagon soon. (Because baby is coming, and I have a lot to get done before that happens!)

The one thing I have managed to accomplish:

Prairie Pinwheel rows
I've stitched all the blocks into rows in the Prairie Pinwheels quilt. Now I just need to put those together, stick some borders on, and I'll have a top! (If only it would go together as easily/quickly as that sounds!)

Monday, February 22, 2010

Some weekend work

I feel like I got a lot accomplished this weekend! Here's a rundown of what I did:


In addition to the Stickle block I did over the weekend (which I've already posted about), I managed to put together another mini-chunk of the top.

Paintbox quilt along blocks, weeks 4 and 5
Here is another batch of Paintbox Quilt Along blocks. I'm up to 50 now!

Greenpiece center block prep work
I also started stitching the center medallion for my Moda Greenpiece BOM. I've got the grass and tree trunk completed. Now I just need to stitch on about a bazillion leaves (well... maybe more like 60-70). But at least most of them are now prepped and ready to go.

Prairie Pinwheels on the design wall
And my proudest accomplishment was finally putting up my "design wall" (a fancy term for a giant piece of white flannel thumb-tacked to my wall). I was able to start laying out my "Prairie Pinwheel" blocks and even got a couple rows put together. Woo hoo!!!

I got to do some work in the quilty room and some handwork too. The best of both worlds!

Sunday, February 21, 2010

A new diaper bag!

Last week I finished up my diaper bag! I have to say, I'm really glad I stuck it out because it turned out really well. It's a very nice looking bag, if I do say so myself.

diaper bag hanging view
The pattern is one I found on etsy.com from Jenna Lou Designs called the "Mabel Messenger." I love the shape, size, and look of this design. I also love the adjustable strap.

close-up front view
Construction was a little bit of a challenge for me, but I think it worked out in the end. Really, the trouble was all my own doing. Worried that using all quilting-weight cotton would result in a too-flimsy bag, I went ahead and added a canvas interlining. As it turns out, the canvas was not necessary with all of the interfacing and the heavy-duty Peltex that was called for in the pattern, and it created a LOT of bulk that I (and my machine) had a hard time dealing with. If I make the bag again (I may... because I do really like it!) I would definitely just follow the instructions and see how that goes.

inside view of pocket excitement
The pattern included just one inside pocket. I chose to add a few more-- 4 on the inside, and one on the outside. They worked out really well, and are a great addition to this design to make it a little more functional as a diaper bag.

loaded diaper bag
Here it is, all loaded up. Stuffed inside: 1 cloth diaper, 1 diaper cover, 1 wet bag, 1 receiving blanket (makeshift changing pad), 1 water bottle, 1 tube of diaper paste, 1 container of Purell, 1 package of wet wipes, 1 extra pair of pants, 1 pack of kleenex, keys, and wallet.

stuffed and closed
And it was still nice and trim looking even when the flap was closed. Considering that all of this was bulky toddler-sized stuff, I think it will work even better for an infant. (I keep crossing my fingers that my boy will be potty trained soon...)


I apologize for the blurry picture. I'm not so hot at self-portraits. But hopefully you can get a better idea of the size/scale this way (and see my big belly, too!).

I gave it a test drive the other day when the boy and I took a visit to the zoo. It worked pretty well! I loved that it wasn't hugemongous like my Nappy Bag. It was able to hold it all and still look really good. At the same time though, I may need to invest in a bigger bag for any outings more than a couple hours long (or if I have to carry diapering stuff for two). So I'm still on the lookout for some pattern options. Maybe this one, or this? The thing is, I'm running out of time... only 9 weeks to go!

Saturday, February 20, 2010

Jane Stickle Quilt: LS-4

Jane Stickle block LS-4Block number/name: LS-4 “Virginia’s Kite”

Date completed: February 20, 2010

Number of pieces: 21

Notes on block: I really enjoyed putting this block together. It may also have helped that I was watching a fun movie to go with it (Lost in Austen). Really, that was probably just a bonus (mmm... Mr. Darcy!).

Thursday, February 18, 2010

Greenpiece: Pieced block 5

Tonight was the Moda Greenpiece meeting at my local quilt shop. And I finished the last of my blocks for the month just in time. Woo hoo!

Pieced block 5:

Moda Greenpiece pieced block number 5
Not my best piecing, but they're done (and are close enough to the right size).

This is the first evening meeting I've attended and I had a great time. It was more intimate than the daytime meeting I attended last month. Having fewer ladies there meant that we really got to chat a little, and that was a lot of fun for this cooped-up toddler mama! There was some discussion of techniques, some show-and-tell, and some laughter. It was a great time and I really hope I can make it to another meeting soon.

Wednesday, February 17, 2010

Jane Stickle Progress

I meant to post a picture of my Jane Stickle progress with my last block. It was number 175 of 225. Only 50 blocks to go!!!

Robin's Jane Stickle progress, 2-15-2010
Ahem. But let's just not discuss having to actually put all those blocks together.

Tuesday, February 16, 2010

Jane Stickle Quilt: J-11

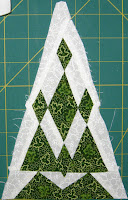
Jane Stickle block J-11Block number/name: J-11 “Twin Sister”

Date completed: February 15, 2010

Number of pieces: 7

Notes on block: This block looks a whole lot better in person. In real life, there really is contrast between the fabric and background. Really! This was a quick, simple block to stitch, taking less than an hour. Having all of the melons prepped and ready (with freezer paper on the bottom) was a big help too. It made positioning them much easier and more accurate.

Monday, February 15, 2010

Greenpiece: Applique blocks 9 & 10

These are the last of the Moda Greenpiece applique blocks for the month.

Applique block 9:

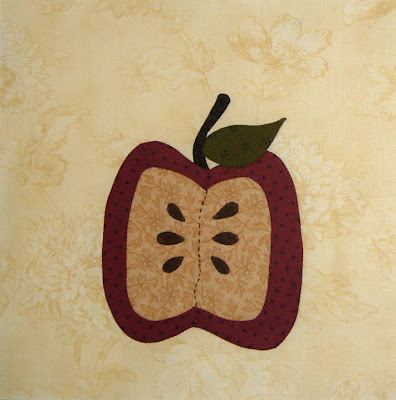
Moda Greenpiece applique block 9, the apple
This little apple is definitely my favorite block so far. I'm so pleased with how it turned out!

Applique block 10:

Moda Greenpiece applique block 10, the funky flower
This block, on the other hand, is not a favorite. My placement of the leaves wasn't great, resulting in one leaf kind of shooting off into the distance compared to the others. And then just the overall look of the flower seems odd to me. But it's done, and I'm definitely happy about that. :)

Hopefully, I'll be able to get to this month's pieced block before the Thursday club meeting!

Sunday, February 14, 2010

Jane Stickle Quilt: L-9

Jane Stickle block L-9Block number/name: L-9 “Walter’s Place”

Date completed: February 13, 2010

Number of pieces: 29

Notes on block: I stitched up this happy little block while watching the movie Couple’s Retreat. It was a fun movie to go with a fun block.

Friday, February 12, 2010

On cupcakes and pinwheels

On cupcakes:

Today is my birthday, so (with a little help from my boy) I made myself some cupcakes!!!


Yum!!! We used the Vanilla Cupcake Recipe from the Magnolia bakery. Overall, I was very happy with the resulting cupcake. It was maybe a little on the dry side, but I loved the dense texture and the sweetness level and the vanilla flavor (though we had a little vanilla incident in the making of these cupcakes... so I don't know exactly how much ended up in there-- but I know it was a at least a little over the top!). I even got a little fancy and whipped out the piping bags for some decorative frosting. So pretty!

On pinwheels:

How can I resist?

Pinwheel Party button from Twiddletails
It just looks like way too much fun!

Thursday, February 11, 2010

Jane Stickle Quilt: BR-12

Jane Stickle block BR-12Block number/name: BR-12 “Jessie’s Stained Glass”

Date completed: February 10, 2010

Number of pieces: 19

Notes on block: This is one of those blocks where finished is definitely better than perfect. I looked at the block in the original quilt vs. Brenda’s draft, and decided that I really liked the look of the original. I liked that there was more color and I thought the little diamond dipping into the bottom section was kind of cool. So I did a little drafting.

BR-12 redraftedWhen I redrafted, I attempted to do it without changing the entire block (because I’m lazy). It resulted in a changed middle area (the areas outlined in the dark pen), but the top and bottom sections were left the same (the ones in pencil). Just from my draft, you can see that it wasn’t perfect, and that imperfection translated pretty perfectly into a finished wonky block. And that little dippy diamond gave me fits! It was mostly stitched and then that little point was appliquéd. I also had lots of fun trying to get the bottom section attached (it’s actually stitched on one side of the dippy diamond and then appliquéd on the other).

In the end, though it doesn’t look great now, I think it will work fine in the quilt. Phew!

Wednesday, February 10, 2010

Greenpiece: Applique blocks 7 & 8

I've made some more progress on my Moda Greenpiece quilt.

Applique block 7:

Greenpiece, applique block 7
I really like the simplicity of this one. And my boy loves pears. So it also makes me think of him.

Applique block 8:

Greenpiece, applique block 8
This one was a little more challenging, mostly because placement was difficult (there are no placement diagrams for any of these-- all that is included is a tiny little picture of the block and all of the separate pieces). It ended up kind of off to one side, but when I trim the block down, I should be able to get it a little more centered. I think this one is really pretty.

Nearly caught up on these now! Just two more applique and two pieced blocks to go before next week's meeting/block distribution.

Tuesday, February 9, 2010

Indecision...

One of the things on my before-baby to-do list is to make a new diaper bag for myself. A couple months after the Boy was born, I made Amy Butler's Nappy Bag, and I have been using it ever since.

Amy Butler nappy bag
You can't tell from the picture above (because it was taken when it was sparkly and new), but it is starting to look a little worn, and I'm pretty tired of it. After three years of use, it is definitely time for something new!

I searched about for a pattern, and came across the Mabel Messenger by Jenna Lou Designs on etsy. I like the size, the shape and the long adjustable strap. I don't like the dearth of pockets-- but that is something I think I can remedy pretty easily.

At this point, I've got everything cut and fused and I've stared sewing.

bag in process
Here's where the indecision comes in. The pattern calls for Peltex (a super thick, heavy interfacing) on the outer pieces. I used it. I'm not thrilled with it. It is super stiff. I mean, I like a structured bag and all, but this verges on the ridiculous for me. At first, I wasn't even happy with how it looked, but with some vigorous ironing, I've tamed it to a shape I like. So now it's just back to the overall feel and crazy structure that I'm unsure about. I'm torn (and here is where the indecision comes in):

Should I scrap it (since I'm not thrilled at this point) and start anew (keeping in mind that this would require purchasing more fabric, because I don't have enough of the outer for a do-over)?

-or-

Should I keep plugging along and see how it goes? If there is one thing I've learned from my Jane Stickle blocks, it's that what seems hopeless at first can turn out just fine in the end. And this bag could be like that too.

At this point, I'm kind of leaning towards forging onward, but at the same time, I'm really worried about the waste of time if it's turns out to be a bust. It's just stressing me out. I think I'll sleep on it. Maybe even for a couple of days.

Monday, February 8, 2010

February Project Linus

Yesterday was the February workday for the local Project Linus chapter. And I even had a quilt to bring along with me!

Beaded Curtain quilt
I call this quilt "Beaded Curtain" because that's kind of what all those long lines made me think of, which also inspired the quilting.

Beaded Curtain quilting detail
I used white thread in the white areas and did three wavy vertical lines in each section. Then I quilted the colored areas with a bright variegated thread in a wavy criss-cross design that kind of resembles beads.

Beaded Curtain view of backing
The pattern came from the book, M'Liss Rae Hawley's Fat Quarter Quilts. The design is called "Parallel Paths." My white bars are wider than what she called for in the pattern, since I wanted to take advantage of the whole width of the roll o' fabric I was using. My quilt ended up at 62" by 67". I used the white print to bind it as well. It wasn't my first choice, but I have a lot of it and want to use it all up. It was a little challenging to work with because it is more of a home dec/canvas weight-- but it got the job done.

Beaded Curtain label
And the label.

The focus of this month's workday was to pack up blankets to send to Haiti. We packed 300 blankets and quilts for the cause. Wow! My quilt isn't making the trip to Haiti (it was a little too bulky), but I know it will find a happy place somewhere closer to home.

Sunday, February 7, 2010

Jane Stickle Quilt: G-6

Jane Stickle block G-6Block number/name: G-6 “Papa’s Star”

Date completed: February 6, 2010

Number of pieces: 31

Notes on block: This was a toughie. I really wasn’t sure how to go about it, so I just started in the middle and worked my way outward, worrying the entire time that pieces weren’t fitting together correctly. I guess that’s how they were supposed to work, because I ended up with a 5” square block. Frankly, I’m still a little confused as to how that even happened. But I’ll take it!

Saturday, February 6, 2010

Late-night catch-up

I've seemingly reached the point in my pregnancy that is making sleep more challenging. I decided to take advantage of that last night and stayed up way too late working in the quilt mines (aka, my sewing room). Now I'm up to date on my Paintbox Quilt Along blocks!

A pile of Paintbox quilt along blocks
Not only did I finish the blocks from last week, but I also got this week's blocks completed as well. Twenty blocks in all:

Paintbox quilt along blocks, weeks 2 and 3
It always feels so good to get caught up.

Thursday, February 4, 2010

Playtime: the checkerboard

This morning, I finished up another Playtime block!

Playtime Quilt: the checkerboard
This block is probably the simplest one in the quilt. I'm thinking I may put some buttons on there for checkers once it's all done. That might be kind of cute.

Between this and the Jane Stickle block I recently finished, I feel like I've been appliqueing a lot of stars lately. Good practice!

And my progress thus far:

Playtime progress chart, 2-4-2010

The next block is the train. I spent a few minutes looking it over yesterday, and have a feeling it might take awhile. It's 43" long, and there's lots of applique involved!

Wednesday, February 3, 2010

Jane Stickle Quilt: I-6

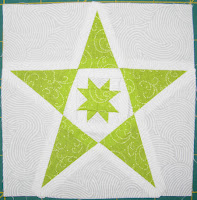
Jane Stickle block I-6Block number/name: I-6 “Viewer’s Choice”

Date completed: February 2, 2010

Number of pieces: 9

Notes on block: I used freezer paper on the bottom when appliquéing these melons. I think that method really helped control the long, skinny pieces better than I would have been able to do with needleturn. As a result, they have a nice, uniform look to them. And freezer paper on bottom really helps make placement easier too. For the star shape, I did needleturn with freezer paper on top. Overall, a very happy little block!

Tuesday, February 2, 2010

Jane Stickle Quilt: TRC

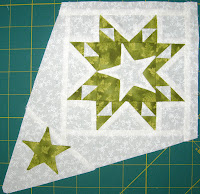
Jane Stickle block TRCBlock number/name: Top Right Corner “Longwood”

Date completed: February 1, 2010

Number of pieces: 48

Notes on block: There were some challenges along the way in putting this one together. The first was I had no idea how big it was. The Dear Jane software automatically defaults to 4.5” x 4.5” when printing. So you have to manually adjust it for all of the triangles and corner blocks (known as “kites”). But I could not find anywhere exactly how big it was supposed to be. I finally just decided on 8” x 8” as that seemed kind of logical (since all of the surrounding triangles are 8” tall). I feel pretty confident that I’ve got the size right, but I guess the true test will be when I put my borders together. This block just feels so huge compared to the rest!

Another challenge was the appliqué. Stars are not my favorite shape… too many narrow pointy-points! But, I feel like they turned out alright. I did them by needleturn with freezer paper on top.

The last challenge was that I mis-cut my white star section. It ended up being kind of a lopsided square. Fortunately, I was able to compensate when I pieced it into the block, but it was definitely a pain.

Hopefully, my next kite will go a little more smoothly!

Monday, February 1, 2010

Autumn House - Border

In my applique frenzy over the last week, I finished up the applique for my Bunny Hill Designs Autumn House quilt!

Autumn House border applique
And then I even got the top put together! But, I'm not going to show you that part. I think I'll wait until I get it quilted before the big reveal. But, I can tell you, it is really, really nifty! :)