Monday, September 30, 2013

September wrap-up

I am still kind of in disbelief that tomorrow is October 1. September just flew by for me! But it has been a good month. Back-to-school went very smoothly; the new schedule is finally starting to feel "normal" (as opposed to crazed); and I managed to meet my September crafty goals for Carrie P.'s Nothing but UFOs Challenge! Woo!

Nothing But UFOs in 2013 button

  1. School bag for Little Bear:

    Mail Sack, Little Bear view

    The bag was complete just in time for back-to-school (blogged).

  2. Harrington & Hannah:

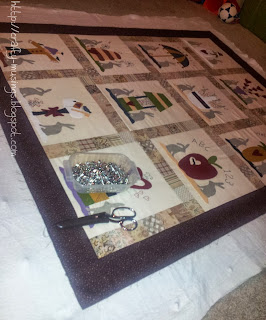
    basting Harrington & Hannah

    Not only did I finish the top, but I managed to get it basted. Yay!!!

  3. Spring Mystery Quilt:

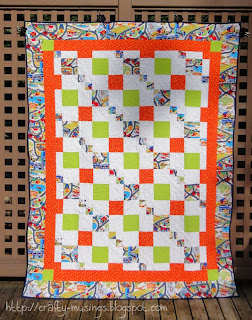
    Spring Mystery Quilt, front view

    Completed and blogged!

It feels good to check things off the list. Many thanks to Carrie P. for the continued inspiration and motivation!

Saturday, September 28, 2013

Spring Mystery Quilt complete!

Heather Spence Mystery Quilt button

My 2013 Spring Mystery Quilt from Heather Spence Designs is complete!

Spring Mystery Quilt, front view

It was a fun quilt to put together, and it was good use-what-I-have project: no fabric was purchased for this quilt!

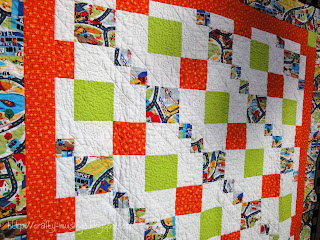
Spring Mystery Quilt, front quilting detail

I used Aurifil 50/2 thread in dove (2600) and rusty orange (2240) for the quilting. I started with the straight diagonal lines using my walking foot. Then I stippled in the open areas of the center.

Spring Mystery Quilt, back quilting detail

I then did the inner border in a stacked ripple and each of the cornerstones have a square-on-point outline with stippling in the center (I failed to get a good picture of that though.) The outside border is quilted in straight lines the same width apart as the ones in the center. I used Kona Navy for the binding and finished it by machine, ala Red Pepper Quilts.

Spring Mystery Quilt, back view

I love the pieced back on this. It really works for me. I think the symmetry makes me happy.

Spring Mystery Quilt, side view

This quilt is going to be donated to Camp Korey, one of the local charitable organizations my guild supports. I have no doubt its future will include many snuggles. :)

And, in case the thought of doing a mystery quilt intrigues you-- there is going to be another one starting soon! The Heather Spence Designs Fall 2013 Mystery is starting on October 4th. Sign up now!

Edited to add:

If you like this design, it is now available for purchase through Heather's shop. The pattern is called "Connect the Dots."

Sunday, September 22, 2013

It's time!

After spending the last few months really focused on UFOs and finishing projects, I finally decided that it was time to start something new. Woo! I've actually started two new projects-- one small, one big. In this post, I want to focus on the smaller one:


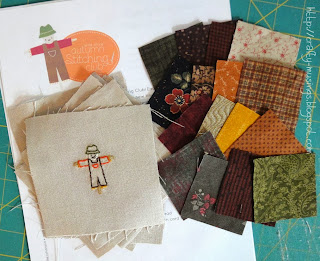
I decided to join Wild Olive's Autumn Stitching Club! It is $8.00 to sign up for this serial project featuring hexagons and cute little embroidery designs. I love fall, and a small project like this just sounded super appealing-- so I signed up! I get to look forward to an email every week during the months of September, October, and November that contains a piece of the project. So far, I have received the main instructions (fabric requirements, etc.) and three designs. At this point, I have managed to stitch up one of them and the second is in progress.


Autumn Stitching Club, block 1, scarecrow

These are tiny! The fabric is cut 4-1/2" square. The embroidery design is only about 2" tall. But look at the cuteness! As a bonus, this is a great scrap project-- I was able to find all the fabrics I need in my stash. Yay!

Autumn Stitching Club, block 2 in progress

Mollie recently posted a hint regarding the use of sticky-backed water-soluable stabilizer for embroidery. You trace your pattern on the stabilizer and then stick it to your fabric; it offers both nice clear lines as well as some firmness to the fabric, making embroidery a breeze. I've done that with the first couple of blocks, and really appreciate the extra stiffness the stabilizer gives to the super-soft and slippery linen. I'm finding myself really enjoying stitching these up.

Small + simple + autumn = happy.

Oh, and you need to check out this cute little pumpkin spice latte design from Mollie! Love.

Sunday, September 15, 2013

Vogue 1224 = Woo hoo!!!

This Tracey Reese design from Vogue Patterns had been sitting on my floor all cut out and ready to sew for months. I decided it needed to be one of my challenge goals for August, and I managed to get it made just under the wire (finished the morning of the 31st!). I finally got a chance to wear it and get some pictures (many thanks to my husband!).

V1224, front view

I bought the beautiful border-print knit from Gorgeous Fabrics last summer with the intention of using it with this pattern. (It took me a year, but at least I finally got it made!) For the skirt lining, I used a nude-colored polyester interlock I bought at Hancock Fabrics.

I cut a size 16, and made a couple of adjustments to the pattern, based on the reviews I read:
  • Lengthened the bodice by 1-1/2 inches.
  • Lengthened the skirt by 2 inches.
  • Omitted the ties at the neckline (I have cats and a preschooler... long ties just aren't practical for me).
  • Omitted the separate casing pieces at the waist-- I opted instead to stitch down the seam allowance where the skirt and bodice are joined and used that as the casing.
  • Ignored the cutting instructions for the skirt pieces so that I could take advantage of the lovely border on the fabric.

V1224, back view

This was actually a very easy dress to put together. I'm kind of kicking myself that it took me so long to get around to making it.

V1224, looking stylish

I love that it is something I wear anytime. It is comfy enough for everyday wear and I can still dress it up for an occasion with the right shoes and accessories. I really think I will get good wear out of this project and I can totally see myself making another dress like this if I find the right fabric for it.

V1224, jumping view

Hip-hip-hooray for a happy new dress!

Friday, September 13, 2013

Baby Bots!

One of my goals for August included completing this quilt:

Baby Bots, front view

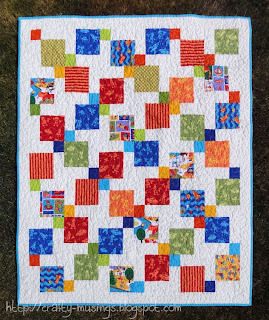
I call it "Baby Bots." It is a disappearing nine-patch design.

Baby Bots, quilting detail

The fabrics were left over from my Mod Mosaic block exchange quilt. I cut 5" squares from the scraps, put them together in nine-patches, and then cut them in half through the center, once horizontally, once vertically. Then I sewed them together to create the quilt.

Baby Bots, back view

I quilted it with a big easy stipple. Easy peasy and fun!

Baby Bots, label

Baby Gunnar's parents told me that they were decorating his nursery with robots. So this quilt turned out to be the perfect gift for him.

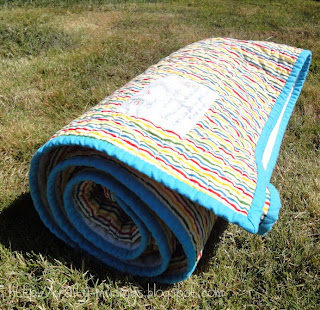
Baby Bots, rolled up and ready for gifting

Yay!

Wednesday, September 11, 2013

Back to School: Part 2

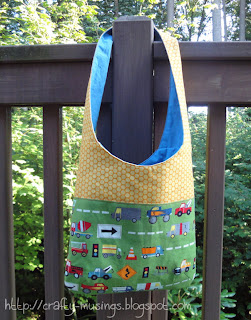
This week it is Little Bear's turn to go back to school! This will be his third year of cooperative preschool. He decided that he wanted a school bag, just like his big brother. I was happy to oblige!

Mail Sack, front view

I used the Mail Sack pattern from Pink Chalk Studio. I actually made this same bag 3 years ago when Big Bear was in preschool.

Mail Sack, side view

He chose the fabrics. His favorite color is green. Again, it went together fabulously. I shortened the strap by 2" as Little Bear is on the smaller side. I think it is a great length for him that he can grow into some still.

Mail Sack, inside view

This time around, I interfaced everything (except for one pocket piece) resulting in the bag being a tad bit stiff. I figure as time passes, it will soften up. And as it belongs to Little Bear-- it needs all the durability it can get!

Mail Sack, Little Bear view

Sometimes, I look at him and it blows my mind. He's growing up so fast!

Saturday, September 7, 2013

September goals

Nothing But UFOs in 2013 button

Another month, another set of goals for Carrie P.'s Nothing but UFOs Challenge!

  1. School bag for Little Bear:

    materials for Little Bear's bag

    It is cut and ready to be sewn. Preschool starts on Monday for Little Bear, so this project is top priority!

  2. Harrington & Hannah:

    completed Harrington and Hannah blocks

    All the blocks are complete (yay!). Now it is time to put them all together, add borders, and get a backing made. It would be a bonus if I could get it basted too... we'll see.

  3. Spring Mystery Quilt:

    Spring Mystery Quilt completed top

    This one needs to be basted and quilted.

Frankly, this month's calendar already looks insane, so I'm not sure how productive I'll be. But I am still feeling the pull of my UFOs and really want to keep progressing as much as I can while the motivation is still there. And I'm actually starting to feel like it might be time to get going on something new too, just to mix it up.

Thursday, September 5, 2013

Wednesday, September 4, 2013

Happy Kitty Heads

Heather Spence Mystery Quilt button

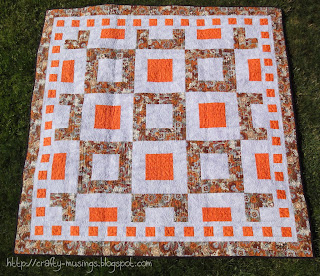
One of my finishes from last month was my 2012 Fall Mystery Quilt from Heather Spence Designs. I call it "Happy Kitty Heads" (inspired by the Laurel Burch print I used).

Happy Kitty Heads, front view

I quilted the heck out of it using Aurifil Mako 50/2 threads to coordinate with the fabrics: dove (2600), bark (1140), and rusty orange (2240).

Happy Kitty Heads, quilting detail

And my love affair with Angela Walters continues! Once again, her fabulous book, Free-Motion Quilting with Angela Walters, inspired my background quilting. I used her "Swirled Hook" design through all of the grey areas.

Happy Kitty Heads, even more quilting detail

I kind of did my own thing in the orange areas and I think it works pretty well. Then I just did some straight-ish line quilting in the center kitty areas, and feathers in the outer border.

Happy Kitty Heads, back view

As I have been wont to do lately, I used the leftover fabrics from the front on the back as well as pieces from my stash. I swear, quilt backings are the best stash-buster ever!

Happy Kitty Heads, back feather detail

Using this Moda marble on the back ended up being a great choice because it really shows off the quilting. Feathers! You can't really see them at all on the front because of the busy print (which was intentional, as I am not-so-confident of my feather quilting skills as of yet)-- but seeing them on the back is a treat since they turned out better than I had hoped.

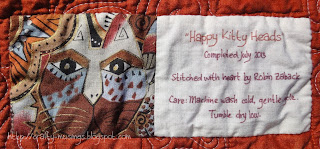
Happy Kitty Heads, label

I used one of the last scraps of the kitty head fabric with my label.

Happy Kitty Heads, draped on a bench

This one is for me!

Tuesday, September 3, 2013

Back to school!

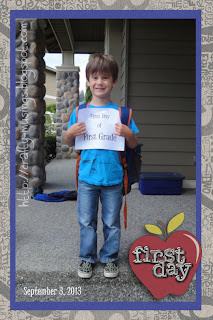
This morning was Big Bear's first day of First Grade!

Big Bear on his first day of First Grade!

He was a bit nervous, but definitely excited!

As he did half-day Kindergarten last year, this is also his first full day and the first time he's eating lunch at school. I decided to make some reusable snack bags to use when packing his lunch.

inside view of finished snack bag, showing off the exciting French seam

I started with the "Snack and Sandwich Bags Tutorial" at the SAHM of Etsy blog and then changed it up just a bit by using French seams in stitching up the sides. I just didn't like the naked seams in there. Also, as suggested in the tutorial, I used ripstop nylon as it is a food safe option (I was surprised to learn that laminated cottons and PUL are NOT food safe... good to know!!!). They were super quick and easy to put together and the perfect excuse to use some fun fabrics!

a nice big pile of snack bags with a friendly little lunch note

I also decided to try and add a personal touch by including a little note in his lunch bag. I used a printable I purchased through Sweet Pink Designs on Etsy. I printed it, glued it to some cardstock, and then my husband and I both wrote brief messages to Big Bear on the back. I think it will be a nice little surprise for him at lunchtime. :)

Now I need to go buy some more ripstop nylon so I can finish up our snack bag stash!