Lately, I've been feeling overwhelmed by the amount of clutter and general chaos that surrounds me in my home. I am determined to improve my situation! As a first step, I decided to tackle the top of my dresser:
The bulk of the above mess is my pile of jewelry. The pile is not only messy, but it is difficult to find, extract, and untangle pieces (particularly from the bottom of the pile!). I have been eyeing jewelry storage racks for a couple of years now and then stumbled across a tutorial from Home Depot: "DIY Jewelry Organizer Made from a Salvaged Drawer." I didn't have any drawers laying about, but I was able to find a base:
I found this one at Jo-Ann's (and I was able to use a 50% coupon for it-- yay!). Then I pretty much followed the tutorial.
I started by sanding and then painted the piece with an off-white acrylic craft paint.
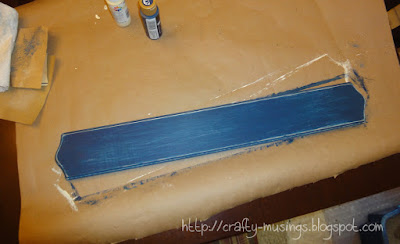
Then I sanded again and painted with a navy blue.
Then I sanded again to give it that distressed look with the white base peeking through.
Next I mapped out where to put the hardware. I chose a mix of knobs and a couple of pulls and then lined the bottom edge with hooks. I gotta say-- the hardware was not cheap. I think I spent about $28 on the pulls and knobs, purchased from Home Depot and another local hardware store. I am sure I could have been thriftier about it, but I decided the convenience was worth it. Fortunately, the wood was inexpensive and I already had the other supplies. So the project was not a budget-breaker. And it was still a lot less than the jewelry racks I was looking at on etsy!
Using a paper template taped it to the front of the rack, I marked where each piece of hardware was to go. When I went to make the holes, I drilled through the template-- that way I didn't have to mark up the front of the jewelry rack. It worked really well. And I successfully used a drill for the first time and I survived to tell the tale. Yay!
In the above picture, you can see the back after all of the hardware was installed. Just above the rack, you can see the paper template I used (with all of the holes).
And here is the completed front view:
Finally, I got it hung on the wall and loaded it up:
Check out that tidy dresser top! And now I can actually see and easily find all of my jewelry. Success!
Saturday, August 8, 2015
Monday, August 3, 2015
Borders on!
Last week, I had four blocks done and a few in progress. Today, I added the final borders:
I feel like I have had a productive week! Even better, I am totally loving how it has turned out. Yay!
Backing is next on the agenda. I have the fabric-- I even have enough that I *should* be able to piece the full back with just the one print. There is so much piecing on the front, I really want to avoid a ton of seams on the back. Here's hopin'!
Subscribe to:
Posts (Atom)


