Saturday, February 28, 2009

Another finish!

Shark-Filled Waters is done! I completed it just in time for the Project Linus workshop tomorrow.

Shark-Filled Waters, front view
I used the Quick Strippie pattern from MaryQuilts.com. It was perfect for showcasing this fabulous shark print. I'm really happy not only with how quickly it came together, but also with the overall look.

Shark-Filled Waters, quilting detail
Here you can see the quilting a little better. I stitched-in-the-ditch between all the bars. Then I free-motion quilted the wave pattern in the light blue sections using a King Tut variegated thread (so pretty!). Finally, I went through and did some random outline stitching through each of the shark sections (again with the variegated thread).

Shark-Filled Waters, back view
The back is entirely unexciting, but here it is. I just used some fabric I had in my stash.

Shark-Filled Waters, label
And here is the label.

I'm excited to turn it in tomorrow. I really hope that it will help bring some comfort to a child in need.

Friday, February 27, 2009

Feelin' Kitty!

With a name inspired by the song "Feeling Groovy" by Simon & Garfunkel (I'm not sure why that song was running through my head, but there it was), I present to you my completed challenge quilt, Feelin' Kitty!

Feelin' Kitty completed front
Not the best pictures... it was finally sunny outside and I wanted to take advantage of it, but the shadows got the better of me.

another front view
It feels really good to get this project finished! It's not my best work, but I learned so much from doing it.

It forced me to be really creative... remember, it started like this:

ufo in a bag
In addition to the challenges in using the chenille bits and strips, I also got to work with lots of other materials/textures in making this quilt, including minkee, micro-fleece, woven suede, corduroy, satin, flannel-backed satin, and cotton flannel. Combining all of them was both fun and challenging.

texture details
It definitely stretched my quilting skills. Quilting it, with its backing of flannel-backed satin, was definitely adventure. I would have thought it would be slippery, but really, it took some serious force to get it to move around. My arms got very tired.

Feelin' Kitty back view
I love how much texture the quilting added to back! I went with a big curvy stipple, in large part because I wanted to try and use the quilting to help stabilize the chenille (which easily pulls apart and sheds). But the quilting is far from perfect. Part of it, I attribute to the fact that I couldn't actually see where I was quilting. The quilting was completely invisible in the chenille areas. So I ended up crossing over previous stitching a bunch of times. On the bright side, it's not like anyone will be able to tell except from the back. Another issue was that I didn't do enough basting. It really needed more pinning to stabilize it and prevent some of the little folds I got.

quilting detail
I also had my first real experience with bias binding. The quilt didn't need bias binding, but since I was having to cut bias strips for the piped border, I went ahead and cut the binding strips at the same time. It worked out really well, and I think the little extra stretch/ease from the bias helped make working with the satin a little easier.

Feelin' Kitty label
And, finally, the label.

Overall, I'm feeling pretty happy with it. As per the rules of the challenge, I get to determine the fate of the finished quilt. Initially, I thought I might donate it. But, what with the instability of the chenille, I'm really afraid the quilt isn't going to hold up to much use. So I don't feel comfortable donating it or giving it away. But, my son loves touching the fabrics and snuggling with it, so I think it will have a good home here.

The big challenge "reveals" will be at the March guild meeting, next week. I'm really excited to see what everyone has done, and in particular, what became of my UFO contribution! Hopefully, I'll be able to get some pictures.

Wednesday, February 25, 2009

Playtime: the house block

The Playtime quilt has two blocks this month. The first was the airplane. The second is the house:

Playtime house block
I've determined that this BOM is definitely not for the faint of heart. The first applique block was a huge challenge, and this pieced block was no cakewalk. It has been a long time since I've pieced something this intricate by machine (all those bars around the window finish at 1/4"). Thank goodness I managed to be accurate enough with my seam allowances that everything actually fit together! (My block is square, even if the picture isn't.) :)

The pattern didn't help. I actually didn't have enough of one of the backgrounds. I had thought all the backgrounds were cut in the first month, so I freely used the rest to do the little pieced setting blocks. Unfortunately, more pieces were needed. Ugh. On the bright side, I happened to have some of the exact same Moda marble in my stash. It seems like I have plenty extra of the rest of the backgrounds, so hopefully I won't run into this problem again (because if I do, my stash won't save me!).

The cutting instructions were also confusing for me. My mistakes resulted in me having just barely enough of the window frame fabric and the house siding fabric (I actually had to do some additional piecing to make the siding work). But it all worked out in the end. Phew!

Here's the progress thus far:

Playtime progress, month 2
I can actually start putting the whole upper left corner together now!

If you haven't been over to Carrie's blog lately, you should check it out. Not only is there always wonderful eye candy, but she's also having a fabulous birthday/100th post giveaway.

Tuesday, February 24, 2009

Jane Stickle Quilt: K-1

Jane Stickle block K-1Block number/name: K-1 “Crooked Creek”

Date completed: February 24, 2009

Number of pieces: 28

Notes on block: I tried to be all clever with the fabric on this one. I fussy cut the cactus stripe into lighter and darker sections. Even the triangles are cut so that they are kind of divided into lighter/darker halves. I really like the resulting interlocking effect, but it looks much more effective from far away than up close.

Anina has been hinting that there are going to be some tough blocks coming up. Woo hoo! I’m ready for a bigger challenge.

Sunday, February 22, 2009

Jane Stickle Quilt: BR-13

Jane Stickle block BR-13Block number/name: BR-13 “Argyle”

Date completed: February 20, 2009

Number of pieces: 20

Notes on block: Have you ever decided to try and learn something new, thinking that it would be simple and quick, but then it just didn’t work out that way? I spent a little time today trying to figure out Paint Shop Pro and transparent backgrounds in an attempt to make visualizing my triangles without seam allowances much simpler. Ugh. So much for that preconceived notion. I know I just need to take time to read instructions, find tutorials, and experiment. But I just wanted it to be easy. Hopefully, I’ll be able to find some time to play with it again soon.

Thankfully, this block did not cause any frustration. Slow and steady. The most challenging part was trying to figure out what to do with all the seams in the diamond section. I’m afraid mine are going every which way. It’s hard to deal with seams and points in such a small area. But it is laying even and flat, so I’m not going to fret.

Saturday, February 21, 2009

In with the new

The challenge quilt is complete! Hopefully, I'll be able to take some pictures tomorrow so I can share.

It is time for a quick and easy, instant gratification kind of project. Back in January, I had said I wanted to try and have a quilt to donate to Project Linus by the March workshop. So that's what I've decided to work on next. I don't know if I'll manage it, since the meeting is on March 1, but I'm going to give it a shot.

shark filled waters
These are the fabrics I've chosen. I'm using the Quick Strippie pattern I found at MaryQuilts.com. If you haven't visited her site before, this generous and big-hearted quilter has a wonderful array of free patterns she has designed for charity quilts. The Quick Strippie pattern is about as simple as it gets, but I think it is going to be great for showcasing the fun shark print.

Finishing a project and then getting to start something new... it's such a great feeling!

Thursday, February 19, 2009

Sample book

Last spring my friendly neighbor, a former interior designer, offered me some of her old sample books. She gave me four books like the one below.

decorator fabric sample book
Initially, I was very excited. Books filled with pretty fabric? Oh, heck yeah! But upon closer inspection, I found that instead of clean and pretty samples, they were all paper backed and very securely bound. Below you can see how the back of each page looked.

paper-backed fabric samples
At this point, I was a little put off. While I couldn't throw out this treasure trove, I also didn't want to deal with getting it to a usable state. So the books have sat (in a large pile on my already messy sewing room floor) for more than a year. Until today!

As I said, these books are very securely bound. I managed to tear apart the main outer cardboard bits, only to find some hardcore staples holding it together.

evil staples
I used a berrypicker (an indispensable tool for removing upholstery staples) and pliers to remove the ten 2" long staples (six on the front, four on the back). Once I could free the individual samples, I had hoped that I would be able to easily remove the paper backing.

the paper does not want to be removed from the fabric
No such luck. What bits of paper I could remove tended to leave a nasty, sticky residue. So, I got out my rotary cutter with a pinking blade and hacked away at each page. I trimmed away all the paper bits to get usable pieces of fabric.

samples hacked to bits
The above picture shows the resulting sample book carnage. You may be horrified to hear that I just threw all of this away. But that's what I decided to do. I really just don't have any use for all these paper-backed fabric bits. And I don't have anywhere to keep them. So I'm not going to keep them. (Can you tell I feel a little guilty about this?) (But I'm still not keeping them!)

And after all that ripping, pulling, tearing, and cutting?

sample remains
Here is one book's worth of fabric bits. They range in size from about 2" x 3.5" to 4" x 6", plus one or two 6" x 8" pieces. It took about an hour of work to get one book dismantled.

So... what to do with these little bits of prettiness? I have been asking myself that very question. Here are my thoughts so far:
  • Patchwork pillows
  • Patchwork purse
  • Cute little checkbook cover (like amandajean's)
  • Nifty journal cover (like bloom's)
  • Fabulous fabric basket (like Pink Penguin's)
  • Patchwork futon cover? (because our futon could really use one)
Just thinking about the possibilities is really making me excited about these little sample bits. Two books down, two to go!

Wednesday, February 18, 2009

Birthday treats!

Last week I celebrated my 35th birthday. I received lots of wonderful birthday love from friends and family and went out to an incredible dinner with my husband and the boy. I also was the recipient of some super birthday treats: a gift certificate to a local quilt store, some much-needed new clothes, and a beautiful vase. Then there were a few gifts that didn't arrive until today.


A happy package from my in-laws via amazon.com arrived that included some fabulous books and a DVD of Wall-E. The Gayle Bong book, Save the Scraps, is just full of amazing projects that I really want to make. I checked it out from the library awhile back, and am now super-thrilled to have my own copy! The other book, I Like You: Hospitality under the Influence by Amy Sedaris, is campy, happy, crazy funny, and actually includes some very tasty looking recipes. I'm going to have lots of fun combing its depths.

Another package, from Pink Chalk Fabrics, was actually my birthday gift to myself. I've been wanting to start using solids more, and the Kona Cotton Starter Pack seemed like a perfect way to get going. And I just couldn't resist the famous "Bento Box" quilt pattern. I've seen a number of these quilts now, and just love the design. This was my first time ordering from Pink Chalk Fabrics, and I am a happy customer. My order was packed up beautifully, arrived quickly, and the customer service was great.

Meanwhile, I finished quilting my challenge quilt and completed the first phase of binding. Now all that's left is to stitch the binding to the back and attach a label. Should keep me out of trouble for a little bit.

Tuesday, February 17, 2009

Quilting away

I feel as if the last few days have been rather unproductive. I suspect this is because I have not been spending every evening with a project in hand. Instead, I've taken some time each day to work in the "quilt mines" (this is how my husband refers to my sewing room).


Quilting has begun on the challenge quilt (I really need to think of a catchier name...). In fact, it is nearly complete! I'm hoping that tonight or tomorrow, I'll be able to finish it up and get the first stage of binding done.

Oh! And I finally finished my pile of ironing! Yay! Now I just need to find room in the fabric closet for all of my new stash.

So I guess I haven't been unproductive. It's process and progress.

Sunday, February 15, 2009

Jane Stickle Quilt: J-7

Jane Stickle block J-7Block number/name: J-7 “Chicken Tracks”

Date completed: February 14, 2009

Number of pieces: 41

Notes on block: Whoa. This block looks so sweet and innocent. I mean, what could be simpler than a few nine patches? Then I realize how many pieces it has, and how many seams it will take (lots of tiny little seams). Suffice to say, this block took me awhile. But I’m pleased with the result.

Sometimes it freaks me out how much I look forward to working on the next block in this quilt. I’m having so much fun!

Friday, February 13, 2009

First quilt

Nothing terribly exciting to report from the craft front today. I've cut out the latest block for my Jane Stickle quilt, I've started work on another applique block for my Grandma's Country Album II quilt, and I still haven't quilted my challenge quilt (but it's going to happen this weekend!).

Since I am feeling somewhat nostalgic today, I thought I'd share a little of my quilting past.... my very first quilt.

(Sorry it's not a great picture... it is a picture of a photograph, and it was taken a long while ago.)

For Christmas in 1995, my mom gave me a rotary cutter, a ruler, and a cutting mat for Christmas. I didn't even know what they were, and all she could tell me was that they were for quilting. (This was back during her random-gifts-out-of-left-field phase.) I started graduate school the following month, and discovered that I lived about a mile away from a quilt shop. I decided to walk on down there and see what the deal was with my funky new tools. Lo and behold, they had an opening in their beginning quiltmaking class, and I immediately signed up.

I finished my first quilt in February 1996 and gave it to my mom for her birthday.

The happy little 2-color lap-quilt is a pattern called "Snowball Quilt" from the long out-of-print book Template-Free Quiltmaking by Trudie Hughes. I have to say it was a great pattern for a first quilt-- not too overwhelming in terms of pattern and color, but it introduced lots of great basic techniques.

I used a dark purple marbled print for the chain, and a bright turquoise and purple paisley print made up the background. The border and binding are sky-blue batik... I remember my quilt teacher raised her eyebrows at that choice (particularly for the binding), but in the end, I think we both liked it... and of course, Mom sure did!

The quilt is in tatters now... very well loved!

Wednesday, February 11, 2009

Jane Stickle Quilt: F-3

Jane Stickle block F-3Block number/name: F-3 “Snowball”

Date completed: February 10, 2009

Number of pieces: 17

Notes on block: This was a really quick block to put together! Usually, I do all my handwork in the evening, after the boy goes to bed. But I picked this one up and completed most of it during his quiet time this afternoon.

This green fabric is from the “Butterfly Queen” collection from In the Beginning. I think it came out in 2002 or 2003? When I saw the collection, I fell in love and actually bought a fat quarter of every print. It’s the one and only time I’ve ever done that.* It’s funny though, because I look at the prints now, and though I like the bright colors and graphic nature of the prints, I can no longer see what it was that I found so compelling about them. I guess it goes to show how tastes can change.

*Well… really, I’ve tried to do it one other time. It was the Cecily Mary Barker “Flower Fairy” collection from Rose and Hubble. But the collection was out of print and so I couldn’t actually manage to find all of the prints. So I figure it doesn’t really count.

Tuesday, February 10, 2009

Oh, wow!

Talk about positive reinforcement! Thank you all so much for all the wonderful comments on my airplane block. I'm feeling pretty proud, and it's in large part because you. I don't think I've ever mentioned here how much I appreciate all of you who visit and leave your thoughts. It means a lot to me. One of the reasons I started blogging was because I hoped it would help keep me focused and motivated. Well, I don't know how focused I am (I try not to think about how many projects I've got going at this point!), but I'm definitely motivated. Thank you so much! :)

Last week, I mentioned that I'm a part of a block exchange with some other quilters in my guild. I received a couple queries concerning what exactly that means. Since I'm lacking fresh crafty goodness to share at the moment, this seems like a good time to offer a little bit of an explanation of how the block exchange works in my guild.

Block exchange participants were put into groups of 12 quilters. Each person in the group selected a block. For our exchange, the blocks could be no bigger than 15" and had to be pieced-- no foundation piecing or applique. But other than that, it was wide open! This is the block I chose to use for the exchange:

my sample block exchange block

Katie Jump RopeThen each of us created a "block box" that included a completed sample block, detailed instructions on how to make it, and contact info (in case anyone has questions about our block as they're making it). Optionally, we could choose to include as much or as little fabric as we wanted (if there was no fabric, then we were supposed to include color preferences or guidance). In my case, I included the white background fabric, as well as an "inspiration fabric" (the Katie Jump Rope plaid pictured at left). In my instructions, I requested each quilter to choose their own fabrics to make the block, using the Katie Jump Rope fabric as a jumping off point as to what colors to use (they could also choose to use the plaid as one of the fabrics if that's what they want to do).

I passed my completed block box off to another person in my group back at the September guild meeting, and I received someone else's box. At each guild meeting, we pass the block boxes around so that each month, we're each making someone else's block while someone in the group makes ours. By the end of a year, we'll all have 12 blocks-- probably enough to make a nice lap quilt.

It's been really interesting each month. So far, I've only made one block where I could choose my own fabrics. The rest have included a selection of fabrics to choose from in the box. One even instructed exactly which fabric to put where.

I think one of my favorite aspects of the exchange is that in the end, I'll have blocks made by 12 different people, so it's kind of a friendship quilt. Another thing I think is pretty cool is that it's kind of a mystery... I won't see my box or the blocks in it until the end of the exchange. It will definitely be a surprise at the end as to how the blocks look. It's an adventure!

Monday, February 9, 2009

Playtime: the airplane block

The last few days I've been working on another block in the Playtime quilt. This time it was the airplane.

Playtime: airplane block
This block really challenged my applique skills. To start with, the pattern is designed for fusible applique, so all of the instructions are written for that and the line drawings are reversed to make that easier. Since I really wanted to do it by hand, I had to reverse the line drawing. Then I needed to figure out what order to applique all of the pieces and number them (so I wouldn't forget). Because there are so many layered, partial pieces, I also had to figure out a way to get them all placed on the background correctly. Long ago, I saw an episode of the show Simply Quilts in which someone demonstrated using vinyl to help with accurate applique placement. So that's what I did.


Using clear vinyl and a fine-tipped Sharpie, I drew horizontal and vertical gridlines so I could match the center of the design with the center of my fabric (I lightly pressed the center lines in my fabric to find the center). Then I traced the line drawing onto the vinyl. You can see my vinyl overlay to the right of the finished block above. With each piece, I'd position the vinyl on top of my background fabric and then slide the piece to be appliqued between the two layers. I could then use the lines on the vinyl to make sure the piece was in the right place on the background. I'd pin the piece in place, put the vinyl back over it to re-check placement, and then I'd either thread baste or (on the smaller pieces) start appliqueing it down (I used needle-turn applique with freezer paper on top). The process was time consuming, but it really worked!

Another challenge were the tiny pieces, like the little grey fin at the back of the plane, as well as the propeller blades. Then there were the teeny-tiny windows which I decided to reverse applique (maybe not the best decision, as I had problems with fraying, but they don't look too bad). By the end of the block though, my confidence had gone up considerably. Hopefully, my applique skills will continue to improve.

My only frustration with this block was that the kit I'm using to make the quilt did not include any fabric that looked like it would work for the body of the airplane. It also didn't include any solid red (it has some patterned ones, but it just seemed like it would be too busy to have that much pattern going on). So I had to go out and find some alternatives.

Saturday, February 7, 2009

Crafty Friday

Yesterday the boy and I met up with E for a field trip to the Bellevue Arts Museum. They have a new quilt exhibit: American Quilt Classics, 1800 - 1980: The Bresler Collection. I wish I had some photos to share, but alas, no photography allowed. The collection included some gorgeous quilts. They grouped them into categories, including whole cloth, mosaics, albums, Amish, medallions, log cabins, and more. The boy precluded me getting to really focus too much on the details of each quilt (must be moving at all times!), but I really enjoyed the exhibit. There were some truly beautiful quilts on display and I came out feeling seriously inspired.

Later, the boy and I went over to E's house and we crafted it up! E saw some super-cute Valentine garlands being displayed around blogland (like this one) and decided it would be a quick and fun afternoon project.

Armed with my bag of red/white/pink fabric I joined E and her giant piles of felt, fabric, and trims. Now, though I do consider myself pretty crafty, the only garlands I've ever made have been paper chains at Christmas. I was feeling rather clueless as to where to even begin. So I sat back and observed as E got started on hers.


This is what she came up with. I love how she used the ribbon-- each heart is separate and then they can be chained together by tying the ribbons. And I also love the pinked edges. So cute!

Once I saw how hers was coming together, I got brave enough to get going on my own.


Somewhere in the center of the crafty chaos, you can see the start of my garland. Instead of ribbon, I went with a continuous strand of white rick rack. Each heart includes a backing fabric (I used the same fabric for each heart), two layers of felt or fleece (depending on what was closest at hand), and then a top fabric. To hold all the layers together, I used a decorative stitch around the perimeter of each heart (each one is different).

Fun fact: in doing this project, I realized I do not have a single heart-print fabric in my rather expansive stash. Crazy! Fortunately, E was happy to share a few of hers with me.

My garland finished around 9 feet long. I decided to hang it in my kitchen, over the pantry.

heart garland
Right now it's being held up by tape. I might try using little tacks or nails at some point in the future. But overall, I'm pretty pleased with the happy little hearts.

Many thanks to E who helped me along, offering sage advice, materials, and great company. Yay for crafty friends!

Friday, February 6, 2009

Jane Stickle Quilt: I-2

Jane Stickle block I-2Block number/name: I-2 “Kaye’s Courtyard”

Date completed: February 5, 2009

Number of pieces: 13

Notes on block: I should have been a little more careful with my seam allowances on this one. It took some fudging to make it all fit together. But, fit together it does. Once again, the iron is my friend! I also really love this green and gold print—so pretty and elegant. I found it at Quilt Festival back in October.

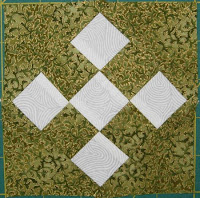
cornerstone optionI recently bought fabric for sashing (I got 3 yards… I’m really hoping that will be enough!). Now I just need to figure out what I want to do. I’m pretty sure I want cornerstones. I just don’t know what I want them to look like. One option I saw made up in the That Quilt flickr group was a simple square-in-a-square (like the one at left) that looked very pretty. But, there is a lot going on already in this quilt, so maybe a plain square would look better. Decisions, decisions.

Thursday, February 5, 2009

February guild night

Tonight is my quilt guild's first meeting in the new year. Yay! The challenge quilt deadline has moved to next month because they were able to schedule a speaker for tonight's meeting, author Cassie Barden. She has a new book out with some really fun looking projects. I'm looking forward to learning more.

And with another guild meeting comes another block exchange block to complete:

D.O.'s block
This one included fabric and it was also very easy to put together. It's a really simple block, but I'm very intrigued about what the final quilt will look like because it has all these folded points. According to the instruction sheet, the plan is once the quilt is constructed, these folded points will somehow be stitched down and then create a "falling leaves" effect. It sounds like it will be pretty cool. Of course, with these fabrics (I think they are all from April Cornell's "Sonnet Collection" from Moda), it would be tough to go wrong in any case. They are just gorgeous!

Tuesday, February 3, 2009

Jane Stickle Quilt: RS-4

Jane Stickle block RS-4Block number/name: RS-4 “Dutch Apron”

Date completed: February 2, 2009

Number of pieces: 15

Notes on block: As soon as I saw this block appear on the That Quilt blog, I knew exactly what fabric I wanted to use. That’s pretty rare! Typically, I spend much time thumbing through the green stash trying to decide on the perfect fabric. For me, choosing fabric is one of the best parts of making any block. It’s all about potential, vision, and creativity and the options are completely open. It can be so much fun!

Monday, February 2, 2009

Laundry day

Unfortunately, I have nothing particularly crafty to share today. Except my laundry. It might qualify as crafty because it was all fabric!

my fabric laundry
Inspired by my friend E's lovely stacks of washed, ironed, and neatly folded fabric, I started in on washing my fabric haul from last August. The pile above represents four full loads of laundry. I actually managed to iron and fold the first load (the tiny looking neat pile in front). Sadly, I think I've got another three or four loads of fabric to go. Anyway, that's about it for crafty accomplishment today.

In other news, I've received my first-ever blog award.

Kreativ Blogger Award
Woo hoo! Many thanks to Satu. She is a skilled quilter who does the most beautiful piecing and has an amazing eye for color. It is really an honor to receive such an award from her!

I think I'm supposed to now pass this award along to seven other people. It's hard to narrow it down because there are so many amazing and inspiring blogs out there (I just looked, and my Bloglines list has 131 subscriptions!). But I'd like to pass this award along to:
  • Carrie P.-- an amazing applique artist
  • Emily-- a gifted and prolific quilter and businesswoman
  • Gayla-- who makes beautiful crafty things
  • Kira-- who is super-crafty and makes me smile
  • Zonnah-- a talented quilter (and mom to a toddler, like me)
  • Karen-- for sharing her many quilting journeys
  • Yvette-- crazy productive and creates beautiful things

Now, I know I've seen this award on other blogs, and (of course) I can't remember where. So, if you've already received this award, and I'm awarding it to you yet again... well, I just want you to know that I appreciate all the work you're doing!

Sunday, February 1, 2009

What's for dinner?

Tonight dinner was Smoky Slow Cooker Chili from this month's issue of Cooking Light. (Have I mentioned how much I love that magazine??? I cook from their recipes all the time.)


This recipe is not for anyone who wants instant gratification or simplicity. It was kind of involved... cooking the ground pork, cooking the pork shoulder, sauteing the onion and bell pepper, and then putting it all (along with the 10-12 other ingredients) into the slow cooker. And there it sat for more than 5 hours. But the end result? Serious comfort food that was very, very tasty! This is a good thing, since we'll likely be eating it all week! This recipe made a goodly amount.

To go with it, I made some cornbread from Martha Stewart's Baking Handbook. It is definitely a "northern-style" cornbread-- moist, fluffy, and kind of sweet. Usually, I'm not so much into sweet cornbread, but it worked well with the spiciness of the chili. Yum!

After dinner (and bedtime for the boy), I finally got my challenge quilt basted.

basted challenge quilt
I decided on a flannel-backed satin for the backing. It's super soft but it's also super slippery. That (combined with the not-quite-flat top) is making me a little nervous, but I'm crossing my fingers that the quilting will go smoothly.