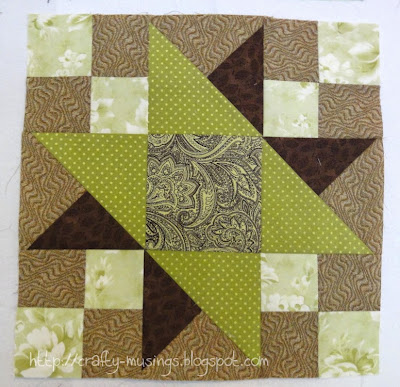
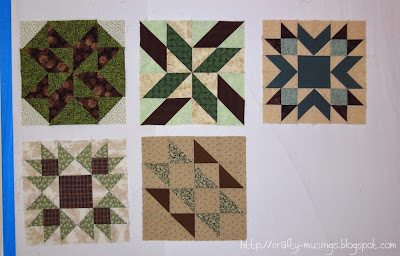
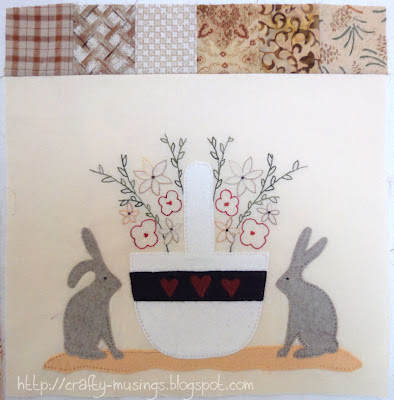
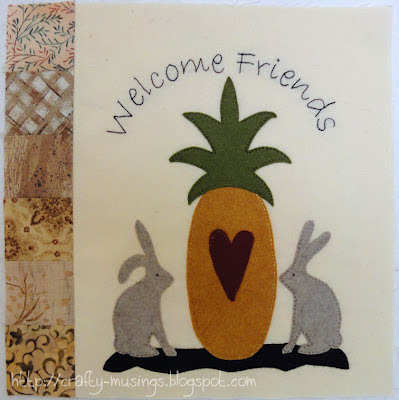
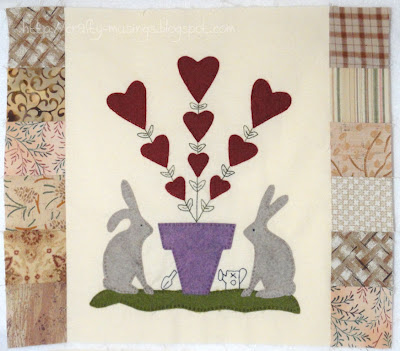
I finished these a little while ago, but wanted to share them on here (for completeness, I guess?). Here are the final blocks of the Sea Breeze Quilts "Chocolate Marshmallow Sampler" quilt along:
Block 11
Block 12
Here I've laid all twelve blocks out in what I'm thinking might be my final layout. I've set them aside for now. I need some time to think about how I want to sash them and finish it all (though I am leaning toward the suggested option as I do like the stars).
Many thanks to Kate at Life in Pieces for the inspiration for this project's new moniker! Green and brown and white? "Mint Chocolate Marshmallow" is perfect!
Showing posts with label BOM. Show all posts
Showing posts with label BOM. Show all posts
Friday, May 1, 2015
Wednesday, February 25, 2015
Block do-over
Success!
This time, with focused attention to accurate 1/4" seams and using the "no-waste flying geese" method (which meant less bias edge contention and increased accuracy), the finished block measures 18.5". And I like this turquoise fabric even better. So it is a win!
Meanwhile, I am nearly done with a sequin tank top made from the failed dress parts. A little bit of hand stitching and some hems to go. I'm feeling the garment bug right now, so I think I'll focus on clothing for a bit. I've traced a few patterns and look forward to getting some cutting done soon!
Labels:
blocks,
BOM,
Modern Building Blocks,
quilting,
sewing
Saturday, February 21, 2015
Skill building
As a gift to myself last Christmas, I signed up for a Block-of-the-Month at a local quilt shop, Gathering Fabric. They are offering a beautiful rendition of the Moda Modern Building Blocks quilt as their Saturday Sampler this year.
I was all hyped to get going when I picked up my first packet. But after making the first block, I realized this project was going to be a test of my skills!
My finished block ended up a full 1/2" smaller than it was supposed to. You can see my issue(s) highlighted in the photo above. Gah!!! But-- it was a good eye-opener. This pattern is truly a skill builder, enforcing the importance of accuracy while piecing. There is very little room for error. I think I have been spoiled by the patterns I have been using lately-- relatively simple blocks, lots of "trimming down" to size as you go and whatnot. My piecing skills have definitely gotten a bit rusty (lazy).
With accuracy in mind, I finally dove into my second block paying very careful attention to seam allowances:
Woo! And it is the right size! *happy dance*
Now I'm going to give that first block a do-over. I want to get it right!
Wednesday, January 21, 2015
Quality crafting time
It has been a good few days, with lots of crafty goodness!
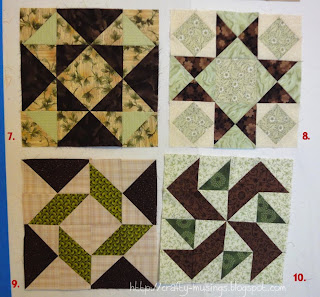
I spent some time catching up on my Sea Breeze Quilts "Chocolate Marshmallow Sampler" quilt along blocks:
Blocks 7-10 are now complete, and I am all caught up! Only two blocks to go in this one, I believe.
I also got all of the pillowcases washed, ironed and packaged for donation.
And I received a fabric order from Gorgeous Fabrics. Yum!!! Remember how I said I wanted to do more garment sewing? My plan at this point: tops from the b/w stripe and the purple, a skirt from the coral stripe, and not sure about the brown. They were actually sold out of the one I originally ordered and I chose this as a replacement, but I'm not sure I like it for the cardigan I had in mind... so it might turn into a skirt. Not sure yet. The next step though is to get them pre-washed, which with long swaths of fabric that need to be air dried, is kind of a process. Hopefully I'll fit them into the laundry cycle here soon.
In addition, I've been working on some party prep for Big Bear's upcoming birthday. He's turning 8! Crazy!
Monday, December 1, 2014
On the design wall...
Last night I finished a couple more blocks in the Sea Breeze Quilts "Chocolate Marshmallow Sampler" quilt-along.
This brings me to five total. One more block, and I'll be caught up.
However, my immediate plan is to work on a couple more gathered clutches for teacher gifts. I have two more cut out and ready to sew. Now that it is December, I find myself suddenly feeling holiday pressure. So I wanna get these off my plate!
Thursday, November 6, 2014
Harrington & Hannah
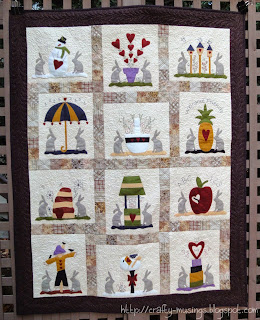
"The Adventures of Harrington & Hannah" was a block-of-the-month offered by The Raspberry Rabbits back in 2012 (the quilt is currently offered as a downloadable pattern through Craftsy).
I finished it over the summer and finally got some pictures of it last week. Woo!
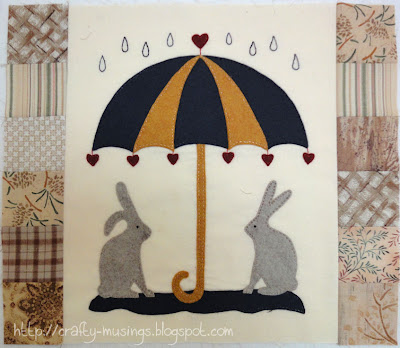
This is the first time I have worked on a quilt that incorporated wool. The wools in this quilt were purchased from The Raspberry Rabbits and were just lovely to work with, as were the gorgeous Valdani embroidery threads used for all of the applique.
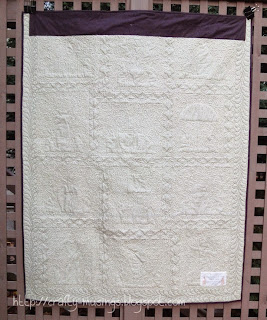
All of the quilting was completed using Auriful 50/2 thread. Three colors were employed: "Pale Flesh" (#2315) in the blocks, "Sandstone" (#2370) in the sashing, and "Bark" (#1140) in the outer border.
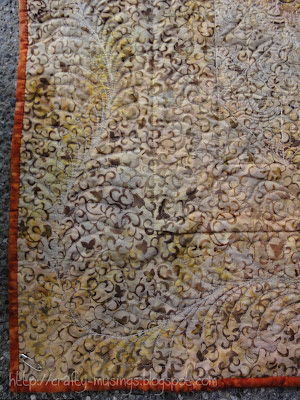
I love how well the quilting shows up on the back!
So while I was making this quilt, I started calling it "The Bunny Quilt." However, I actually already have a quilt by that name. As a result, this is now "The Bunny Quilt (2)." I feel like I should subtitle it "The Reckoning" or something. Ha!
There is just something about calendar-style quilts that really appeals to me. Love them! And I'm super happy to have this UFO finally completed. Now I just need to figure out where to hang it!
Friday, July 4, 2014
Right now...
There's a number of things I want to blog about, but I am feeling overwhelmed at where to start. Since I have to start somewhere, here is what I've been doing this week:
Here are a few quilts that need binding, including my Raspberry Rabbits BOM, a quilt for Little Bear, and my Framed Coins (which I finished quilting on Sunday, 6/29). Okay. Technically, I've not actually been doing any binding this week, but this pile has been weighing heavily in my mind. I really need to just. do. it.
Anyway, after all of the intense quilting my Framed Coins, I needed something quick and easy-- a palette cleanser:
I threw this together on Monday, from cutting to basting. It is the "Playpen" design from the Me & My Sister Designs book, Crazy for Baby. Now it is ready for quilting.
After getting the baby quilt put together, I was ready to jump into something new:
A triangle quilt! The Sassy Quilter's Triangle Quilt Along caught my attention back in April, but I just wasn't ready to join in at that point. But triangles have remained on my mind, so I've finally started in on one. I used Julie Herman's Hex N More ruler to cut 4.5" equilateral triangles and Electric Quilt to help me figure out how many I needed. The print fabrics are all from Patty Young's Sanctuary collection from Michael Miller Fabrics that came out a few years ago. The solids are Kona cottons in Glacier, Medium Gray, Spring Green, and Bahama Blue. I've pieced all the rows and am now working on joining those rows together.
Now I am off to squeeze some limes. We're making margaritas. Woo! Happy Independence Day!
Wednesday, November 14, 2012
A festive pincushion!
I made myself another happy pincushion. Yay! This is another kit I received in the Shabby Fabrics Pincushion Club last year. It is one of their exclusive designs and is called the "Christmas Tree Pincushion."
It is a biggie! At the base it is about 6" wide and it stands 10" tall. As it is filled with crushed walnuts, it is pretty darn heavy too. Essentially, it is made of a series of stacked, stuffed yo-yos. It is put together nearly entirely by hand (the exception being the stitching on the star topper-- I did that on my machine). All of the fabrics were included in the kit, as well as the happy colored pearl-topped pins. I love those! Unfortunately, I don't see either the pattern or the kit available at Shabby Fabrics at this point. It might have even been a pincushion club exclusive kit. But, if you are interested, you could always contact Shabby Fabrics and ask (they are really friendly there!).
My only challenge in putting this one together was in cinching my yo-yos closed... I kept breaking my thread. Gah! Eventually, I figured the whole tension thing out though. And now I have a happy tree pincushion, just in time for the holiday season. Woo!
Monday, July 23, 2012
A little bit of Christmas in July
Another pincushion!
This was the December kit from the Shabby Fabrics Pincushion Club I received last year. The pattern is the "Peace...Love...Joy Pincushion" from Primitive Gatherings.
The kit included the pattern, all of the required fabrics, as well as beautiful Valdani threads for the embroidery. It was great! (And if you are interested, Shabby Fabrics still has some kits available.) The pattern itself was pretty bare bones-- it assumed embroidery knowledge and, as I am not well-practiced, that involved some research on my part. And let me just say that trying to mark on black wool is a challenge-- by the end, I was just kind of free-stylin' it (the oddly angled tree trunk under the star is evidence of that). But it sure is a cute design!
It took me a long time to stitch this one up. My husband commented that this has to be the most elaborate pincushion I've done to date. I don't know about that, but it definitely gave me the opportunity to work on my stitchery skills.
Happy snowman!
Saturday, July 21, 2012
On the design wall...
...for the moment, anyway:
My Moda Greenpiece quilt! I was in the mood to sit and sew at the machine the other night, but didn't have any current projects ready to go. So I went to the project box pile and pulled this one out. I just looked and am shocked to find that it has been nearly two years since I last touched this project (September 2010, to be exact). Whoa.
Anyway, I trimmed all of the applique blocks and added corner triangles to them. I even managed to stitch a few blocks together. I'm not sure I'm committed to getting it all put together right now, but it feels good to have taken at least a few more steps in the process.
Monday, July 9, 2012
One Thing, One Week Challenge: Catch-up edition
This last week, Amy at Amy's Creative Side hosted another One Thing, One Week Challenge, and I decided to take the plunge and commit.
This time, my goal was to catch up on my Adventures of Harrington & Hannah block-of-the-month.
I needed to finish April, and then complete May and June. That worked out to about 2.25 blocks (because April was all done but for the sashing). And I did it!
April:
May:
June:
I really wanted to be caught up before the next block is posted, so this challenge came at a really good time. And I love that I've finally been feelin' the handwork again lately. Woo!
If you have the chance, check out some of the other inspiring challenge finishes for the week over at Amy's Creative Side!
Saturday, June 30, 2012
Pincushion o' plenty
It has been awhile since I finished one, but don't think for a second that I have left my pincushion obsession behind! This latest beauty was the November kit from the Shabby Fabrics Pincushion Club.
It is the Cornucopia pattern from Mary Jo Hiney Designs. (And I just noticed that she has a whole slew of other gorgeous pincushion designs available as well... oh, my!)
As much as I love the finished pincushion, I have to say that of all of the kits in the Pincushion Club I received, this one was my least favorite. The kit for this one included only the fabrics. Albeit, they were gorgeous silk fabrics, but in order to complete the pincushion as designed, additional embellishments are not just enhancements-- they are required to cover up holes and the like. I really wish that the kit had included some of those elements. Fortunately, I have a nice stash of beads, and I was able to procure some buttons and wired ribbon without too much difficulty. But it really felt like the "kit" was incomplete.
That said, if you want to make this gorgeous pincushion with these same lovely silk fabrics, Shabby Fabrics does still have kits available. Just be warned that you're gonna need more than silk to make this one.
The instructions were concise and clear and there wasn't anything too tricky. Turning the cornucopia right side out was a challenge as it was a very narrow opening, and then there was a bit of handwork (mostly long running stitches for gathering) and lots of hot glue involved. Hot glue is not my forte. I accidentally made a little glue puddle. It looked horrible and so I tried to cover my mistake with seed beads. That looked weird, so then I ended up adding little piles of seed beads all over to make it look less like a mistake. I think it was a pretty good save. Yay! My only other variance from the pattern was that I didn't use any paper products as she did (the original has a little paper fan and paper tag embellishments); instead I just added additional fabric and ribbon leaves to fill in those spaces.
I really do love this design. Not only is it beautiful, but it also brings to mind thoughts and memories of autumn and Thanksgiving-- my favorite times of year!
Monday, May 7, 2012
More bunnies!
I've completed a couple more blocks in the happy "Adventures of Harrington & Hannah" BOM from The Raspberry Rabbits. This is such a fun project.
February:
March:
And I have April's all prepped and ready to go! Now I just need to find some time for a little bit of handwork.
February:
March:
And I have April's all prepped and ready to go! Now I just need to find some time for a little bit of handwork.
Thursday, April 19, 2012
"The Bunny Quilt"
Finished!
The design is from Edyta Sitar's book, Hop to It.
The first block I completed was the bunny block, and somehow, my family just started calling it "The Bunny Quilt", as in, "Mama, are you working on the bunny quilt again?"
It is all hand appliqued. After a lot of vacillating and fear (I was so afraid of messing it up!), I worked out a quilting plan: stabilizing quilting with walking foot (straight lines through the sashing, and in-the-ditch along the inner border); quilt each block; quilt the sashing and cornerstones; quilt the border.
For the quilting, I decided on McTavishing for all of the applique blocks. Since it is a dense filler with a lot of traveling back on itself stitch-wise, I used Aurifil 50/2 for all of the quilting. I'm really pleased with how it came out! But boy, it was not fast. Each block took a little more than an hour to quilt. It was scary at first, but the design really is easy to work with and flows so nicely.
I went with curvy lines in the sashing diamonds. Then I found a design I liked in Keep on Quilting Pattern Pack #3 by Keryn Emmerson, and used it in the cornerstones.
The inner border was inspired by a border treatment I saw in passing at the Thimble Pleasures blog (which I saved to my pinboard so I wouldn't forget where I found it!). I just thought it was so pretty, and it looked like something I could do. I think it ended up working really nicely.
For the outer border, I did feathers. Woo!!! Did you hear that? I DID FEATHERS! (*feeling mighty proud*) I spent a lot of time practicing first. I practiced at every opportunity-- with crayons while the boys colored, with sidewalk chalk on the driveway, in my notepad while taking minutes at the preschool board meeting, on my husband's whiteboard, in the sandbox at school (tracing the design with my finger)-- if I had a free moment, I was feathering. After about a week of that, I finally sat at the machine to try. And I was able to do it. And it didn't look too bad! I am so happy with how it came out.
The feathers are even more visible when one looks at the back.
The backing was pieced from my border fabric rejects/leftovers as well as a little bit of stash (those birds have been in my stash since 1999!). I really love how it came together! Scrappy and happy.
And, of course, the label.
Now I just need to find the perfect place to hang it!
Monday, February 27, 2012
A new project!
A couple of weeks ago, I celebrated my 38th birthday. Woo! And there were presents. Double woo! The one I am most excited about though is this one:
My husband ordered the wool and Valdani floss kits for me from The Raspberry Rabbits shop so that I can participate in their new (free!) block-of-the-month program, Harrington and Hannah! After taking a wonderful wool applique class last fall, I've had my eye out for projects that incorporate wool, and this is one that I'm really excited about. The first two blocks have been posted so far, and they are so cute!
I immediately got to work on my first block, and put the finishing touches on it today:
This is a little different from the techniques I learned for wool applique in my class. This project suggests fusible web and a running stitch. I found it challenging (especially on the layered areas) to actually stitch all the way through the background fabric (the wool is thick!). Hopefully I caught the background fabric sufficiently that the pieces will all be secure. Between the stitches and the fusible web, it's probably fine. In wool applique quilts, does one usually quilt over the wool too? I'll need to start paying attention to the quilting when I see wool quilts in shows/shops.
I'm looking forward to block two!
Thursday, February 16, 2012
Hoppin' along with Hop to It
After all of the excitement of testing out border options for my Hop to It quilt, I realize that I never actually shared the final picks. Doh! So, here is the top with borders and all:
I ended up going shopping and chose an inner border that actually looks pretty similar to my previous options, but it is cooler-toned and more blue/green than brown. Then I decided to bring the lightness I was craving into the outer border. I'm so happy with how they work together and with how the quilt looks as a whole. Huzzah!
This week, I managed to sit down and plan out my backing and get it pieced together. And then...
Basting! That's me in the picture above, keepin' it real with my crazy hair and surrounded by toys. I have to say, there is nothing like basting a quilt on the floor for making one feel old and decrepit. My back was killing me after this. But, the basting is done. Woo!
I took the plunge and entered this into my quilt guild's April show. Here's hoping they decide to hang it; based on my entry picture (of just 12 blocks hanging on a wall), they might decide I'm a lost cause and say no. LOL! Regardless, I'm motivated to get it quilted. I have a plan. Now I just have to get up the gumption to do it.
I won't mess up my quilt; I won't mess up my quilt...
Subscribe to:
Posts (Atom)


