The October pincushion from the Shabby Fabrics Pincushion Club was from Pine Mountain Designs. The Pumpkin Pie Pin Cushion is actually the second pincushion I've completed by them. The first was the Love Pin Wheel Pastry-- the very first kit I received from Shabby Fabrics. And, once again, I love the results. Their patterns are so dang cute!
The combination of embroidery and patchwork is a happy one. I really enjoyed putting it together.
The instructions were easy to follow and I really appreciated that directions for all of the stitches used in the embroidery sections were included.
Rick-rack on the side...
...with a little yo-yo, a wool leaf, and a button on top to finish it off. I stuffed mine with crushed walnuts, so it has a nice heft to it as well.
*happy sigh* I do love me a cute pincushion!
Shabby Fabrics still has some kits available if you're in the mood for a little bit of Pumpkin Pie for yourself.
Showing posts with label 2011 finishes. Show all posts
Friday, January 20, 2012
Tuesday, January 10, 2012
For the man who has everything...
Well. My husband doesn't exactly have everything. More like, he just doesn't want anything. It makes for a serious gift-giving challenge. So this year, I didn't even try to shop. Instead, I found a super-cool fabric (the totally awesome mini robots from Caleb Gray which I purchased from Pink Chalk Fabrics) and decided to make some pajama pants for him.
I used Kwik Sew Pattern #3793. I took his favorite pair of pj pants and held them against the pattern to determine size and any other adjustments that might be needed. I ended up with a size Large and took 1.5" off the leg length. The pattern is designed for beginners and the instructions truly were very clear and easy to follow. And (bonus!) they were quick and easy-- I got them cut and sewn in one evening, no problem (well, other than the problems I had with my own brain, resulting in a massive un-sewing session). But, even with the unsewing, I got them done in one evening!
And they were a total hit when my husband opened them on Christmas! So much so that he even agreed to model them for the blog:
His only complaint about them is that the fly kind of pops open when he sits down. He thinks a button in that area would be a good idea. As that is a very do-able and easy adjustment to make, I feel like I can definitely call this gift (and pattern) a success. Yay!
I used Kwik Sew Pattern #3793. I took his favorite pair of pj pants and held them against the pattern to determine size and any other adjustments that might be needed. I ended up with a size Large and took 1.5" off the leg length. The pattern is designed for beginners and the instructions truly were very clear and easy to follow. And (bonus!) they were quick and easy-- I got them cut and sewn in one evening, no problem (well, other than the problems I had with my own brain, resulting in a massive un-sewing session). But, even with the unsewing, I got them done in one evening!
And they were a total hit when my husband opened them on Christmas! So much so that he even agreed to model them for the blog:
His only complaint about them is that the fly kind of pops open when he sits down. He thinks a button in that area would be a good idea. As that is a very do-able and easy adjustment to make, I feel like I can definitely call this gift (and pattern) a success. Yay!
Wednesday, January 4, 2012
Cute and practical!
The September pincushion from the Shabby Fabrics Pincushion Club was the "Abbey Bag" from Abbey Lane Quilts (Shabby Fabrics still has some kits available if you're interested in making one).
There was a lot to this one-- the flower, the connector, the bag.
It all went pretty smoothly until I went to stuff the flower and got confused. In this one, there is a separate liner stuffed and cinched tight and then you put that inside the flower. I read it wrong and tried stuffing the flower and then spent lots of time trying to cinch it, but it just wasn't happening and was looking horrible. Whoops! Then I figured out the liner thing-- and suddenly it was working just like the instructions said it would. Sigh. Reading and following instructions is definitely not my forte. I guess the lesson is read carefully.
My biggest frustration with this pattern was the gluing involved (the flower to the connector, the connector to the bag, the top band to the bag, the shelf liner to the bottom of the flower). I'm just not a glue girl, not to mention the fact that I didn't actually have any fabric glue on hand, so it was just inconvenient. But it works and (to be fair) glue was probably easier than attempting to sew the parts together.
The best part about this pincushion project is that not only is it super cute, but it is very practical. Having the little bag right there next to my machine to toss clipped threads into is awesome, and the pincushion is nice and heavy (I stuffed it with crushed walnut shells) and does not slip or move around at all thanks to the shelf liner on the bottom.
The Abbey Bag would make a great gift for any sewist. But I'm keeping this one for me!
There was a lot to this one-- the flower, the connector, the bag.
It all went pretty smoothly until I went to stuff the flower and got confused. In this one, there is a separate liner stuffed and cinched tight and then you put that inside the flower. I read it wrong and tried stuffing the flower and then spent lots of time trying to cinch it, but it just wasn't happening and was looking horrible. Whoops! Then I figured out the liner thing-- and suddenly it was working just like the instructions said it would. Sigh. Reading and following instructions is definitely not my forte. I guess the lesson is read carefully.
My biggest frustration with this pattern was the gluing involved (the flower to the connector, the connector to the bag, the top band to the bag, the shelf liner to the bottom of the flower). I'm just not a glue girl, not to mention the fact that I didn't actually have any fabric glue on hand, so it was just inconvenient. But it works and (to be fair) glue was probably easier than attempting to sew the parts together.
The best part about this pincushion project is that not only is it super cute, but it is very practical. Having the little bag right there next to my machine to toss clipped threads into is awesome, and the pincushion is nice and heavy (I stuffed it with crushed walnut shells) and does not slip or move around at all thanks to the shelf liner on the bottom.
The Abbey Bag would make a great gift for any sewist. But I'm keeping this one for me!
Sunday, January 1, 2012
Happy 2012!
The start of a new year is always an exciting time for me. New year = fresh starts in my mind. Really though, 2011 was a pretty awesome year for me, and I have no complaints-- so really, I'm just kind of hoping for more of the same. Is that weird?
My goals for last year:
Only 5 quilts (and one of those was a little wallhanging), but lots of bags, pincushions, and even a fair amount of clothes.
My goals for 2012:
I'm looking forward to a happy and healthy 2012!
My goals for last year:
- Use more fabric than I buy.-- Ha!
Fabric In: 148.700
Fabric Used: 88.801
I feel like I did exercise a lot of self restraint though. So that's something, right? - Finish at least one UFO-- Only one UFO finished, but it was a biggie-- "Forest Canopy" for the win!
- Put together my Jane Stickle top.-- So close on this one... I've stalled out on adding the final outside border (the narrow 2.5" one that I'll cut the scallops from after quilting). But the center is otherwise done. Woo!
- Have fun with being creative and making stuff!-- This one was a total win! I have had lots of fun this year branching out from just quilting-- I did a lot more sewing and made lots of clothes, bags, and pincushions (my new addiction). I've also been pretty good about keeping up with our family scrapbook, which I'm feeling really proud about.
Only 5 quilts (and one of those was a little wallhanging), but lots of bags, pincushions, and even a fair amount of clothes.
My goals for 2012:
- Use more fabric than I buy.-- Someday, I'm going to actually meet this goal. Maybe this is the year? :)
- Get my Jane Stickle quilt basted and start quilting it!
- Complete the Amy Butler Style Stitches challenge.-- The actual challenge group is seemingly retired, but I still really want to make those last two bags in the book.
- Finish some UFOs-- Specifically, I'd really like to finish Hop to It, Playtime, and (highest priority!) my wedding quilt (started in 2002... as this year will be our 10th anniversary, it seems like it is time).
- Keep exercising!-- Last summer I started exercising regularly (primarily running) and it is not only helping me physically (I've lost nearly 30 pounds in the last 4 months), but it is also so beneficial to my mental well-being. I feel so much more hopeful, refreshed, and energetic after I run. More energy = more crafting! I gotta make sure I keep going!
I'm looking forward to a happy and healthy 2012!
Thursday, December 29, 2011
"Forest Canopy"
Hello! It feels like a long time since I've blogged. As you know, this time of year tends to be on the busy side. We had a wonderful Christmas spent with friends and family (with, of course, much feasting!). I hope you have had a wonderful holiday season as well!
There was a fair amount of handmade gifting this year. I gave my mother-in-law the Blossom Bag I made, and my sister-in-law received the Fringed Hobo Bag. In addition, I made a pair of nifty pajama pants for my husband (more on those later-- I'm still hoping to get some pictures of him actually wearing them!). And, finally, completed just in time for Christmas:

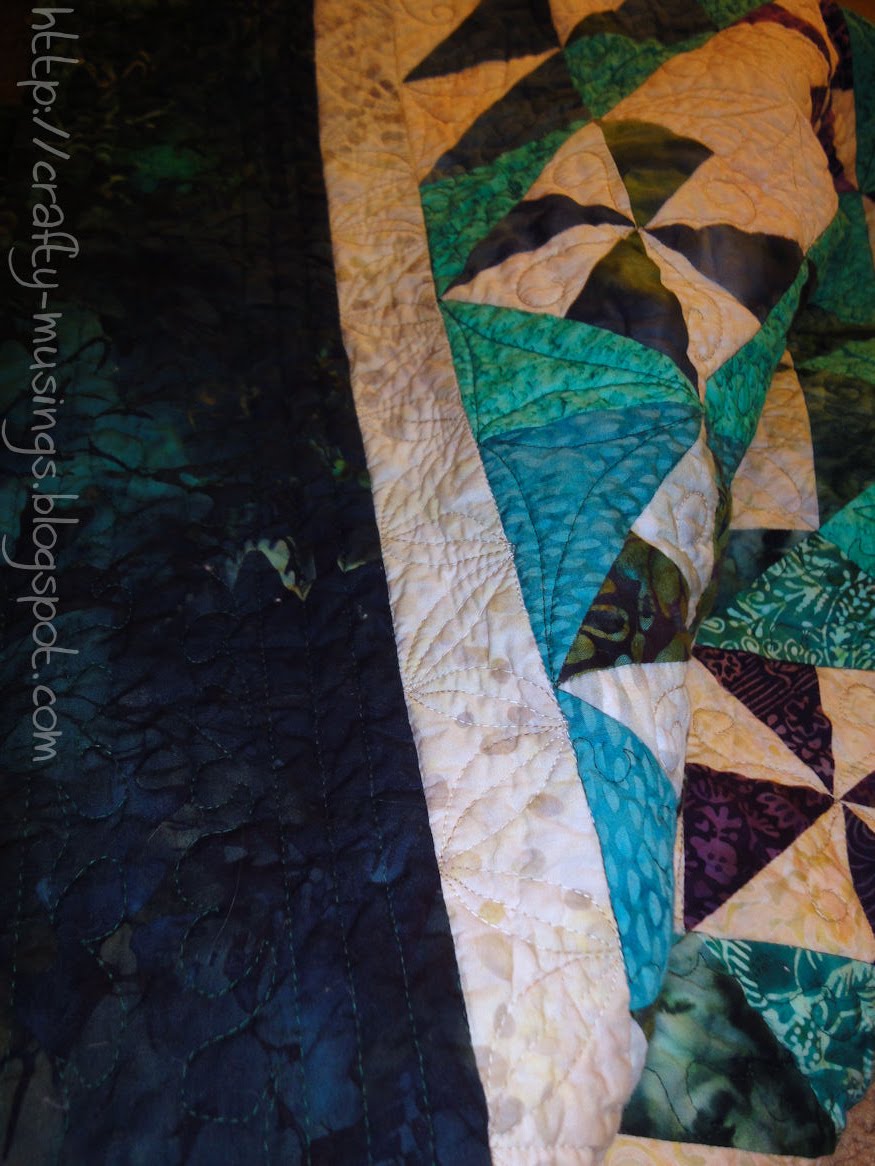
Woo! It took three-and-a-half years, but my Prairie Pinwheels quilt (which has now been officially titled "Forest Canopy") is finally finished. As I technically gave it to my father-in-law two years ago (via an IOYAQ (I Owe You A Quilt) card), it was definitely time. The pattern is from the July/August 2008 issue of McCall's Quilting. It is a large quilt measuring 85 1/2" x 109 1/2" (making it very difficult to take good pictures of it-- so many thanks to my intrepid quilt-holding volunteers!).
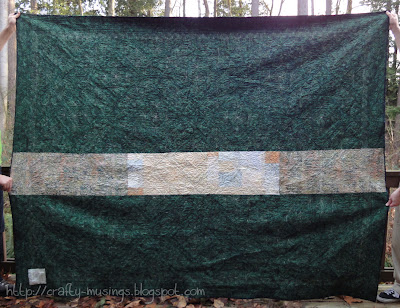
Ahhh.... *happy sigh* I just love this pieced back. And I love how well the quilting shows all over.

Quilting it was a slow process. I started by stitching-in-the-ditch to stabilize the layers and then did all of the free-motion work. Since all of my quilting designs were independent motifs, it involved a LOT of starting and stopping. Slooow process.

I did the cream-colored areas first using a King Tut 40/3 variegated thread, "Sands of Time" (#920). I love how the weight of the thread really makes the quilting pop.

Then I completed all of the green areas, including the outside border, using Aurifil Mako Cotton 50/2 (in dark green, #4026). As much as I loved quilting with it, I'm not thrilled with how subtle it is. The lighter weight really blends in with the background and the quilting is nigh invisible. For all of the effort I put into it, I really kind of wish I had used a heavier weight thread that showed a little better.
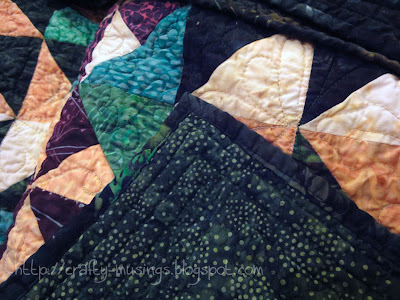
As it was getting down to the wire, I decided on a machine binding. I'm glad I did! I've had enough practice now that it looks good and I was able to accomplish it in about two-and-a-half hours. I do my machine binding using Red Pepper Quilts' method. It took a little practice, and it maybe isn't as fast as other methods, but I love the finished look (invisible from the front, as a hand-stitched binding would be), it works for me, and it allowed me to finish the quilt in time for gift-giving. (Yay!)

On the label, I repeated the wreath quilting motif I used throughout the center and in the outside border. The motif was designed with the idea of a tree's canopy-- how you stand below and look up and see the outline of the edges of the canopy, and it all looks kind of connected and of one piece with the light filtering through it and putting the canopy itself in shadow... you don't see individual leaves, but rather the outline of it all.

Not only was the quilt completed in time to give it to my father-in-law for Christmas, but it was also kitty approved!
There was a fair amount of handmade gifting this year. I gave my mother-in-law the Blossom Bag I made, and my sister-in-law received the Fringed Hobo Bag. In addition, I made a pair of nifty pajama pants for my husband (more on those later-- I'm still hoping to get some pictures of him actually wearing them!). And, finally, completed just in time for Christmas:

Woo! It took three-and-a-half years, but my Prairie Pinwheels quilt (which has now been officially titled "Forest Canopy") is finally finished. As I technically gave it to my father-in-law two years ago (via an IOYAQ (I Owe You A Quilt) card), it was definitely time. The pattern is from the July/August 2008 issue of McCall's Quilting. It is a large quilt measuring 85 1/2" x 109 1/2" (making it very difficult to take good pictures of it-- so many thanks to my intrepid quilt-holding volunteers!).

Ahhh.... *happy sigh* I just love this pieced back. And I love how well the quilting shows all over.

Quilting it was a slow process. I started by stitching-in-the-ditch to stabilize the layers and then did all of the free-motion work. Since all of my quilting designs were independent motifs, it involved a LOT of starting and stopping. Slooow process.

I did the cream-colored areas first using a King Tut 40/3 variegated thread, "Sands of Time" (#920). I love how the weight of the thread really makes the quilting pop.

Then I completed all of the green areas, including the outside border, using Aurifil Mako Cotton 50/2 (in dark green, #4026). As much as I loved quilting with it, I'm not thrilled with how subtle it is. The lighter weight really blends in with the background and the quilting is nigh invisible. For all of the effort I put into it, I really kind of wish I had used a heavier weight thread that showed a little better.

As it was getting down to the wire, I decided on a machine binding. I'm glad I did! I've had enough practice now that it looks good and I was able to accomplish it in about two-and-a-half hours. I do my machine binding using Red Pepper Quilts' method. It took a little practice, and it maybe isn't as fast as other methods, but I love the finished look (invisible from the front, as a hand-stitched binding would be), it works for me, and it allowed me to finish the quilt in time for gift-giving. (Yay!)

On the label, I repeated the wreath quilting motif I used throughout the center and in the outside border. The motif was designed with the idea of a tree's canopy-- how you stand below and look up and see the outline of the edges of the canopy, and it all looks kind of connected and of one piece with the light filtering through it and putting the canopy itself in shadow... you don't see individual leaves, but rather the outline of it all.

Not only was the quilt completed in time to give it to my father-in-law for Christmas, but it was also kitty approved!
Thursday, December 8, 2011
Another bag...
...and it's NOT Amy Butler! *gasp!*
This is my version of the Trendy Faux Leather Handbag:

I found this tutorial via Stacy Sews and have had it in the back of my mind for a little while now. Then when I went to Hancock Fabrics in search of my sparkly cami fabric, I saw this pretty brown/copper-shimmery vinyl on one of their remnant tables. On sale. I snatched it up!

For the lining, I found a happy brown Laurel Burch fabric. I love me some kitty heads!
This was actually a pretty quick project. But sewing with the vinyl involved a couple of challenges for me. The main one: when I made a mistake and had do some unsewing? Holes. This vinyl had zero self-healing properties. Fortunately, the holes are not terribly visible. But I know they are there. The other big challenge was the thickness of the vinyl-- there were a couple of points when the bulk just didn't fit under my presser foot. Fortunately, having faced that challenge before with a previous project (I'm talking about you, Blossom Bag!), I knew I could take off the foot and make it work. But it is so hard to control and not the cleanest look.
My biggest frustration though was in sewing in the handles. I just couldn't get rid of that funky "bump" along the top of the bag and get it even all around. I tore out stitches a couple of times, and it just wasn't happening (and I was ending up with more and more holes!). I think it was in large part because I didn't have the small binder clips that the tutorial recommends. The vinyl-covered paperclips I was using just weren't cutting it in terms of keeping everything in position. Clearly, having the right tools makes a difference!

On the bright side, at least both sides have the same issue. So now it is a design feature!
All-in-all, a very cute bag! I think now I need to make a matching wallet.
This is my version of the Trendy Faux Leather Handbag:

I found this tutorial via Stacy Sews and have had it in the back of my mind for a little while now. Then when I went to Hancock Fabrics in search of my sparkly cami fabric, I saw this pretty brown/copper-shimmery vinyl on one of their remnant tables. On sale. I snatched it up!

For the lining, I found a happy brown Laurel Burch fabric. I love me some kitty heads!
This was actually a pretty quick project. But sewing with the vinyl involved a couple of challenges for me. The main one: when I made a mistake and had do some unsewing? Holes. This vinyl had zero self-healing properties. Fortunately, the holes are not terribly visible. But I know they are there. The other big challenge was the thickness of the vinyl-- there were a couple of points when the bulk just didn't fit under my presser foot. Fortunately, having faced that challenge before with a previous project (I'm talking about you, Blossom Bag!), I knew I could take off the foot and make it work. But it is so hard to control and not the cleanest look.
My biggest frustration though was in sewing in the handles. I just couldn't get rid of that funky "bump" along the top of the bag and get it even all around. I tore out stitches a couple of times, and it just wasn't happening (and I was ending up with more and more holes!). I think it was in large part because I didn't have the small binder clips that the tutorial recommends. The vinyl-covered paperclips I was using just weren't cutting it in terms of keeping everything in position. Clearly, having the right tools makes a difference!

On the bright side, at least both sides have the same issue. So now it is a design feature!
All-in-all, a very cute bag! I think now I need to make a matching wallet.
Monday, December 5, 2011
Saturday night
On Saturday I went out on the town with some of the moms from preschool. Of course, I needed something to wear! I bought some fun, sparkly knit at Hancock Fabrics and dug out McCall's 4923 (now out-of-print) from my stash.

The pattern includes six variations of cardigans plus a lined cami, which was perfect since the sparkly knit was sheer. I made a size XL and added 2" to the length (if I make it again, I might add a little more length... maybe 1/2"-1"?). I found a black polyester knit in my stash to use for the lining.

Based on the finished garment measurements listed on the pattern envelope, I didn't do an FBA. As it turns out though, I did need to make an adjustment to make it work:

When I tried it on, I found that though it fit around my bust, it also gaped significantly at the armhole. So I added darts at the armhole on each side to take in the extra fabric there. It isn't perfect, but the fabric is black-- so it's not very visible-- and it gets the job done, so I'm happy.
The pattern instructions were pretty basic and very easy to follow. The only real downside was that the method they used for the lining involved a bit of hand sewing. It wasn't bad, though it was a little time-consuming and my hand stitches with the knit were not pretty. But they're on the inside, so I'm the only one who has to look at them.

I paired the top with some new jeans. Woo! Sparkly!

Ready for a fun night on the town!

The pattern includes six variations of cardigans plus a lined cami, which was perfect since the sparkly knit was sheer. I made a size XL and added 2" to the length (if I make it again, I might add a little more length... maybe 1/2"-1"?). I found a black polyester knit in my stash to use for the lining.

Based on the finished garment measurements listed on the pattern envelope, I didn't do an FBA. As it turns out though, I did need to make an adjustment to make it work:

When I tried it on, I found that though it fit around my bust, it also gaped significantly at the armhole. So I added darts at the armhole on each side to take in the extra fabric there. It isn't perfect, but the fabric is black-- so it's not very visible-- and it gets the job done, so I'm happy.
The pattern instructions were pretty basic and very easy to follow. The only real downside was that the method they used for the lining involved a bit of hand sewing. It wasn't bad, though it was a little time-consuming and my hand stitches with the knit were not pretty. But they're on the inside, so I'm the only one who has to look at them.

I paired the top with some new jeans. Woo! Sparkly!

Ready for a fun night on the town!
Wednesday, November 30, 2011
Style Stitches Monthly Bag Challenge: Everything Wristlet

The October Style Stitches Monthly Bag Challenge was the Everything Wristlet. I actually finished it mid-October, but somehow managed to fail in blogging about it. So here goes...

I chose to make the small version and used some fabrics that have been in my stash for quite some time.

I love that taupe-y medallion print and wish I had taken time to center the design. But when I was cutting, I didn't even think of that. Doh!

This bag is in the "Experienced" (read: advanced) section of the book. And it really earns that moniker.

There were a number of challenges in making this bag, almost all of which had to do with the lining elements.

For one thing, there was some crazy thickness going on because the design called for sewing through multiple layers of Peltex. Fortunately, my machine worked it like a champ. But it caused for some stress.

And, as always seems the case for me and these bags, the zipper instructions were very challenging. The lining is made up of two parts: the card slot/center pocket and the main body. The main body starts as one long rectangular piece of fabric. The zipper is laid on top then the lining is folded over on top of itself and laid on top of the bottom half of the zipper to create the pocket. So when stitching the bottom half of the zipper, one has to be careful not to accidentally stitch the whole pocket closed. Because the pocket is so narrow, the only way to avoid stitching through it is to sew it in 3 steps (illustrated above): 1. from the outer edge to the head of the zipper; then take it out of the machine and open the zipper and reposition the foot on the edge of where the stitching started and 2. sew to the end of the zipper, at which point you have to remove it from the machine and then 3. sew from the other outside edge to the end of the zipper.
In fact, the whole time I was working on it, I was sure I must be doing it incorrectly, because none of this was detailed in the instructions at all. All it said was: "Note: Do not stitch through the back of the pocket." But it actually worked. I was shocked. Really. I probably wouldn't have even used her technique (being as I swore off A.B. zipper instructions), except that the lining is a single piece that is folded accordian-style to create the inside of the bag. It is actually a clever design, but the execution involved to make it happen is challenging.

Inserting the lining was interesting as well (but it definitely went more smoothly than the zipper!). Essentially, you drop it inside of the bag body, fold the edges of each to the inside, and then edgestitch all around the perimeter. In theory this is simple. In practice it is challenging because you need to deal with crazy thickness on the sides, the barrier of the center pocket section, and with lining up the stitching with the outside flap seam (which you can't see at all). It took lots of pins, going very slowly, and then a little bit of handstitching to finish it all off-- but it worked.

It turned out to be a cute little bag. I like it, but I think I would like the larger version better. I'm not sure I'll ever go back and make another of this bag though, as it was a lot of effort for a style that is just okay for me. But you never know.
I didn't manage to finish the November bag, but it seems that JemJam, the challenge host, is taking a little break too. She says she'll jump back in again soon, but until she does, I probably won't start on the final two bags. I've got so much else going on with the upcoming holidays, I think it will be good to take a little break.
Monday, October 31, 2011
The Little Merboy
A very rare species, indeed...

Recently, Big Bear read the story of the Little Mermaid and watched the Disney movie and declared that was what he wanted to be for Halloween. Then one of his preschool buddies pointed out that mermaids are girls. Uh-oh. Big Bear was not happy to hear this. But he thought about it for a bit and decided he could be a mer-boy instead. Phew! Crisis averted... (well, other than the fact that then I actually had to figure out how to make a merboy costume...).

For the bottom half, I used McCall's 4964, a pattern for fleece pants that included side seams. I then drafted a fin shape to insert into the side seam. I used fleece for the pants and overlaid each piece with the fancy fish-scale looking fabric. The fins were made of felt overlaid with the same scale material. I was worried about the weight of the fins, so I added in the gathered tulle on the backside of each to help support them so they wouldn't just flip backward.

The shirt is from Burda 9537, a basic t-shirt design. I changed it up a little by adding a center back seam and seams along the top of each sleeve so that I could insert some fins. Again, I used the scale fabric overlaid onto felt and used gathered tulle to help support either side of each fin (and to help tie in with the look of the tail fin). I cut the shirt extra long in the torso and sleeves to allow me to cut a jagged edge (in lieu of hems).

And then we finished it all up with some fun merboy face stripes, a little bit of blue hairspray, and some shell necklaces.
Now Merboy is ready for some Halloween fun!

Recently, Big Bear read the story of the Little Mermaid and watched the Disney movie and declared that was what he wanted to be for Halloween. Then one of his preschool buddies pointed out that mermaids are girls. Uh-oh. Big Bear was not happy to hear this. But he thought about it for a bit and decided he could be a mer-boy instead. Phew! Crisis averted... (well, other than the fact that then I actually had to figure out how to make a merboy costume...).

For the bottom half, I used McCall's 4964, a pattern for fleece pants that included side seams. I then drafted a fin shape to insert into the side seam. I used fleece for the pants and overlaid each piece with the fancy fish-scale looking fabric. The fins were made of felt overlaid with the same scale material. I was worried about the weight of the fins, so I added in the gathered tulle on the backside of each to help support them so they wouldn't just flip backward.

The shirt is from Burda 9537, a basic t-shirt design. I changed it up a little by adding a center back seam and seams along the top of each sleeve so that I could insert some fins. Again, I used the scale fabric overlaid onto felt and used gathered tulle to help support either side of each fin (and to help tie in with the look of the tail fin). I cut the shirt extra long in the torso and sleeves to allow me to cut a jagged edge (in lieu of hems).

And then we finished it all up with some fun merboy face stripes, a little bit of blue hairspray, and some shell necklaces.
Now Merboy is ready for some Halloween fun!
Sunday, October 30, 2011
Fierce!
Oh, my...

Have you ever seen suchcuteness ferocity???
Watch out! He's on the prowl...

For cookies!!! (Tigers love cookies, you know.)

The costume is from Kwik Sew 3099. I made a size small (12 months), and it fits pretty well on Little Bear (he's 21 pounds and about 31 inches tall... I probably could have shortened it a little, but it is fine when he is wearing shoes). The body is fleece and then I used "bunny fur" for the belly and ear contrasts. The paws are just white fleece with some black faux suede that I found in my stash. This is actually the second time I've used this pattern, so it went pretty smoothly (other than sewing the hood on inside-out... thank goodness for seam rippers!).
I'm so thrilled with how it turned out. Super cute, nice and toasty warm (perfect for chilly night of trick-or-treatin'), and he actually seems to enjoy wearing it. Yay!

Have you ever seen such
Watch out! He's on the prowl...

For cookies!!! (Tigers love cookies, you know.)

The costume is from Kwik Sew 3099. I made a size small (12 months), and it fits pretty well on Little Bear (he's 21 pounds and about 31 inches tall... I probably could have shortened it a little, but it is fine when he is wearing shoes). The body is fleece and then I used "bunny fur" for the belly and ear contrasts. The paws are just white fleece with some black faux suede that I found in my stash. This is actually the second time I've used this pattern, so it went pretty smoothly (other than sewing the hood on inside-out... thank goodness for seam rippers!).
I'm so thrilled with how it turned out. Super cute, nice and toasty warm (perfect for chilly night of trick-or-treatin'), and he actually seems to enjoy wearing it. Yay!
Labels:
2011 finishes,
costume,
Halloween,
KS3099,
Little Bear,
sewing
Friday, October 28, 2011
Bloggers' Quilt Festival, Fall 2011: A Quilt for Finn
I'm excited to have something new to share for this fall's Bloggers' Quilt Festival! I call this quilt "Gone Fishin'":

The design is adapted from "Sea Views" by Kate Conklin Designs. The print fabrics are all from the "Storyboek" collection by Jay-Cyn Designs for Birch Fabrics, and then I also chose a few coordinating Kona solids.

I really love the design with all of it's wonderful, flowy curves. But I really wanted to take advantage of the larger panel prints of the fabric. So I mixed in some of those as "plain" blocks. And then I embroidered the recipient's name in one of them.

As much as I love the design, the pattern was a little bit challenging. Cutting it all was easy-peasy. But sewing all those curves back together again resulted in some serious wonkiness. To get them to work, I ended up having to trim my blocks smaller than her suggested sizes. And almost none of them laid flat (despite repeated attacks with the full-on steam iron). But all ended up working in the end once everything was quilted. Yay!

The pieced back is fun too, I think.

And the finishing touch. I love making labels for my quilts. Not only can I easily personalize them for the recipient, but I can include some care instructions and information about the making of the quilt. I think of it as more than just a label-- it's also a sort of memory.

This quilt is for a baby boy named Finn. Hopefully he'll have lots of fun snuggling in it!

The design is adapted from "Sea Views" by Kate Conklin Designs. The print fabrics are all from the "Storyboek" collection by Jay-Cyn Designs for Birch Fabrics, and then I also chose a few coordinating Kona solids.

I really love the design with all of it's wonderful, flowy curves. But I really wanted to take advantage of the larger panel prints of the fabric. So I mixed in some of those as "plain" blocks. And then I embroidered the recipient's name in one of them.

As much as I love the design, the pattern was a little bit challenging. Cutting it all was easy-peasy. But sewing all those curves back together again resulted in some serious wonkiness. To get them to work, I ended up having to trim my blocks smaller than her suggested sizes. And almost none of them laid flat (despite repeated attacks with the full-on steam iron). But all ended up working in the end once everything was quilted. Yay!

The pieced back is fun too, I think.

And the finishing touch. I love making labels for my quilts. Not only can I easily personalize them for the recipient, but I can include some care instructions and information about the making of the quilt. I think of it as more than just a label-- it's also a sort of memory.

This quilt is for a baby boy named Finn. Hopefully he'll have lots of fun snuggling in it!
Subscribe to:
Posts (Atom)