Last weekend was the big event: Big Bear's 6th birthday party!!! He had a great time with family and friends.
The hit of the party was the lava rock toss into the paper mache volcano we created:
Seeing Little Bear attempting to get his lava rock out of the volcano kind of gives you a sense of scale. It was a fair-sized mountain!
I made some special bean bag "lava rocks" to toss. I just used some rock and lava-looking fabrics from my stash. Some were traditional square shapes, others were more irregular (rock-like!). They are filled with a mix of poly-fil and dry red beans.
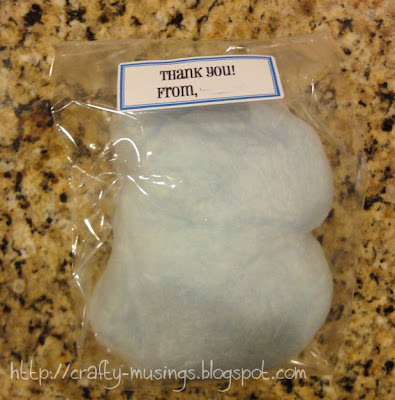
For prizes/favors, I ordered some custom-created cotton candy through etsy seller, Sweetopia. She was even able to color it grey-- to mimic volcanic ash! It was awesome!
And of course, there was a volcano cake. I took inspiration from a tutorial I found for making an erupting volcano cake and used a bundt pan and a bowl to create the cake stack. Since I knew we wanted it to be sturdy (as opposed to spongy), I used a recipe for Vanilla Bean Bundt Cake that was nice and dense (though it was also a little on the dry side; still tasty though!). We used a glass to cut out the center of the bowl cake and then stuck it down the hole through both layers, just as in the tutorial. Then we used some dry ice to create a foggy/eruption-effect. It was actually pretty darn cool in person. Big Bear loved it!!!
Happy Birthday, Big Bear!!!
Showing posts with label paper mache. Show all posts
Showing posts with label paper mache. Show all posts
Friday, February 1, 2013
Saturday, January 26, 2013
Making of a volcano - Days 2-5
And then the great volcano sat. Dormant... waiting for its time to erupt! (In other words, lots of waiting around while the giant mountain dried.)
Day 2:
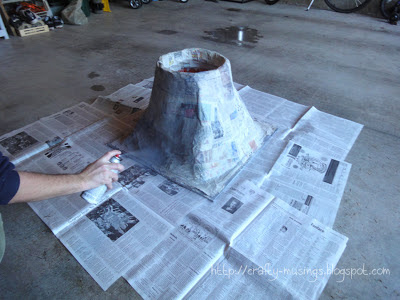
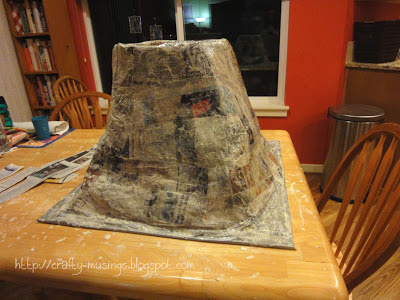
Definitely drying on the outside, but the inside was clearly still on the very wet side. Big Bear worked the blow dryer to help it along.
Day 3:
Hmmm... dry on the outside, but still way too wet on the inside.
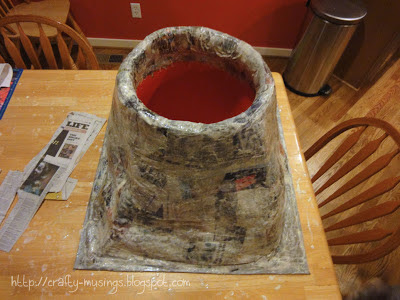
My husband decided to try drilling some holes on the sides of the bucket to see if allowing more airflow to the inside would help. There was some blow dryer action after the holes were drilled as well.
Day 4:
The venting holes worked! The inside was definitely drying out. Yay!!!
Day 5:
Dry!!! Time to prime...
...and paint!
Ready toerupt party!
Day 2:
Definitely drying on the outside, but the inside was clearly still on the very wet side. Big Bear worked the blow dryer to help it along.
Day 3:
Hmmm... dry on the outside, but still way too wet on the inside.
My husband decided to try drilling some holes on the sides of the bucket to see if allowing more airflow to the inside would help. There was some blow dryer action after the holes were drilled as well.
Day 4:
The venting holes worked! The inside was definitely drying out. Yay!!!
Day 5:
Dry!!! Time to prime...
...and paint!
Ready to
Tuesday, January 22, 2013
Making of a volcano - Day 1
Big Bear is coming up on his 6th birthday this week, and we are getting ready to party! We're branching out from just family this year and are inviting some of his friends, so we're trying to plan a couple of games/activities for them to do together. The theme is: Volcano! One idea I thought of for an activity was a "lava rock" toss into a "volcano." So our first step is to make a volcano. We decided to try paper mache. It's not something either my husband or I have any experience in, so I thought it might be fun to document our adventure. Here's hoping it is successful, too!
We made a family trip to Home Depot yesterday for the main supplies: a big bucket, duct tape, a piece of plywood for the base, chicken wire, and bolts/nuts/washers. Then I made a trip to the grocery store to get some newspapers and flour.
My husband started by drilling two holes into the plywood and the bottom of the bucket. Then we secured the bucket to the plywood using the bolts/nuts/washers. Next we used chicken wire to build a sort of cage around the bucket.
Duct tape was used to cover the edges of the board and the inside of the bucket where the chicken wire ended-- to cover up all the pointy edges.
As we worked, my husband tried to shape the chicken wire and create some contours. I used a staple gun to help secure the wire to the base as well.
Then came the fun part: paper mache!
Using the recipe we found at cockeyed.com of 3 cups of water to 2-1/2 cups of flour, we made our goopy paste.
Then we used strips of torn newspaper and got to work.
Paper mache is a seriously messy business.
Big Bear didn't help because he was in bed-- but as he hates getting his hands dirty, I suspect he wouldn't have wanted anything to do with this process anyway. LOL!
After about 2 hours of focused paper mache work, we finally had something resembling a volcano.
Now we're crossing our fingers that it will be dry by Wednesday or Thursday night.
I made some cookies today to help warm up the kitchen and facilitate dry time. (Mmmmm.... chocolate chip!!!)
There may still have to be some blow dryer action involved. Or maybe more cookies.
Subscribe to:
Posts (Atom)


