Monday, November 19, 2012

Basting it up!

I kind of lucked out. The last time I had to baste a queen-sized quilt, I had to do it in sections because we didn't have a large enough area of floorspace to do it. But as we are having some interior walls painted this week, we had to clear out our loft area. It is the perfect size to lay out a large quilt. And (even luckier!), my husband helped me with the basting, making it a much speedier process. Woo!

KC's quilt, ready for basting

I've been thinking hard about what to do with this one, and have a plan in mind. My thought is that I want some curves in the center area to help give all those straight lines some movement and a stronger sense of flow. Then in the outer border, I kind of want to do straight lines, mostly because I think it will look cool. Ha! Still not quite sure about the inner border... maybe a ribbon-candy type of thing? Or some vine-ish action? I guess I'll decide when I get to it. Hopefully, I'll be able to start quilting it later this week!

Wednesday, November 14, 2012

A festive pincushion!

I made myself another happy pincushion. Yay! This is another kit I received in the Shabby Fabrics Pincushion Club last year. It is one of their exclusive designs and is called the "Christmas Tree Pincushion."

my completed Christmas Tree Pincushion from Shabby Fabrics

It is a biggie! At the base it is about 6" wide and it stands 10" tall. As it is filled with crushed walnuts, it is pretty darn heavy too. Essentially, it is made of a series of stacked, stuffed yo-yos. It is put together nearly entirely by hand (the exception being the stitching on the star topper-- I did that on my machine). All of the fabrics were included in the kit, as well as the happy colored pearl-topped pins. I love those! Unfortunately, I don't see either the pattern or the kit available at Shabby Fabrics at this point. It might have even been a pincushion club exclusive kit. But, if you are interested, you could always contact Shabby Fabrics and ask (they are really friendly there!).

top view of my Christmas Tree Pincushion from Shabby Fabrics

My only challenge in putting this one together was in cinching my yo-yos closed... I kept breaking my thread. Gah! Eventually, I figured the whole tension thing out though. And now I have a happy tree pincushion, just in time for the holiday season. Woo!

Wednesday, November 7, 2012

Finished: Paintbox Quilt Along!

After finishing up my wedding quilt, I was feeling motivated. So I grabbed my basted Paintbox Quilt Along sandwich, and got to work. And now I have another UFO complete. Woo!

Paintbox Quilt Along, completed, front view

The pattern is from Elizabeth Hartman of Oh, Fransson! She hosted a quilt along in 2010 for her Paintbox Quilt design.

Paintbox Quilt Along, completed, quilting detail

I made quick work of the quilting by doing a simple, all-over stipple using King Tut thread in White Linen (#971). I am thrilled with how it looks, especially after washing it!

Paintbox Quilt Along, completed, artistically draped... ha!

For the binding, I used Kona cotton in Navy from my stash.

Paintbox Quilt Along, completed, rolled up nice and tidy

I didn't do the fancy back suggested by the quilt along on this one. Instead, I used this happy blue-striped stars fabric from Sandy Gervais. It worked perfectly, as the front was completed using one of her collections (a layer cake of her Zippety Doo Dah line from Moda).

When I started this quilt, I was planning on giving it to my guild for donation to one of our chosen charities, so I did not include a label, as per guidelines. It feels weird to finish a quilt and not have a label! But there are some good reasons for keeping it anonymous, so I can respect that.


Last Thursday I gave the quilt to our Charity Committee at the monthly guild meeting. Hopefully it will end up in a happy new home!

Saturday, November 3, 2012

Clue #4

Heather Spence Designs Mystery Quilt button

Here is my completed Clue #4 from the Heather Spence Designs Mystery Quilt:

Heather Spence Mystery Quilt, Clue #4 complete

There are many possibilities with this block! As I've received Clue #5, I know what direction it is taking now, but I'll wait until I finish the clue before I share it. I gotta say-- I'm loving these simple steps. They are making this quilt very a very do-able project for me right now.

Wednesday, October 31, 2012

Halloween 2012

This year, both bears had opinions about what they wanted to be for Halloween.

Little Bear finally decided on a "scary dinosaur." As we happened to have a dragon costume on hand (in the right size, even!), and I didn't want to re-invent the wheel, we have Dragon 2.0 -- aka Scary Dinosaur!

Scary Dino/Dragon, front view-ish, roaring

Dinosaur ROAR!!!

Scary Dino/Dragon, back view

Hopefully, I'll manage to get some better pictures of Little Bear as Scary Dinosaur today.

Meanwhile, Big Bear decided he wanted to be Perry the Platypus. I got to break out the sewing machine for this one!

Perry the Platypus, front and back views

I used Kwik Sew 2711 for the main suit, and then drafted my own tail, bill, and feet. I made a size Small, and shortened the legs by 1". The eyes are from Simplicity 3594 (the frog prince view). Because I had made the pattern before (Blue Kitty!), the main part went together both smoothly and quickly. The other parts took some time to figure out, but once I had a plan, they went together quickly (except for the tail... the quilting took a bit of time!).

Perry the Platypus holding Perry the Platypus

Here he is with the actual Perry. I'm still a little amazed I was able to find the perfect color of fleece. Best of all, Big Bear LOVES it. Yay!!!

the dynamic duo

Tonight, we trick or treat! Woo!

Happy Halloween!

Happy Halloween!

Friday, October 26, 2012

Blogger's Quilt Festival -- Fall 2012


block signing station at my wedding
October 26th is a special day at my house. It is the day my husband and I were married-- and this year marks our 10th anniversary! At our wedding, instead of a guest book, we had guest blocks-- blank quilt blocks for our guests to write any well-wishes (or whatever else) they had for us. At left is a picture of our "block signing station" at the wedding.

After the wedding, I designed a quilt to feature those blocks. I even started the quilt. But then, for whatever reason (I can't even remember why), the project got set aside... Until now! I finished our wedding quilt just in time for our anniversary. Woo!

Robin & Keith's Wedding Quilt, front view

I created the design using Electric Quilt and then I went out and shopped for fabrics. That beautiful leafy print just called to me, and I pulled all of the other colors from that.

Robin & Keith's Wedding Quilt, compass detail

The compass was created using paper foundation piecing. Setting it onto the background was one of my early attempts at hand applique. I try not to look too closely at the stitching. Ha! But I am pleased with the quilting. It isn't perfect, but I think it manages to add to the look of the compass in a positive way.

Robin & Keith's Wedding Quilt, quilting detail

I drew the pieced border onto freezer paper and then cut it apart to create paper templates. The templates were used to cut the fabric, and then I pieced it all together.

Robin & Keith's Wedding Quilt, corner detail

I love the little fans in the corners! I was seriously stressed out about those corners and what to do with them. Eventually I stumbled into the fan idea, and I'm so glad I did. They make me happy.

Robin & Keith's Wedding Quilt, corner detail from back side

Here is a view of the same corner from the back where the quilting is much more visible. Overall, I'm really proud of my quilting on this project! I used Hobbs Tuscany Wool batting for this quilt. I was actually really worried that it might result in the quilt being too poofy looking. But I'm glad I went for it. It is not too poofy, and it forced me to quilt more than I otherwise would have as the wool batting has denser quilting requirements than I'm used to. It really made me think about the type of quilting I wanted to do and how to deal with every space on the quilt.

Robin & Keith's Wedding Quilt, back view

The woodsy print in the center of the back was purchased when we went on our honeymoon to Maine. When I bought it I knew I wanted to use it on the back of this quilt. So even the back of this quilt has special memories attached to it.

Robin & Keith's Wedding Quilt, label

I vaguely recall creating the embroidery design back when I first got my sewing/embroidery machine. I think my intention was to use it in a block on the front. But, coming back to the project many years later, I couldn't figure out a way to make it work. So I put it on the back with the label.

Robin & Keith's Wedding Quilt, front view from an artsy angle

I am so glad that I finally finished this! Just picking up the project again, reading all of the wonderful words our friends and family wrote for us... it is a very special quilt, and it truly reminds me how blessed my husband and I are and I am so excited to continue our journey together!

Not only did I complete this quilt in time for my anniversary, I am thrilled that I've finished it in time to share in the Fall 2012 Blogger's Quilt Festival hosted by Amy's Creative Side.

Amy's Creative Side

Here are some stats for my quilt:
Quilt Name: Keith & Robin's Wedding Quilt
Finished size: 53" x 53"
Pieced and Quilted by: Robin Zaback (me!)
Best Categories: Home Machine Quilted Quilt; Wall Hanging

Thanks so much for stopping by and I hope you enjoy your Blogger's Quilt Festival adventures! So many beautiful quilts; so much fabulous inspiration!!!


Thursday, October 25, 2012

Clue #3

Heather Spence Designs Mystery Quilt button

Lookie here! I managed to complete Clue #3 in the Heather Spence Mystery Quilt. Woo!

Heather Spence Mystery Quilt, completed clue 3

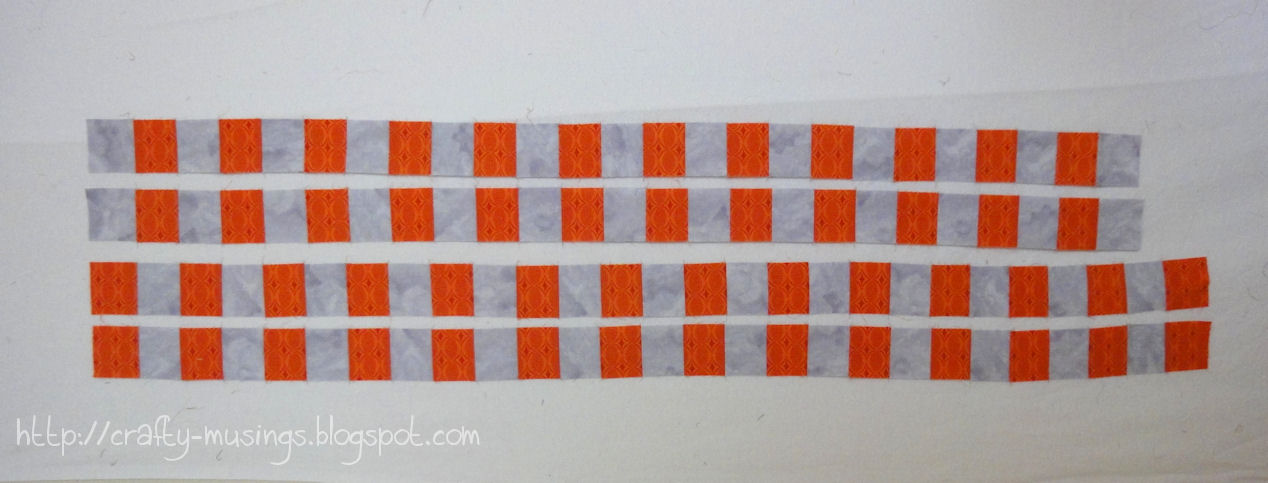
I'm thinking they must be borders? Maybe I'll learn more when Clue #4 is revealed on Friday. I'm loving the anticipation!

And a gratuitous boy pic:

Big Bear and Little Bear work together to try and lift a giant pumpkin

We went to the pumpkin patch last weekend. The boys had a great time (it was nice and muddy!). I love this picture of the two of them working together to lift a pumpkin. They weren't able to get it off the ground, but they sure gave a great effort! :)