For this month's Style Stitches Monthly Bag Challenge, I made the Fringed Hobo Bag.

Going into it, this was the one project in the book I was seriously considering skipping. It just seemed a little too over-the-top. So, I never thought I'd say this, but it really turned out to be such a fun bag!
I decided on the small version because I liked the slightly longer strap that can be worn over the shoulder. The bag is listed as an "Advanced" project, and I definitely concur. Dealing with the curves, the trim, and the sheer bulk of all the interfacing and fleece involved all make for a bit of a challenge. So much interfacing. I think I probably spent more time fusing all of it on than I did actually sewing. And I nearly lost it when it came to the topstitching through it all at the end. Ugh. But once I switched to my 90/14 Topstitching needle, I got through it. Thank goodness I had one of those on hand (because the 80/12 quilting needle I usually have in my machine was an epic FAIL)!

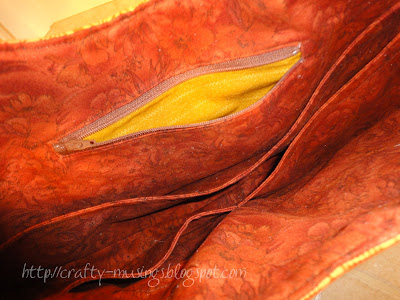
I decided to go ahead and add a zipper pocket to the inside. This was a little more challenging than normal because of the bulk of the fleece that had been fused to the lining panel. But I got it to work.

Inspired by cottage revolution's version, I went out and found some wooden disc trim at Hancock Fabrics. It felt like a great match for my woodsy-themed fabric (a gorgeous Julie Paschkis print from In the Beginning fabrics).

Here I am modeling it. You can see exactly just how "small" it is. Ha!
Overall, I'm really pleased with the bag. It is a gift for my sister-in-law. Hopefully, she'll enjoy it!
ETA: I nearly forgot! There was some trim drama on this one. The pattern for the small bag calls for 2-3/4 yards of trim. That was about 9" too short. I ran back to the store and was able (thankfully!) to get another 1-1/2 yards, and that fit exactly. So the small bag definitely requires at least 3 yards (I'd probably err on a little extra, like 3-1/8 yards).


Very cool! Definitely not my style but pretty nonetheless.
ReplyDeleteYour bag turned out fabulous! I love it, great job!
ReplyDeleteIt's awesomne! I love it and you say this is the smaller version. Your pick of fabrics was spot on and the trim really makes it. Congrats on now being in the advanced class!
ReplyDeleteBeautiful! Great fabrics and the trim is perfect :) Love that someone else found the topstitching a nightmare.
ReplyDeleteLovely! And I'm happy to hear I wasn't alone with some of the struggles I experienced with that bag. The layers, fusing and the topstitching are all kind of beastly, but the end product certainly paid off for you.
ReplyDeleteLovely! And I'm happy to hear I wasn't alone with some of the struggles I experienced with that bag. The layers, fusing and the topstitching are all kind of beastly, but the end product certainly paid off for you.
ReplyDeleteWOW WOW WOW!!! I am very impressed! That is the small bag? HA HA!
ReplyDeleteIt really turned out great and you should be really proud of yourself. I am sure your sister in law is going to love it.
so that is where that animal print went! It is pretty. I do like the trim. A very nice touch.
ReplyDeleteShe will be so styling for fall! What great colours! And the fun fringe on the bottom is just icing on the cake! You can do anything!! It really rocks!
ReplyDeleteLOVE THIS BAG!!! Simply amazing. The fabrics turned out great!
ReplyDelete