Tuesday, May 31, 2011

Style Stitches Monthly Bag Challenge: Perfectly Pleated Clutch

Style Stitches Monthly Bag Challenge
I can't believe it is already the 31st. What happened to May??? My goodness.

This month's bag in the Amy Butler's Style Stitches challenge was the Perfectly Pleated Clutch. The book includes three size options for this design; I decided to go with the medium.

The instructions call for 1-7/8 yard of fabric for the medium clutch. From that, there are only 2 pieces to cut, each 9" x 64". This would result in a lot of leftover fabric. So I decided to go ahead and piece mine since I figured I could hide the seam in the pleats. From 1 yard of fabric, I cut four pieces 9" x 36" and then pieced them together to create two pieces, each 9" x 72". Then I pleated... and pleated... and pleated some more.

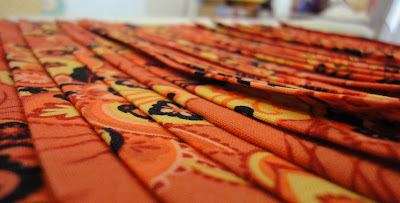
pleating in progress
There were many pleats.

Here you can see my 72" piece of fabric pleated to measure close to 16" (the width of the pattern piece). And there's that seam-- but it is completely invisible on the front side.

Pefectly Pleated Clutch, pleats in progress
I pleated the heck out of it! I didn't measure my pleats (in fact, the book even suggests varying the pleat widths)-- but I did as suggested and made them small, between 1/4" and 5/8". Now, I've read a number of people say that the amount of fabric is excessive, that you don't need that much to get the cool pleated look. That may be true. But I'm really glad I did it as instructed because not only does it look super cool, but it also really helped to create a very sturdy exterior. Fewer or wider pleats would likely result in a wibbly-wobbly bag and would definitely warrant extra structural support.

In addition to piecing my fabric, I made a couple of other changes in my bag.

Perfectly Pleated Clutch, view of lining
One was to add an interior zipper pocket. For that I used the same technique as described in the Jenna Lou Designs Mabel Messenger bag pattern (which I made last year)-- very easy!

Perfectly Pleated Clutch, zipper view
I also decided to try a different zipper technique for the bag closure. This design offers the same method as was used in the Origami Bag Set, and I was not thrilled with the results. This time I tried a technique shared by Noodlehead in her gathered clutch tutorial that uses tabs to close off the ends of the zipper. My measurements were a little off, so I ended up sewing over most of my tabs-- but you can see the contrasting orange peeking out at either end in the picture above. Even though I haven't mastered the technique, it was definitely an improvement over the Style Stitches method and creates a much nicer finish. With practice (and better measurements), I'm certain it will be a winner.

Perfectly Pleated Clutch, front view
Lastly, I used a tutorial I found over at Alphamom to create the fabric flower that I pinned to the front. Super quick and easy and I love the way it looks. It adds that little extra somethin', I think.

Perfectly Pleated Clutch, back view
I'll be honest here: I'm not a clutch kinda gal. I love me a good shoulder bag. But after finishing this one, my tune has changed. This bag is great: fun design, the perfect size for just tossing in a couple of things and going, and I love that it has a little handle. I'm also diggin' the pretty orange print I used. It is so happy! So much so that I think I'm going to gift it to the friend who inspired me to buy it. Hopefully she'll love it too!

Of course, this means I have to make another one for me. LOL! I'll just add that to the list.

Sunday, May 29, 2011

Book sling!

Big Bear loves books and reading. When he started sleeping in his big boy twin-size bed, we set up a bed rail. He started using it as a place to store all of his books-- he'd stand them up between the rail and the mattress, making them very convenient for bedtime reading.

Last week we took the bed rail down, and ran into a problem: what to do about all of BB's nighttime reading? He was still keeping the books in bed with him, and getting slept on every night was definitely taking a toll on the books (particularly the paperbacks). Then I found the perfect solution:

Tutorial: hanging book display
at Penny Carnival.

new book sling!
We went fabric shopping and BB helped me pick out this fun home dec weight cotton. After a quick trip to the hardware store for hangers and dowels, it was about an hour of work getting everything sewn and hardware installed. (Many thanks to my handy husband who did all non-sewing stuff!)

book sling action shot
Super quick and easy, inexpensive, and exactly what we needed. Perfect!

Friday, May 27, 2011

This week in the quilt mines...

My husband calls my sewing room the "quilt mines" (*crack!*) <-- sound of cracking whip. Ha! Anyway, Little Bear is finally starting to sleep through the night. Huzzah! The only downside is that he now wakes up at 6 am, so my late night crafting has really slowed down (I'm just too sleepy!). But I do have some projects moving along, slowly but surely.

Some handwork:

embroidery in progress
Embroidery complete! Now I need to work on getting all of my sashing sewn for my Whimsy quilt.

Some machine work:

pleating in progress
I've started on my next Amy Butler project for the Style Stitches Monthly Bag Challenge: the Perfectly Pleated Clutch. I've decided that pleating is definitely NOT my favorite thing to do. But boy, does it look cool!

And another bucket hat:

Sarah's hat, outer and reverse views
This one is for baby Sarah. Her mama made a super cute crocheted hat for Little Bear. I had to reciprocate. Once again, I used the ever-fabulous Betz White Reversible Bucket Hat pattern. I added a little ric-rac trim to the brim just for a little extra cuteness.

It is too small to fit my boys, so here it is on another bear:

hat on bear
Hopefully, I'll get to spend some more time in the quilt mines over the weekend. *crack!*

Tuesday, May 24, 2011

Stitch Home Alabama


Over the weekend I heard about this wonderful venture from the ladies at Stumbles & Stitches to help support The Salvation Army Emergency Disaster Services in our tornado-ravaged southern states.

It seems as if I'm hearing of new devastation every week. Just this last weekend over 117 people were killed in Joplin, Missouri by a tornado. My heart goes out to all those in the Midwest and South who have been affected by the horrible storms this year.

Stitch Home Alabama offers an easy way to help, and there's a chance to get a little prize to boot. How cool is that?

If you have the means, I encourage you to donate. :)

Thursday, May 19, 2011

A little something

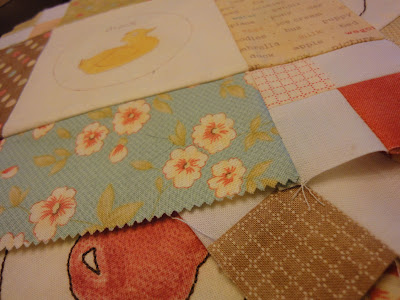
I've had a little bit of time to start working on my Criss Cross Quilt and ran into an unexpected, but fun, challenge. The Whimsy charm packs included 4 squares of a creamy near-solid print that I had to figure out how deal with. I decided that they would be perfect for a little bit of embroidery.

blocks ready for embroidery
I went ahead and pieced the blocks first (a la Little Miss Shabby).

Then I looked to the fabric for inspiration for my designs.

Whimsy vintage milk
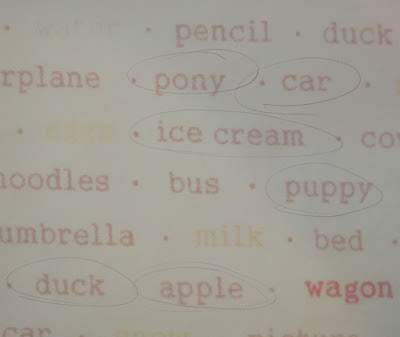
Initially, I was thinking that I'd just grab a couple of the designs and embroider them. But then I noticed this print:

Whimsy words
The words that are colored are the ones that are featured in the fabric drawings. But then there are all of those other words... why not use them to inspire my own drawings? So I looked to the Internet for some visual inspiration to get me going, did some sketching (LOTS of trial and error was involved for each... I was trying really hard to kind of keep the vintage flavor of the drawings in the fabric) and now I have my designs all set:

my design sketches
I'm excited because I think these will really add a little something to the quilt and make it special.

Time to do some embroidery!

Tuesday, May 17, 2011

A fresh start

Because I don't have enough other projects to keep me entertained (ha!), I've started up a new one. Really though, I'm feeling weighed down by my surplus of large, complicated projects, and want something smaller and more manageable (and, dare I say it: finishable!). Besides, I have a friend with a baby on the way who's gonna need a quilt!

The project:
Criss Cross Quilt by Lisnaweary Quilts for Moda Bake Shop.

The fabric:
Whimsy by Fig Tree Quilts for Moda + Kona cotton Snow.

fabric: cut and ready
Progress:
It is all cut out and ready to be stitched. This is my first attempt at using a Moda Bake Shop "recipe" and I've already experienced some frustration. My preference is to do all of my major cutting up front, and then stitch. I like doing it this way because it feels more efficient and because my cutting space and my sewing space are not one and the same (meaning I have to get up and go somewhere else whenever I want to do any big cutting). Anyway-- because of this, I really prefer my instructions to have cutting directions grouped together in one section so I can do it all at once. In this particular set of instructions they are not.

It's a small thing and truly a matter of personal preference, but having been sleep deprived for more than a year, parsing out the cutting stuffs actually ended up being kind of a pain for me and resulted in a couple of (fortunately not irreparable) mistakes. Hopefully I'll do better with the stitching part! :)

Monday, May 16, 2011

Some stylin' pants!

Frustrated by my seeming inability to spend any large chunks of time at my sewing machine (i.e., no time to really sit down and quilt), I have been focusing on small projects that I can get done quickly. These pants I recently made up for Little Bear are a good example. They only took about 2 hours to put together.


I made these using Kwik Sew 3374. The details attracted me to this design: lots of topstitching, the little coin pocket, the front fly look, the back yoke, and the fact that they are simple, pull-on pants. I also really appreciate Kwik Sew sizing-- the patterns I've tried by them always seem to be roomier in the bum, making them great for cloth diapers.

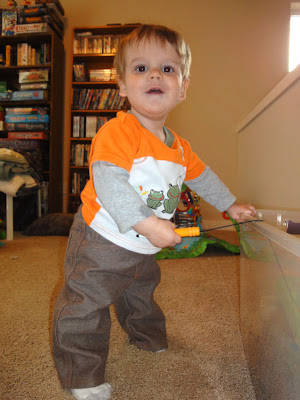
Little Bear sitting down in his new pants
As always, the Kwik Sew instructions were great. But it wasn't all smooth sewing on these pants. My machine did NOT like the topstitching thread. At all. I had the worst tension problems. And it was extra frustrating because I have used the thick topstitching thread in the past, but I've never had problems before. In the end I had to use my extra bobbin case so that I could really mess with the tension screw, I cranked up my top tension to 7, and I needed a longer stitch length (I used a 3). The needle definitely made a difference too-- I used a 90/14 topstitch needle (though if I had had a 100/14 on hand, I would have used that). I think I probably spent more than an hour messing with just the thread. I actually went through a whole spool just trying to get it to work. Ugh! In the end, though the stitch still wasn't perfectly balanced, at least it looked good from the top.

new pants, back view
The other challenge for me on this project was the waistband. The instructions have you create a casing around the elastic all in one step. It made sense, and appeared easy enough. But I kept sewing through the elastic instead of creating a casing for it. So I ended up having to scrap the instructions and create the casing first and insert the elastic as a separate step. I think it might have been partly due to the denim I was using-- I just couldn't feel where the elastic was through the thickness of the fabric. I took the long way around, but it worked out just fine.

And Little Bear definitely seems fine with his new pants:

Little Bear wearing his new pants
Now it's time to do some sewing for Big Bear!

Monday, May 9, 2011

Angry Birds fierceness!

Last week wasn't a very productive blogging week for me. A long-time friend came cross-country to visit, so I spent my week focused on that. However, there was still some crafting fun!

Inspired both by Big Bear's passion for the video game Angry Birds, as well as the incredibly creative work of Kristan at Confessions of a Cookbook Queen, I really wanted to make some Angry Bird cupcakes. Normally, I would never venture to try something as elaborate as this, but my visiting friend, Jarred, has mad cake decorating skillz. I knew we could do it!

So we baked some cupcakes (Yellow Spiced Cupcakes from the Fannie Farmer Baking Book... yummy!), bought some doughnut holes, and shopped for a variety of candy. Then we got to decorating.

cupcake closeups
Using Kristan's cupcakes as a starting point, we created our versions of the red birds, green piggies (known as "Penny Pigs" at my house), and yellow birds (known as "Nerb Gobs" at my house). The Nerb Gobs were definitely the most challenging as they are triangular-shaped. So instead of using a doughnut hole, we carved some extra cupcakes to size. It worked really well!

Behold the Angry Bird cupcake army!

Robin and Jarred with an army of Angry Bird cupcakes
And that's Jarred and I smiling in the background (I'll spare you our embarrassingly bad attempts at trying to look fierce like angry birds.)

The next morning, Big Bear enjoyed a Nerb Gob for breakfast.

Big Bear and his Angry Bird breakfast
He was definitely a happy customer!

Tuesday, May 3, 2011

Blocks for Margaret's Hope Chest

Carin, founder of the charity organization Margaret's Hope Chest, decided to put together a quilting bee. If you haven't read the story behind MHC, I recommend you check it out. The way they have been able to create something so positive and good from such a tragic event is very inspiring.

Not only was the bee for a great cause, but Carin also made it very easy to participate: just make two blocks and send them in. Easy peasy! So I signed myself up to help in making blocks for two different quilts.

For Jordan's quilt:

blocks for Jordan's quilt
These were made using Cluck Cluck Sew’s Stack and Whack Block tutorial.

For Frankee's quilt:

blocks for Frankee's quilt
Glittery, sparkly goodness! These were made using Crazy Mom Quilt’s Hourglass Block tutorial (but starting with a 9" square instead of a 6").

Contributing was such a simple thing, and fun to do too!