Saturday, May 3, 2014

Easy as 10

The fourth in my roll o' fabric quintet:

Easy as 10, front view

This is "Easy as 10" from the book, Simple Quilts from Me and My Sister Designs: Easy as 1, 2, 3.

Easy as 10, side front view

I checked this book out from the library and haven't invested in my own copy yet-- but I need to! I also made "Easy as 11" from this same book. The instructions for both quilts were straightforward and very easy to follow, and both were quick to put together. And there are a number of other fun designs in the book as well!
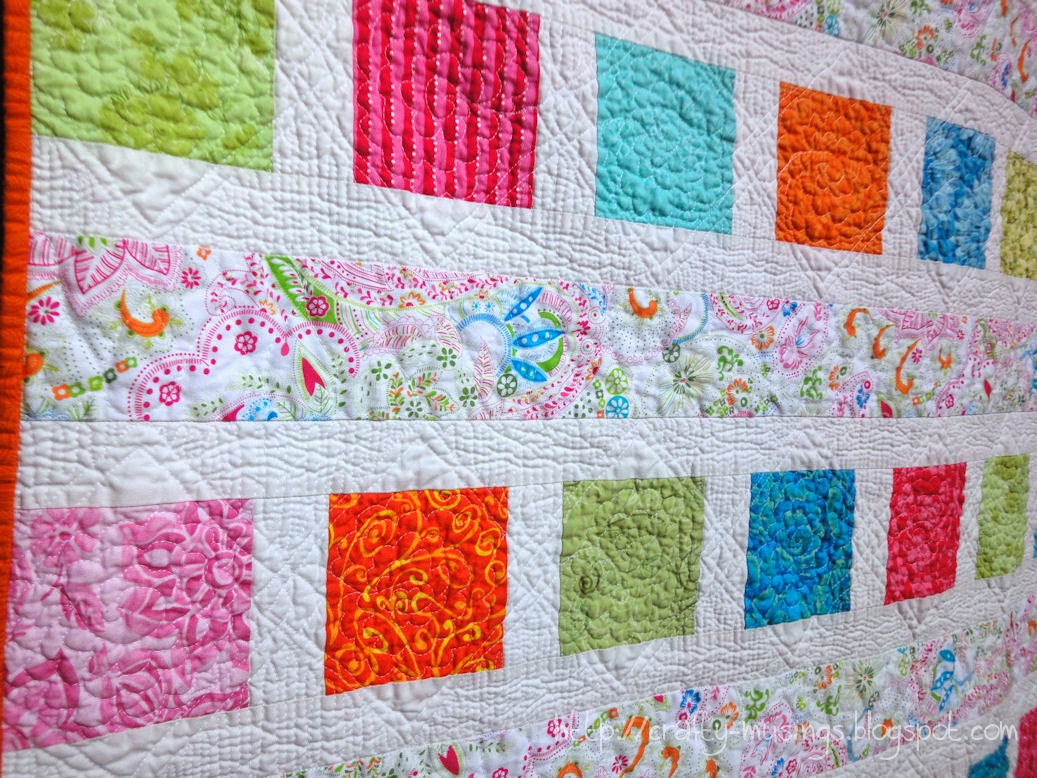
Easy as 10, quilting detail

On this one, I tried to add to the quilt by quilting in a secondary design-- the interlocking diamonds around the squares. I think it worked pretty well. I also quilted flowers in the center of each colored square (using the fabulous Free-Motion Quilting with Angela Walters as inspiration). Through the paisley bands, I stitched a figure 8 design, but it is kind of hidden in the print. Throughout, I used Aurifil Mako 50/2 in White (#2024).

Easy as 10, back view

This is the last of that retro pepto-pink fabric... woo!

Easy as 10, label

And there is the happy Project Linus label. I'm loving the orange binding too. It is finished by machine using the Red Pepper Quilts Binding Tutorial.

Easy as 10, artfully draped

Easy as DONE!

Friday, May 2, 2014

"Floating Triangles"

Oh, my gosh! It has been a busy couple of weeks! Spring Break involved many adventures-- but blogging was not one of them. But, I'm back and ready to continue with the Project Linus roll o' fabric parade of quilts. This is the third of the five I recently finished:

Floating Triangles, front view

The design is from the fabulous book, Skip the Borders, by Julie Herman (of Jaybird Quilts fame). It is called "Floating Triangles."

Floating Triangles, side front view

It really is such a neat design! It speaks to me. And I appreciated that I didn't have to stress out about cutting off any triangle points.

Floating Triangles, quilting detail

I kept the quilting pretty simple, beginning with straight lines around the focal spot where the triangles come together in the lower left corner, and then more straight lines up the main paths from the outside of the diamond to the outer edges of the quilt. Then I stippled over the center of the diamond area and everywhere else. I used Aurifil Mako 50/2 in White (#2024) throughout.

Floating Triangles, back view

Another uninspiring back here... just trying to use that stash!


Floating Triangles, label

There's that happy Project Linus label. And this is another machine-finished binding as well. I was feeling brave though and attempted a contrasting rainbow variegated thread (Superior Threads King Tut 40/3 cotton, #921). My machine binding skills are still not as consistent as I'd like, but I am definitely getting better with practice.

Floating Triangles, artistically draped on bench view

I really like this quilt! Hopefully it will make someone else just as happy.

Wednesday, April 9, 2014

Easy as 11

Here's the next in my recent roll o' fabric quilt quintet:

Easy as 11, front view

"Easy as 11" from Simple Quilts from Me and My Sister Designs: Easy as 1, 2, 3.

This is such a simple, but fun, design. Mine looks maybe a little odd, as it is square rather than the intended rectangle. I had to omit a couple of rows to make it work with the amount of fabric I had. This one finished at 47.5" x 47.5".

Easy as 11, quilting detail 1

What I was most excited about in quilting this one up were the solid stripes. I knew my quilting would show up really well on those, so I wanted to try and do some fun stuff. I took inspiration from Natalia Bonner's book, Beginner's Guide to Free-Motion Quilting, as well as Free-Motion Quilting with Angela Walters. I ended up using 4 different designs, including a viney thing in the green stripes, swirls in the blue stripes, flowers in the pink stripes, figure 8s in the orange stripes, and then wide drops in the one coral stripe.

Easy as 11, quilting detail 2

Then I stippled over the background areas. I used Aurifil Mako 50/2 in Dove (#2600) over the stripes and Superior Threads King Tut 40/3 in Parchment (#971) over the background areas.

Easy as 11, back view

There's that repro pink backing again. And you can see the Project Linus label down in the lower left corner. I managed to sneak in one of my last remaining bits of background fabric into the binding along with the bright and happy Kona Lagoon.

Easy as 11, artsy side view

I have had so much fun working with all of these bright happy fabrics!


Wednesday, April 2, 2014

Shoo Fly!

I've been finishing up a storm in the last few days. My quilts for Project Linus (all of which feature fabric from the now-depleted dreaded roll) have been quilted and all but one have been bound and labeled. Woo! Let the show and tell begin!

This quilt is made from the trimmed leftovers of another Project Linus quilt. I couldn't bear the thought of just throwing out all of the half-square triangle trimmings, so I designed a project to utilize them.

Shoo Fly, front view

It is a small quilt, only 36" x 42"-- but there was a lot of stitching involved in all those blocks!

Shoo Fly, front-side view

Because the background fabric is so busy, I knew that any quilting I did would kind of get lost in all the pattern going on. So I went ahead and just did an all-over swirly design through the center and in the outermost border. In the colored border, I did some straight lines.

Shoo Fly, quilting detail

For all of the quilting, I used Aurifil Mako 50/2 in White (#2024).

Shoo Fly, back view

The back is not the most awesome coordinate, but I really wanted to use my stash, and I had a lot of this fabric. At least it is a happy color!

Shoo Fly, label detail

And here is the special Project Linus label stitched onto the back. You can also see my machine-finished binding (I follow the Red Pepper Quilts binding tutorial).

Shoo Fly, artsy view

I'd been calling this quilt "Churn Dash" until I realized it wasn't actually a churn dash block. Ha! After a bit of research, I learned that these are actually shoo fly blocks. Either way, it is a happy little quilt!

Saturday, March 29, 2014

Yesterday in the quilt cave...

I thought I'd do a little update on the progress I made during my quilt cave day. My husband stayed home so I was able to spend most of the day in my cave (other than quick stops to get lunch, make dinner, and go an emergency thread run... nothing worse than running out of thread in the midst of quilting, which I nearly did!). It was like my own mini quilt retreat! I was able to check a few things off my list:

checking items off the to-do list

I even got some binding strips cut. Woo!!!

Lists can be powerful tools for me. I love seeing those x's as items are completed. It truly gives me a sense of accomplishment. Blogging does that too oftentimes. But putting it out there in the world makes it "real," you know? Sometimes, I'm wanting to go with the flow and see where it takes me without the pressure I put on myself to keep up with the blog. Thus, lack of blogging. I want to make it a priority because I know it keeps me focused. At the same time, I have so much routine and focus in every other aspect of my life that I am finding I don't really want focus-- I want freedom. And I'm lazy. Blogging (writing!) takes so much effort for me. And it is not quick. Clearly, what I really need is to change up my blogging perspective. I'll add that to the list.

Look at that! I did some crafty musing there for a bit. :)

Moving on...

Here are all five of my recent roll o' fabric tops are quilted and ready for binding:

five pretty quilts, all in a row... but they still need binding

Now I'm about ready to start a new project:

and a little something new-- fabrics a quilt for Little Bear!

It's time to make a quilt for my Little Bear.

He turns 4 next month.

Mind.
Blown.


Friday, March 28, 2014

Catching up

This weekend is the annual Tri County Quilt Tour. I've participated every year and my husband even took today off so I could go. But I find myself feeling like my time is better spent at home, working on what I have. I think I have reached a total saturation point with fabric and projects right now. Heaven knows, there is no shortage of projects here!

I haven't blogged in a bit, but I have been doing stuff...

Last weekend I made another name pillow (from the "Personalized Name Pillow" pattern by Kimberbell Designs):

another name pillow!

They are such a good gift-- fun to make and always so well received.

And the dreaded roll o' fabric? It's gone!!!!

the dreaded roll' of fabric is NO MORE!!!!

Look at that empty roll! It took eight quilts (and 6 years!), but I finally used it all. Huzzah! Just that little strip of fabric remaining now-- I figure I'll use that in the binding of one or two of them.

I realize now that I haven't shared a pic of the final top I made from the roll. All I have is a kind of bad instagram pic:


But you get the idea? This is another design from the book, Simple Quilts from Me and My Sister Designs: Easy as 1, 2, 3. This is "Easy as 11." I had to change it up a bit as I ran out of fabric-- so I dropped a couple of rows and mine ended up at 48" square. It may not be the most aesthetically pleasing size for this design (it really does look better as a rectangle), but it works.

I've managed to quilt up four of my five recent roll o' fabric quilts. Today I basted the remaining one:

my Boxed-In quilt all basted up and ready to quilt

Since I am hoping to spend some quality time in the quilt cave today, I went ahead and wrote up a to-do list to help keep me focused.

the to-do list

And look at that-- one thing checked off the list already. Woo!

Next up: quilting!

Tuesday, February 18, 2014

And another!

Still feeling determined to use up the dreaded roll o' fabric, I jumped into another project last weekend. Today I have another completed top:

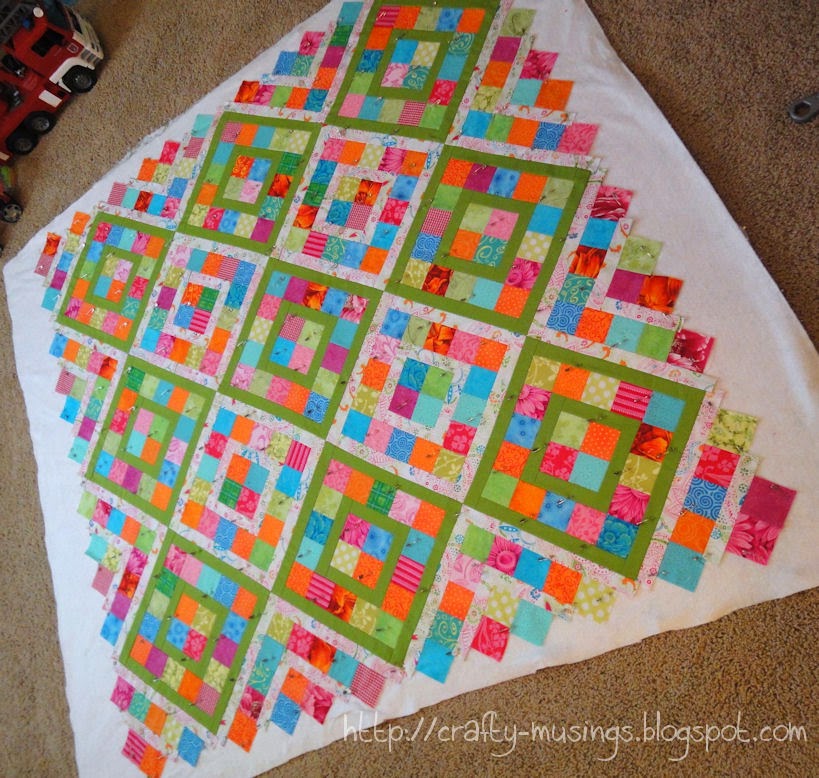
Boxed In quilt top from Skip the Borders

This is another design from Skip the Borders by Julie Herman of Jaybird Quilts. It is called "Boxed In." Putting it together took me a little longer than I expected (I'm not sure why it didn't occur to me that sewing 384 little squares together would not take time... but it didn't. Ha!), but it was worth it. I'm really pleased with the result. Just look at how crazy bright and happy it is!!! It still needs to be trimmed to square-off the edges, but I plan to do that after quilting it.

I've got to say, I am really diggin' Ms. Herman's book! There are so many appealing designs with very clear, easy-to-follow instructions. There is actually another design in there that I've already pulled fabrics from the stash to make-- but that one will have to wait a bit. I'm still feeling the drive to use up this roll. I have a plan in mind and a fresh pile of fabric to make it happen:

happy pile of bright colored Kona solids

I picked up these lovely Kona solids from Pink Chalk Fabrics last week. So happy!!!