Saturday, January 31, 2009

Jane Stickle Quilt: J-2

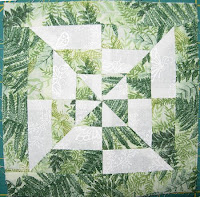
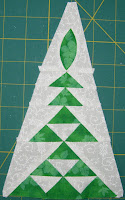
Jane Stickle block J-2Block number/name: J-2 “Picture Perfect”

Date completed: January 30, 2009

Number of pieces: 15

Notes on block: Somewhere I messed up when cutting this one out. None of the outside bars (or the long inner bar) fit—they were all 1/8” shorter than the units they were supposed to connect with. I think I must have messed up the squares somehow. But, since I threw out my cutting notes, I’ll never know.

Typically, with the pieced blocks that have simple shapes (squares, rectangles, certain triangles), I not only print out templates from the software, but I also look at the recommended “Rotary Cutting” directions. Then I pencil in those measurements onto the templates. With triangles, I use the measurements to cut out my initial piece, and then use the template to ensure exact size. But I’m lazy with the squares/rectangles. In this instance, it would have been good to double-check myself with the templates on those. With the larger pieces inside being squished to fit the shorter pieces outside, I ended up with a block that ballooned in the center. Doh!

Fortunately, the iron is my friend, and I was able to press the block into pretty shape. One might even say it is now "picture perfect." (Sorry... I couldn't resist!)

Friday, January 30, 2009

Playtime - Month 1

Woo hoo! I've managed to complete my first set of blocks for Playtime-- and I even did it before the end of the month.

Playtime blocks month 1
To summarize, I finished:
  • 10 - 6" Ohio Stars
  • 11 - 4" Sawtooth Stars
  • 10 - 4" Ribbon Stars
  • 2 - 6" Old Windmills
Phew! I'm feeling kind of accomplished.

Since I didn't really have any direction as far as what fabrics to use where for these blocks, I was very concerned about how they would work in the quilt. So I used Paint Shop Pro to help me visualize how they'll look (just like I do with my Jane Stickle blocks):

Playtime progress month 1
It's not perfect, but you kind of get the idea (I don't have a scanner, so I had to take a picture of the block layout page that came with the pattern). I was afraid maybe I got a little too crazy with my fabric combos. But after seeing them kind of laid out, I think they're a lot of fun and will look snazzy.

Now I can move onto month two! (But only after I do some work on my challenge quilt!)

Wednesday, January 28, 2009

Jane Stickle Quilt: C-8

Jane Stickle quilt block C-8Block number/name: C-8 “Hani’s Crown”

Date completed: January 28, 2009

Number of pieces: 21

Notes on block: Some days I am more anal than others. Today I was definitely more so. The points on this one drove me crazy. One section I sewed and unsewed three times before deciding, “To heck with it!” For all that, the finished block actually looks okay, I think. It helps that the green is light, so the points aren’t in sharp contrast. In fact, it may be a little too light. But it’s staying.

Tuesday, January 27, 2009

Autumn House - Block 1

Yay! I finished!

Autumn House Block 1
I'm really happy with how this turned out, especially considering my very limited embroidery experience. Before I started stitching on the block, I practiced my stem stitch using Judith Baker Montano's instructions in Elegant Stitches as a guide. I'm glad I took the time to practice, because I think it made a big difference.

Now I anxiously await block 2!

Monday, January 26, 2009

On turning two

The Boy had a wonderful birthday. Thank you for all your well-wishes!

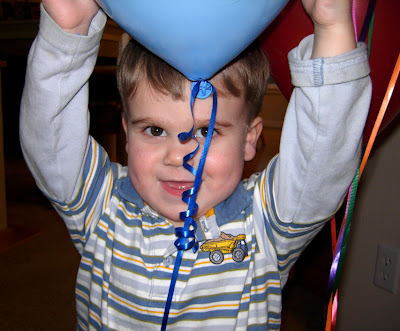
happy balloon boy
We had a small family party on Saturday with the grandparents and great-grandmas, plus a couple of friends and their little one. There were lots of smiles, lots of love, and lots of balloons. He loves balloons. He also received many wonderful gifts, including some fabulous handmade goodness from our crafty friend, E.

roll-up chalkboard from E
It's a roll-up chalkboard! How cool is that?

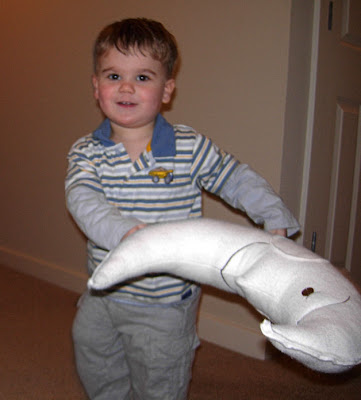
I even managed to get a picture of him with his new pillow.

boy with moon pillow
He has been sleeping with it at night, and tossing it around during the day. So I count it as a success.

I still can't believe he's two!

With all of the birthday festivities, I didn't get much crafting done. But today I got to spend a little time on my Playtime quilt, sewing together the first set of blocks.

month one progress
So far, I've managed to complete ten 4" ribbon stars, eleven 4" sawtooth stars, and one 6" Ohio star. That leaves nine more Ohio stars plus two 6" old windmill blocks to complete this first month of blocks. I'm feeling pretty good about my progress so far.

I also got news that my quilt guild has decided to delay the challenge quilt deadline by one month. So now I have until the March meeting to get it done. I'm not sure how I feel about that. It is nice to have the extra time, but knowing that I have extra time kind of makes me want to procrastinate. At this point, I've finished adding the borders. Next I need to piece the back, baste, and quilt. Now the trick is not putting it off until the end of February!

Friday, January 23, 2009

Moon

My little boy loves the moon. Whenever he sees a moon-like image (or the actual one in the sky), he immediately points to it. (I wish I could say that he also says the word, but he doesn't... yet.) He has an alphabet board book titled First abc's by Susan Winget. He has actually torn out the 'M' page and now sleeps with it at night.


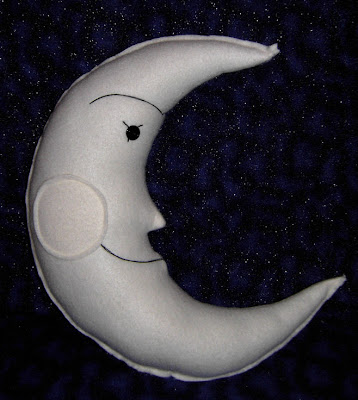
Last week I bought some off-white fleece from Joanns to use as a border for my guild challenge quilt. Well, I changed my mind on using it for the border. But then it occurred to me: it was the perfect moon color! So, using the illustration above as my inspiration, I made a pillow.

moon pillow, right view
I started with a compass and drew a 16" circle onto freezer paper. Then I free-handed the crescent shape and added in the nose and mouth details to create my pattern. I used tracing paper to mark the mouth, eyes, and browline, so that they would be symmetric (since I thought it would be weird to have a one-sided moon).

moon pillow, crescent view
One of the fun things I did on this was to try some bobbin-work for the first time. I hand wound a bobbin with some black perle cotton thread and then used my spare bobbin holder and loosened the tension on it so that the thread would feed through. I used normal thread on top, adjusted my stitch length to 4.0, and then stitched with the right side of the fleece down. The thick perle cotton made a really pretty outline on the right side! This is how I made the mouth, eyes, and brow. Then I just stitched some circles on for the cheeks and used a couple of black buttons for the eyes.

moon pillow, left view
I sewed the inner portion crescent right sides together to create a finished edge (to hide all the stitching ends from the face details), and then sewed the outside edge wrong sides together, leaving a gap to stuff it full of poly-fil (which I had to hand-stitch closed... I tried the machine and it just did not work). I like the wavy look of the raw edge on the outside.

My boy turns two tomorrow! This is his birthday present, and we gave it to him at his party today. But it was the last gift he opened, and it really just couldn't compete with the spinning top he received from Great-Grandma Lu. Hopefully I'll be able to get a picture of him with his moon sometime soon. :)

Dear Baby Jane: M-9

Dear Jane block M-9Block number/name: M-9 “Fan Dance”

Date completed: January 22, 2009

Number of pieces: 28

Notes on block: When I visited the Dear Baby Jane site the other day, I was distressed to find a near-blank page and an urgent call from Anina. I immediately wrote to her and she told me not to stress. It seemed that the copyright issue was rearing its head again, and she decided to take the site down. Fortunately for all of us following along, Anina has taken all that great information and re-posted it on a new site, That Quilt. And she is going to continue to post blocks on a regular basis. Huzzah! Thank you, Anina, for sticking with it, and continuing to lead us on the journey to create That Quilt!!! This block is the first one posted to the new site.

Despite the convoluted approach I took to piecing this block, it turned out pretty spiffy! The smarter method would have been to follow Anina’s example and piece the wedges and then put the wedges together to form the center square. Unthinking, I first put the center pinwheel together. Then I realized that I had to do a bunch of inset seams. Ugh. But, it all worked out in the end. I also love this happy fern fabric. So pretty!

Wednesday, January 21, 2009

It's muffin time

pumpkin-cranberry muffin and a cup o' tea

Today was just one of those days. So I made some muffins-- Pumpkin-Cranberry Muffins. And then I made some tea. Mmmm. The muffins are really moist, tasty (pumpkin = good), and not too sweet. A little baking can go a long way in helping to relieve a grumpy spirit.

The boy has been having some sleep issues lately. Last night he didn't go to sleep until after midnight. Then he woke up at 5. Ugh. Sufficit to say, I'm rather tired today (much more so than usual). Fortunately, the boy went right to sleep at bedtime tonight (for once!), and Keith put together dinner. This gave me some time to relax with a little bit of stitching on block 1 of the Autumn House BOM:

Autumn House block 1 in progress
The house, chimneys, and roof were actually completed last night. Today I did the door and its little roof. As it is one of those days, I actually did the little roof twice. But the second time worked out alright. I took that as a sign that maybe sewing is not the best plan for this tired mama. The new plan: lay down, read a little, and fall asleep.

Tuesday, January 20, 2009

Dear Baby Jane: L-1

Dear Jane block L-1Block number/name: L-1 “Widow’s Pane”

Date completed: January 19, 2009

Number of pieces: 22

Notes on block: I completed this block last night while watching television. It was a nice quiet evening of stitching—just lovely.

Today saw the inauguration of the United States’ 44th president, Barack Obama. The feelings of hope and excitement are near palpable. It will be interesting to see the changes and progress in the years ahead. I’m feeling pretty hopeful right now.

Monday, January 19, 2009

Dear Baby Jane: M-8

Dear Jane block M-8Block number/name: M-8 “Enchanted Square”

Date completed: January 18, 2009

Number of pieces: 35

Notes on block: Phew! This one took a little time. Considering how many pieces there are, I’m really happy with how it turned out. Initially, I was not thrilled with the green I chose—it just seemed kind of blah—but it grew on me. And seeing it in the layout with some of the surrounding blocks, I'm really glad I used it. Apparently, my subconscious was trying to help me out on this one!

Sunday, January 18, 2009

Happy day!

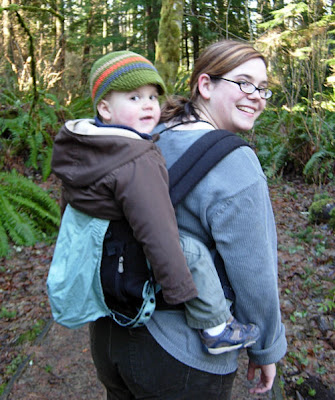
Today we took a spur-of-the-moment family hike! We drove about 30 minutes to get to Tiger Mountain, just off of I-90 at Exit 20. The day was absolutely beautiful (albeit a little chilly), with clear blue skies and bright happy sun. Since it was our first visit to the area, we decided do one of the shorter trails, just circling Tradition Lake. The boy hiked for a little bit, but went up onto my back for the majority of the trek.

in the carrier
We all had a really good time.

happy hiking boy
Hopefully, we'll get to go again and do some more exploring soon!

On the way home, we checked the mail.

Autumn Houses kit 1
I was ecstatic to find the first kit for the Autumn House block of the month! Since I only received the shipping notice on Thursday, I wasn't expecting to receive it for a few days. Then I checked the address on the package and realized that Shabby Fabrics is located here in Washington state. Now I feel even happier about this block of the month, knowing that I'm also supporting a (relatively) local business (it's just a big bonus if my block comes super fast each month too!). I'm excited to get started!

Saturday, January 17, 2009

Celebrating Christmas 2008 (for the last time!)

Tonight my parents came over for our much belated Christmas celebration. We had a simple dinner of Saucy Italian-Style Chicken Thighs (super simple and tasty), pasta, salad (romaine, strawberries, cucumber, cashews, and a berry vinaigrette), and bread. Dessert was homemade oatmeal cookies (from Martha Stewart's Baking Handbook) (they are insanely tasty, by the way) with some vanilla ice cream.

In addition to sharing the meal, we also exchanged gifts-- which means I can finally show off the rest of my handmade gifts, including this pirate pillowcase I made for my brother:

pirate pillowcase
But, the handmade gifts I was most proud of went to my mom and mother-in-law (the grandmas!). I put together little photo albums of my son. I created a page for each month (plus a few more, because the albums each had 16 pages). Here's a sampling:

grandma album sample
I used the scrapbooking software, Storybook Creator Plus, from Creative Memories, to create the pages. Since the albums I was using were 2.5" x 3.5" (not a standard size), I used a 5" x 7" template and divided it into four sections. Once I got my photos, I cut the sheets apart to get four separate photos, stuck them in the albums, and--voilà!-- they were done. The software made building these pages super simple, and it was so fun! I was never really drawn to traditional scrapbooking (though I have made one book with the help of my friend, C), but I am seriously loving digital scrapbooking! (Just so you know, I don't have any affiliation with Creative Memories-- I'm just a very happy customer.) I'm really looking forward to creating new pages as time goes by, to help keep the grandmas' little mini-albums fresh.

It's really nice to finally be done with the 2008 holidays. Now I can really start planning/preparing for 2009!

Thursday, January 15, 2009

Dear Baby Jane: TR-2

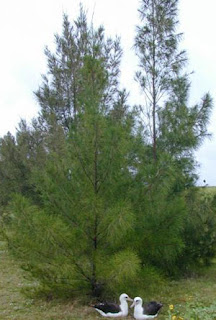
Dear Jane block TR-2Block number/name: TR-2 “Australian Pines”

Date completed: January 14, 2009

Number of pieces: 20

Notes on block: Yay! A triangle completed in a timely manner! Small victories.

Australian pine; photo by Forest & Kim Starr, US Geological Survey, HII couldn’t help but Google “Australian pine.” According to the National Park Service, it’s an invasive alien plant that is causing trouble in the southeastern United States. It has its very own “Least Wanted” poster. I think its mug shot, with the little birds resting in front of it, leans toward cute rather than menacing. They might need to work on that.

Wednesday, January 14, 2009

Making it work

"Challenge quilt" is an apt name. It's been taking a long time to put together. One of the biggest challenges I've run into is that the chenille fabric I got in my challenge sack are not consistent in shape or size. Some are square, some are rectangle, and the sizes have ranged anywhere from 2.5" to 3.75". Since the pattern I'm putting together calls for 3" squares, I'm kind of trimming and stretching and just making them work as I go along.

challenge quilt challenges
Another challenge is that some of the chenille pieces have bald spots. So many, in fact, that I've had to scrap my plan to use them in the border because I don't have enough usable pieces to do it. It's also kind of a pain because I'm having to rip apart otherwise nicely pre-made strips to remove the bald pieces. Whoever started this project apparently wanted to make sure those strips were going to stay together, because a triple-x stitch was used on every seam. This means taking them apart has been rather labor intensive.

Slowly but surely, I managed to get my nine blocks made. Let me just say: I love my walking foot! The blocks are far from perfect (and the top has the ripples to show it!), but with some borders and quilting, it should turn out okay.

pre-bordered top
Last night I also made and attached piping around the perimeter (also an adventure!). Hopefully tonight I'll be able to add the outside border.

Tuesday, January 13, 2009

Mom's night out!

Last night I went to a paint-your-own ceramics place, Color Me Mine, for a night out with some of the other preschool mamas. My husband's last words to me before I left: "Don't do anything too complicated." Ha!

work-in-progress
I couldn't help myself. I like complicated. Mostly, I think, because I like to draw the process out. It has been sooo long since I've had the opportunity to do ceramics painting, that I just couldn't let this chance pass me by. The design is from a Dover clip art book, Geometric Designs CD-ROM and Book. I traced it into the bowl using carbon paper (the markings will disappear once it's fired in the kiln) and then painted the outline. I wish I hadn't traced it off-center, but I think it will still be pretty when done. Hopefully, I'll be able to squeeze in time over a few evenings or on a weekend (or two) to finish it (I want to add some color and do something pretty along the rim).

But really, the highlight of the evening was having a chance to get to know some of the other moms. We see each other every week at preschool, but with the majority of our attention focused on rampaging toddlers, we don't exactly get much time to chat. It was awesome just getting to hang out and relax. And paint! Everyone created some beautiful pieces-- there were bowls, mugs, platters, spoon rests, and lots and lots of beautiful colors and designs. It was really inspiring seeing everyone at work. (Note to self: remember to bring camera next time!)

Sunday, January 11, 2009

Sunday adventure

Project Linus blanket labelToday, E and I participated in a local Project Linus workshop. It was my first time, and it was a really nice afternoon. Each month, the local coordinator hosts a work party. Sometimes, the work days are kind of free days where one can work on one's own projects. Other times, the group works toward more specific goals, including sorting fabric and blanket donations, or (like today) making sure all donated blankets/quilts have labels.

There were probably about a dozen or so ladies who came and went over the course of the afternoon. It was a fun group to hang out with and we were pretty productive to boot!

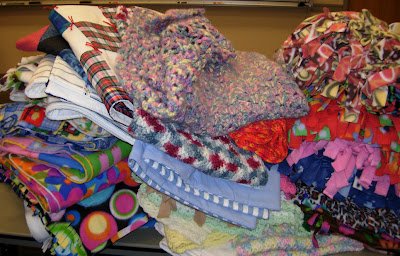
some of the blankets I worked on
All of my efforts were focused on sewing labels onto blankets (including most of the pile pictured above... but that was just the first pile!). Some I was able to machine stitch (on the fleece and flannel blankets), but I also handstitched quite a few onto quilts and knitted/crocheted blankets.

Everyone worked quickly, and together we were able to get more than 200 blankets ready for donation!


Each of these bags has 15-20 blankets inside! When asked if there are ever too many blankets to find homes for, the coordinator responded that Seattle Children's Hospital alone sees more than 40,000 children each year. And there are many more hospitals and organizations that accept blanket donations. So, no, there are never too many blankets.

I didn't manage to contribute anything I made, nor did I bust any stash-- so I haven't met any of my New Year's goals at this point. But I think participating in events like this is definitely a good thing, and certainly in the spirit of my resolutions. My new goal is to have a quilt to donate at the March work party.

Saturday, January 10, 2009

Dear Baby Jane: F-13


Block number/name: F-13 “Tour de France”

Date completed: January 9, 2009

Number of pieces: 5

Notes on block: Instead of my usual appliqué style (needleturn with freezer paper on top), I decided to follow Anina’s example and try the freezer paper on bottom technique. I worked very carefully as I cut out my freezer paper templates so that all my edges would be as smooth as I could make them. And when I pressed, I took my time and really worked the edges so that they would also be as smooth as possible. Last night when I finally got to stitch, I could not believe how quick and easy it was to stitch everything down! And the circles are practically circular! Sometimes when I do needleturn, my piece starts in one spot and somehow seems to shift or contort (no matter how much I baste) so it’s a little off by the time I’m done; and I can’t really tell as it’s happening because the seam allowances and the freezer paper make it difficult to really see what’s going on. This was not an issue at all with this new style. Because the pieces were all prepped and the edges finished, there were no surprises in placement and everything started and ended where it was supposed to! So cool!

I am excited at how well this technique worked for me and very happy with how this block looks.

Thursday, January 8, 2009

Dear Baby Jane: LS-6 & F-4

Dear Jane block LS-6Block number/name: LS-6 “Susie Q”

Date completed: January 7, 2009

Number of pieces: 25

Notes on block: I’m grateful that Anina is interspersing the triangles and center blocks. If the triangles were all left until the end, I suspect I would be in trouble. They'd never get done! Triangles just seem to take me a long time. It’s not that they’re any more difficult… it’s more like I just can’t focus on them as well. I completed the appliquéd top section as well as the bottom section of the block last Thursday (1/1), then the middle portion on Sunday and (finally) put everything together tonight. I guess that’s not too bad. It only took a week.

The green triangles in this block were sized such that it allowed me to use the fabric I cut for I-4 that I didn’t end up using. I really like this green a lot… it’s very tropical and happy! It was one I got from the Dear Baby Jane green swap a few months ago.


Dear Jane block F-4Block number/name: F-4 “Old Windmill”

Date completed: January 7, 2009

Number of pieces: 13

Notes on block: Two blocks in one night. Yay! I chose the fabrics I did for this one because they both made me think of wind, which seems appropriate for this block.

Wednesday, January 7, 2009

Challenge quilt: first block

The Boy is actually napping today(!), so I'm getting a little bit of time for myself. Woo hoo! I've tried to use my time well by reading a few blogs, eating lunch, and starting construction on my challenge quilt.

I managed to get all of my fabrics cut:

challenge quilt fabrics
And then I even got the first block sewn together. This did not go nearly as quickly as I would have liked. Some of these fabrics are really tricky to deal with, particularly the chenille (mainly because they aren't all cut exactly the same size) and the woven suede (which seemed so sweet and innocent on the bolt, but is actually crazy slinky). I was sure the micro-fleece and the minkee would be the trouble causers (and I even cut them bigger, just in case), but they've been fine thus far.


The block is a little wonky, but I think it will be okay once it's all put together. One block down, only eight to go!

Tuesday, January 6, 2009

Planning my challenge quilt

A few months ago, I mentioned that I was going to participate in my guild's latest quilt challenge. The theme: "Terror in a Brown Paper Bag!" Each participant selected one of their UFOs and placed it in a brown paper bag, including the pattern (if available) and as much project fabric as possible. Then we traded in that bag and received someone else's bag. The challenge: to finish the UFO you receive. The twist: there is no requirement to finish the UFO as originally intended.

Well, the challenge is due at the February meeting. And, what with the holidays and illness and all that, I still haven't started. Eeep! Slacker that I am, I never even showed y'all what the my bag contained:

sack o' challenge
Whoa. Talk about a challenge! I have no idea what this person was planning on doing with all these squares of chenille. Some are sewn into strips (seemingly in no particular order). Some are pinned together in strips. And the colors are a little on the funky side-- soft yellow, tan, off-white, and aqua. Very pretty, but not a combination I would have ever thought to put together.

chenille strips
You would not believe the crazy amount of shedding that took place when I emptied my bag onto the table. Crazy, I tell you! Little chenille fluff balls everywhere.

Inspired by the feel of the chenille, I came up with a vague plan to do a textured quilt. I had a couple in my stash that would work well (one a very cute flannel kitty print that actually features all of the same colors as my bag o' chenille). And I went out and picked up a few more. I even special ordered a satin to match the tan color. So by the second week of December I had my fabric. Now, what to do with it?

As I lay awake in bed last night (with the sudden realization that it is January, and I need a quilt before February 2nd), I brainstormed. This morning I got out my graph paper and did some sketches. With a sort-of plan in mind, I went to Electric Quilt and drew up this block. It's simple, but I think it will be a lot of fun, and I should be able to get it done (an important consideration!). All the small squares will be chenille. Then the rest will feature other fabrics, including flannel, micro-fleece, corduroy, and woven suede.


This is my "test" quilt. I did a couple different colorations of the block, and rotated some them. The outside border will be more chenille squares, though my plan is to do piping between the center and border to break it up. This version is a little busy. I'm loving the center, but I may still change up my border plans. But I also need to use as much of the challenge fabric as possible in my project. A border seems like a good way to go. Or maybe I can use it on the back or something instead.

But, now I need to stop fretting and start working. I have a plan for the center, so I can start on that, and I'll just have to wait see where that takes me. I'm starting to feel excited about this project!

Monday, January 5, 2009

Looking ahead to Christmas 2009!

*Gasp!* Yes-- that's right. I'm thinking ahead to the 2009 holiday season, along with lots of other quilters and crafters, thanks to Nanette and Cheryl. Like me, they found that they had stress because they started on their holiday crafting later than they should have. It just sneaks up on you! So, they have come up with a wonderful concept:

handmade Christmas 2009 button
Great Ideas for a Handmade Christmas, 2009!

The idea is to share crafty gifty ideas, both ones that you've made in the past that have worked, as well as ones that you'd like to try. All these ideas/tutorials/etc. will be compiled together in a handy-dandy list for quick reference. So then, come September, we'll be ready to start crafting.

Here are some of my initial thoughts about potential gifts for next year:
  • Coffee cozy-- I found this tutorial last year via the Sew, Mama, Sew! Blog. I loved it then, and I still love it. Maybe this year I'll even manage to make some.

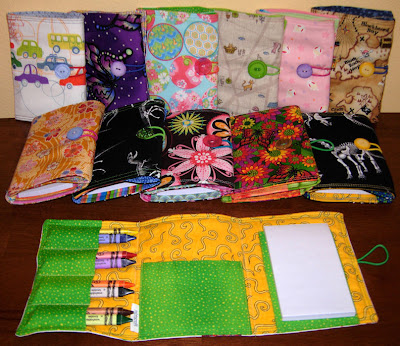
  • Child's Coloring Wallet-- I bought this pattern on etsy from JCasa. It is a fabulous pattern, with clear directions and lots of helpful illustrations. And the finished product is awesome! So awesome, that I actually have made 12 of them so far (and I'm sure there will be more in my future).

    Child's Coloring Wallets
    And not a scrap of fabric was purchased for these-- it all came from my stash. (Yay!) They were initially going to be Christmas gifts, but because we decided not to do a holiday gift exchange, I'll be giving them to our toddler friends for birthdays and other events throughout the year. And, just so you know, these fit an 8-pack of Crayola washable triangular crayons perfectly! (The triangular shape is supposed to help encourage proper crayon/pen grasp.)

  • Gift baskets-- If you haven't checked out Pink Penguin's wonderful tutorial, you need to.


    Not only did I make one for a gift exchange, but I was also the proud recipient of one. So I can assure you, from personal experience, that these baskets are special and wonderful. I am definitely planning on making more of these for gifts.

  • Scribble Ornaments-- How cute are these??? It looks like a lot of fun, and my toddler will be old enough to be a super helper for something like this next Christmas. This one is definitely on my to-do list.

Over the next few months, I'm sure I'll find lots more to share. The procrastinator in me definitely needs this. I'm really looking forward to seeing everyone's ideas.

Sunday, January 4, 2009

Project Playtime is GO!

Yesterday, I started work on a new project, the Playtime quilt from American Jane Patterns.

_Playtime_ by Sandy Klop
I don't know how I first stumbled across this pattern, but when I did, I fell in love. I looked around on the Web for many months, hoping to find a store offering this pattern as a block-of-the-month (BOM) that I could sign up for, but was unable to find one. I even went to my local quilt shop to see if they might be offering it in the future, but I guess the pattern is a couple years old. They offered to order it in for me and help me pick out fabric, but I really wanted to just have it all put together for me (lately, decisions on that kind of scale are a little much for me what with the toddler... thus opening my eyes to the beauty of kits!). Then at Quilt Festival when I found a shop offering a kit for sale, I immediately snatched it up.

I've never made a kitted quilt before. I've done one BOM, so I kind of figured it would be similar—with indications of what fabrics should go where. I was wrong. I've got a bag of fabric and a parcel of patterns. I don't have a picture of the finished project as the quilt shop made it. I don't have any idea what fabric is supposed to go where because the fabrics don't all match the pattern descriptions. And the cuts don't match the suggested fabric requirements, so I can't use that as a guide either. Really, it's not too big a deal, but I worry that I'll use a fabric someplace only to find that I need it somewhere else. I guess though, should that happen, I just need to be prepared to wing it.

Once I got my brain over that initial intimidating hurdle, I was able to get to work.

cutting the backgrounds
I managed to cut out all of the various background pieces of the quilt which was the first part of the "Month 1" pattern. It was pretty time-consuming, but I'm feeling good that I've got this tedious part done. Woo hoo! I even remembered to use some sticky notes to label the pieces as I cut so I'd know what's what in the months ahead. One thing I really like about this pattern is that it offers a place to keep track of the background fabrics used. I was able to paste little swatches of each background in a box printed next to the cutting instructions for that fabric. I thought that was a pretty nifty feature. You can see it above (the pattern is legible in real life, I just swooshed out all the fabric measurements in the picture).

The second part of the Month 1 pattern includes the various setting stars. I think they're going to be a lot of fun to put together. So many pretty colors! Now I just need to find time to sit at my machine and do it.

Thursday, January 1, 2009

Happy New Year!

The beginning of a new year seems like a great time to do a little looking back and some looking forward.

Last year, I made 3 resolutions:
  1. Go to Atomic Java no more than three times a week. Um. I didn't last long on that one. But, I have curbed my caffeine addiction somewhat. I'm able to drink a half-decaf latte now without major headaches. And I can even go multiple days without my java fix. So, on some levels, I was successful.

  2. Use more fabric than I buy. I got off to a good start, but kind of lost control.
    Fabric In: 389.183 yds
    Fabric Used: 93.810 yds

    Dang garage sales. But even that was only 150 yards. Clearly, I have a problem. To be fair though, I have used more than that. But there just isn't a good way to track fabric usage for my Dear Jane, grandmother's flower garden, Grandma's Country Album II, or block lotto and block exchange blocks. But added together they also used up a decent amount of fabric. Still, I think I've definitely earned a failing grade on this resolution.

  3. Don't buy any books; read the books I have. I did pretty well on this one. A few books were purchased, but of those, I've only got 3 left to read. So, there aren't new books languishing on my shelves. I also re-discovered the local library. That has been awesome!!! And it has helped keep me from adding to my personal library. Not perfect, but I feel really good about my adherence to this resolution.


Here are a few goals for this year:
  1. Stashbust— I really, really want to start using up my stash. Really. I'm not sure how to put this in objective, measurable terms though. Based upon last year, maybe I'll say, "Use at least 100 yards of stash fabric." It's ambitious, but I think it's a good goal.

  2. Complete 3 UFOs— I'm trying to be realistic here. I think I can do this.

  3. Make and donate some quilts for charity— I don't know how many I'll be able to get done, but I'm putting this on the list to help me focus.

  4. Keep up with my blocks of the month projects— For Christmas, Keith bought me a subscription to a beautiful block of the month program through Shabby Fabrics, Autumn Houses. I also want to start work on the kit I purchased at Quilt Festival for the American Jane quilt, Playtime. I'm also going to stay focused on my Dear Jane quilt and continue to keep up with the Dear Baby Jane blocks as they are posted.

Not too many, but I want to try and make goals that I can keep. These are already going to be a challenge, I think.

Best wishes for 2009, and best of luck with all of your New Year's resolutions!