Sunday, January 31, 2010

Another year...

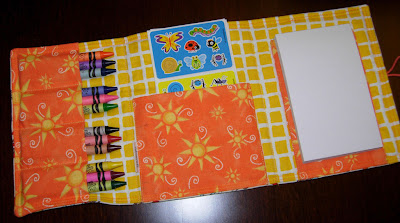
Another round of birthdays for our toddler friends! Last year, my go-to gift was the JCasa Child's Coloring Wallet. This year, I've decided to go with aprons/smocks.

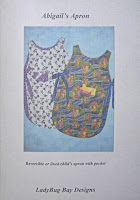
Abigail's Apron patternThe pattern I'm using at the moment is called "Abigail's Apron" by LadyBug Bay Designs (a local designer from Woodinville, WA). I really like it because it is fully lined/reversible, has pockets, offers full front and back coverage, and is easy to put on and wear. It is also a really easy, quick to construct design. My only problem with the instructions is that they call for hand-sewing in some areas. So, after making it once as per the instructions, for my most recent versions I figured out some changes so as to avoid all hand sewing.

The most challenging area to figure out what to do with was the shoulder area. The instructions have you sew a partial seam when stitching the linings to the outer pieces (one for the front, one for the back). Then you join the front and back together along only the outer shoulder seam. The shoulder is then finished by handstitching the lining shoulder seam closed, thus enclosing all of the seams inside.

Abigail apron modified shoulder seam close-up
My solution: instead of hand sewing the lining, I did a zig-zag. It's maybe not the prettiest solution, but I think it is a nice strong finish, and it doesn't involve handwork. Woo!

Anyway, two of our toddler friends have birthdays right about now. So, over the course of the last week, I made a couple of aprons for them.

Kassie's apron:

Kassie's apron
I just love that happy Lila Tueller bird print. So cute!!!

Jackson's apron:

Jackson's apron
For Jackson's, I was a little concerned about the girly-factor of the ties. But, in the end, I decided I really liked the simplicity and adaptability of the ties. So the only change I made was to make the ties blunt-ended, as opposed to the ribbon-looking 45° angle called for in the pattern. I think it works pretty well.

Saturday, January 30, 2010

Playtime: the bear

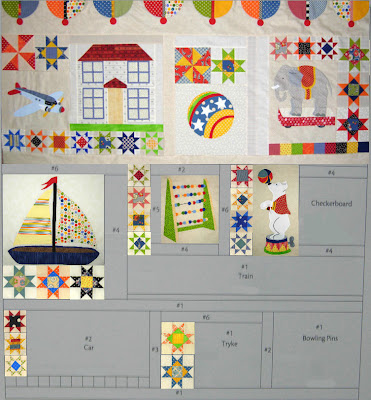
It's been quite awhile since I've taken time to work on my "Playtime" quilt. Having found some inspiration to do applique this week, I was excited to work on this project again! Here is the bear:

Playime, the dancing bear block
It is all applique (plus a little bit of embroidery), mostly needleturn with freezer paper on top. I used a vinyl overlay for placement of the pieces as I went along. Going into this one, I had a few concerns-- what colors to use, how to deal with the ball, and getting sharp points. The drum went together pretty easily. The ball took some time. I used a yellow base fabric (to peek through those narrow areas), and then appliqued the other pieces on top of it. Then I cut a heat-resistant mylar template to the size of the ball and used Carrie P.'s method for preparing circles (LOVE that method!!!). It was a little tricky because of all of the applique (and I forgot to leave wide outside edges on a couple of the pieces), but I think it worked pretty well.
Overall, I think he's a happy looking bear!

And here's my progress chart:

Playtime progress chart, 1-30-2010

Friday, January 29, 2010

Greenpiece month 3: Applique blocks 5 & 6

Last week I got to attend my local quilt shop's monthly Greenpiece meeting for the first time. (Thanks to my wonderful sister-in-law who recently moved to the area and was willing to watch the boy!!!) In addition to passing out the new blocks, techniques are discussed, updates and news are shared, and there is a little bit of show-and-tell. It was a lot of fun, and I'm thrilled I finally got to experience it (maybe I can even do it again next month!).
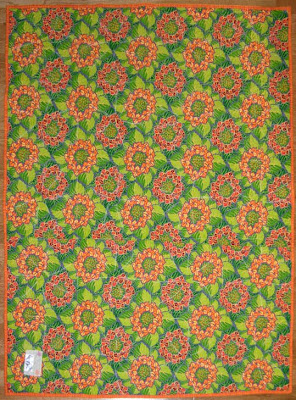
One interesting thing that I learned was that we're a little behind in our applique blocks. They have been giving us two pieced patterns and two applique patterns a month. But because we make two of every pieced pattern, it seems that really we should be doing an applique block for every pieced block we make, not for each pieced pattern. Does that make any sense? I guess I can't explain too well since I found it confusing myself. In any case, we learned that really we should have a total of eight pieced blocks and eight applique blocks at this point, when in actuality, we've made eight pieced and only four applique. So, this month there is an influx of applique.

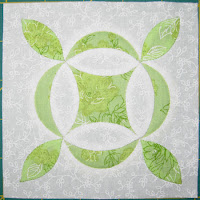
Applique block 5:

Greenpiece applique block 5
A happy little flower. Sweet and simple (with some help in the center from Karen Kay Buckley's Perfect Circles!).

Applique block 6:

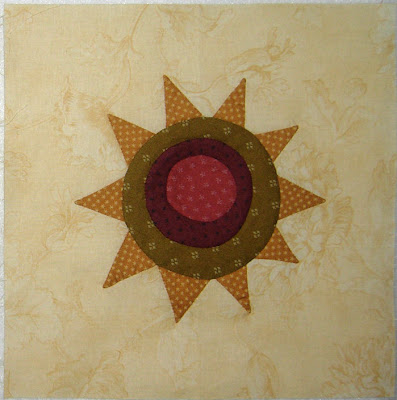
Greenpiece applique block 6
This one was a little more challenging. LOTS of points and round shapes. They aren't perfectly curved, but I figure my block just has a little extra character.

It is still to be seen whether I'll be able to manage another four applique blocks this month to catch up. But, at least I have two done!

Thursday, January 28, 2010

Jane Stickle Quilt: M-1

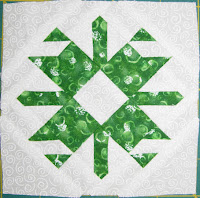
Jane Stickle block M-1Block number/name: M-1 “Dogwood Days”

Date completed: January 26, 2009

Number of pieces: 29

Notes on block: I’m not entirely sure why this fabric called to me from the pile, but I think it works pretty nicely. All-in-all, this was another simple, straightforward block. With most blocks, I need an entire evening of work to complete them. But with this one, I actually had time to work on another project too. Bonus!

Wednesday, January 27, 2010

Paintbox Quilt Along: First blocks

Yay! I finally managed to get the first blocks for the Paintbox Quilt Along completed!

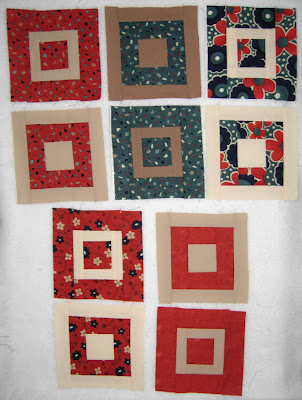
Paintbox quilt along blocks, week 1
So far the only issue I've had is that I cut a few (only five, I think) pieces 1/4" too narrow. So I have some 1/8" seams going on in a couple blocks. But it should be okay (I hope!).

My friend Mikki and I have decided to try and quilt along together. She's in Texas and I'm in Washington, so it's going to be a virtual thing. But it will be nice to be able to cheer each other on as we work through this project. I'm also hoping that she'll help keep me focused so I actually finish (instead of adding yet another UFO to the pile!).

We decided we're going to pace ourselves a little differently than the actual quilt along. We did all of our cutting in the first week, and then for the next eight weeks, we're going to try and do 10 blocks a week. If we stay on track, we should be finishing up our blocks around the same time as the quilt along-- just in time for sashing and finishing instructions. Wish us luck!

Tuesday, January 26, 2010

Jane Stickle Quilt: BR-2

Jane Stickle block BR-2Block number/name: BR-2 “Leigh’s Woods”

Date completed: January 25, 2010

Number of pieces: 31

Notes on block: Fun and simple are good words for describing the making of this block. It was a nice and relaxing experience. The beautiful leafy green was a gift from Zonnah. (Thank you, Zonnah!!)

Monday, January 25, 2010

Birthday boy!

Today is my little boy's third birthday! I can hardly believe it.

boy and birtday balloons
We celebrated the event yesterday by inviting over family and having snacks and cupcakes.

boy eating cupcake
Mmmm... cupcakes.

And, of course, there were many gifts, including this one:

Maisy quilt all folded up
A quilt made by mama!


My little dude loves Maisy Mouse. I love the bright, happy colors, simple art, and sweet stories about Maisy and her friends. When I saw this beautiful kit being offered by the Fat Quarter Shop, it was an easy decision. The kit included the pattern and all of the fabrics needed for the top and binding. I purchased the backing fabric separately (it is also from Andover's Maisy collection).

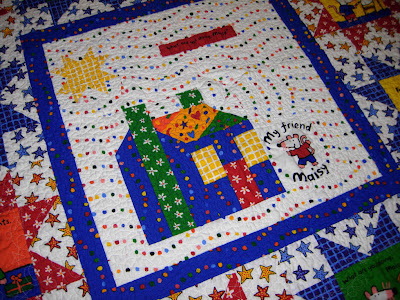
Maisy quilt center
I started working on it at the quilt retreat in November, and finished it last Friday evening. It was washed and ready to go for the party on Sunday. I was a little nervous about washing it, because none of the fabrics (or the batting) had been prewashed. Usually, I am a prewash fanatic, but as the kit suggested not to prewash, I didn't. Fortunately, everything washed beautifully with no bleeding. The quilt has a lovely, comfy crinkled look to it too!

Maisy quilting detail
I'm really pleased with how the quilting turned out. In the center, I did a long, horizontal stipple in the "sky" areas, outlined and then stippled the house, and did a swirl in the sun. Then I did an all-over freemotion design in the outside borders that involved stars and loops (inspired by a quilt I saw on Quilt Hollow's blog recently).

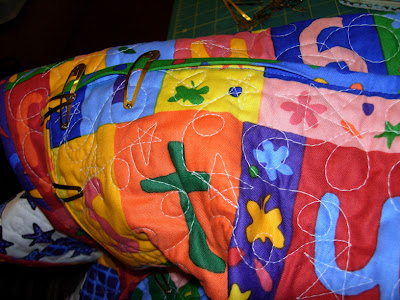
Maisy quilt back
I just love the backing fabric. So cool!


And the label.

I even made a little pillowcase to go with it:


Happy Birthday, little dude!!!! Mama loves you. :)

Friday, January 22, 2010

To the theme of "Rawhide"

Bindin', bindin', bindin'
Though your fingers are swollen
Keep that needle goin'
'Til it's done!


binding along on the Maisy quilt
Sigh... the things that work their way into my brain sometimes.

Thursday, January 21, 2010

Jane Stickle Quilt: J-13

Jane Stickle block J-13Block number/name: J-13 “Pam’s Bells”

Date completed: January 20, 2010

Number of pieces: 21

Notes on block: My fussy cutting isn’t perfect, but I still really like how this block came out. I think it is a lot of fun! I did needleturn appliqué with freezer paper on top and it worked really well for me (and made it much easier to fussy cut the teardrop shapes).

I’m 26 weeks pregnant now (nearly to the 3rd trimester!) and can really feel the baby wiggling about. Woo hoo! But April seems to be coming along awfully fast...

Wednesday, January 20, 2010

Hanging pretty

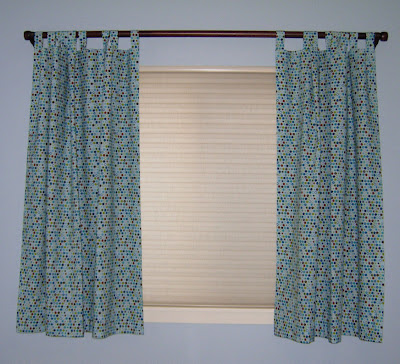
Over the weekend my husband and I managed to get the newly made curtains hung!

curtains open
Woo hoo! They even ended up the same length! (Feeling proud right now!)

I used nearly 6 yards of the printed fabric to make these (the fabric is from Amy Schimler's Creatures and Critters collection by Robert Kaufman). The formulas I used were pretty darn accurate! I was actually a little nervous that I wouldn't have enough fabric it was so close. All I have left is a tiny pile of scraps.

a view of the hem
Here's a view of the lining. The curtains are lined with blackout material. That stuff is heavy! On the outside I did my first ever machine-stitched blind hem. It worked really, really well-- so much so that I couldn't get a good picture.

curtains closed
I think I've determined that making curtains is definitely not my cup of tea. There was a lot of stress involved-- all the necessary precise measuring and marking on a large scale, matching patterns (which I failed to do well-- but at least the pattern is small enough in scale that it's not too obvious), and then just the challenges of workspace (involving many trips up and down the stairs between my machine and the table big enough to deal with it all). Despite the challenges and the stress, I am really thrilled with how these turned out. Most importantly though, my son likes them too!

Tuesday, January 19, 2010

Weekend projects

I managed to keep myself pretty busy this last weekend working on a few different projects...

quilted coasters
On Saturday morning, my husband declared that I needed to make some new coasters for game night that night. So I did! These are the same design I made for gifts over the holidays, but I thought I'd share a picture since I never manged to get any close-up ones of the others. The pattern is from the wonderful book, Last-Minute Patchwork + Quilted Gifts, by Joelle Hoverson.


On Sunday, I completed work on the new Project Linus top I started last week at the PL workshop I attended. It's another one made from the Roll o' Evelyn challenge fabric (which I have a ton more of, so there will be still more projects to come!). I have ideas on how I want to quilt it so I'm even excited about getting it basted (but first, I need a back).

Paintbox Quilt Along fabrics all cut and ready to sew
Another item checked off the list: cutting all of my Paintbox Quilt Along fabrics. Now I'm ready to stitch up some blocks!


And then I finally started quilting the Maisy quilt for my son. Woo hoo! Hopefully, I'll be able to get the quilting done in the next couple days. I'd really like to have this ready to give to him on his birthday next week.

Phew! Listing it all out like this makes me feel like I accomplished a lot. Yay for productive weekends!

Sunday, January 17, 2010

Jane Stickle Quilt: M-7

Jane Stickle, block M-7Block number/name: M-7 “Junko’s Rose Garden”

Date completed: January 15, 2010

Number of pieces: 10

Notes on block: About halfway through this block (after stitching four lopsided-not-quite-fitting-together center melons), I was about ready to chuck it. Grrrr! Then I looked at Jane’s original and saw that it wasn’t perfect either, and that just made me feel better. And now that it’s complete, I’m so happy I stuck with it because it looks so much better than I ever thought it would.

I used freezer paper underneath for the melons and reverse appliqué for the flower. The freezer paper method worked really well for these because it made placement much easier than it would have been with needleturn. But I definitely still need practice with this technique.

Saturday, January 16, 2010

Jane Stickle Quilt: L-2

Jane Stickle block L-2Block number/name: L-2 “Stephanie’s Snowflake”

Date completed: January 14, 2010

Number of pieces: 41

Notes on block: It didn’t make sense to me to piece the pointy ordinal bars (as in the book/software pattern), so I did them in one piece (which is also how the original block appears to have been done). A very pretty block!

Friday, January 15, 2010

Making rows

Over the last few nights, I've been focusing my handstitching efforts on Jane Stickle.

Jane Stickle, rows A, B, and C
Now I have rows A, B, and C put together. Woo hoo!

Thursday, January 14, 2010

Resistance was futile

It's true. I just couldn't resist. Paintbox Quilt Along, count me in!!!

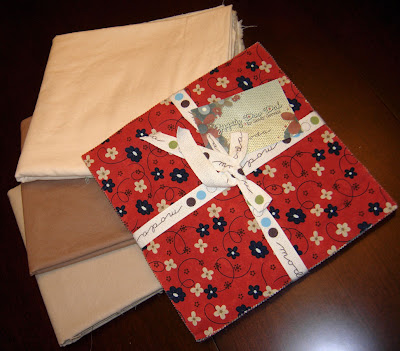
My fabrics for the Paintbox Quilt Along
But at least I'm not buying any fabric.

I'm going to be trying the "Classic Variation" version of the quilt using a Moda layer cake of Zippity Doo Dah by Sandy Gervais, and 3 beige-y solids.

Wednesday, January 13, 2010

Something different

I'm attempting something new this week:

curtain prep
Curtains!

They are going to be for my son's new "Big Boy" room. We got it painted a couple of weeks ago, have ordered furniture (which has just started arriving!), and now I'm making a couple of curtain panels. I wouldn't normally attempt such a thing, but we wanted blackout window coverings and making them seemed the most economical option.

So, I got a book from the library (Sunset Curtains, Draperies, and Shades), did lots of measuring and math (ugh!), bought fabric and blackout lining, bought fabric again (because I failed to calculate for 44"/45" wide as opposed to 54"... oops!)(thank goodness they still had some of the print left!), and finally started cutting and sewing a couple of days ago.

Hopefully, I'll be able to get them done today. And then I'll need to find a curtain rod so we can hang them up (and so I can show you how they turned out!).

Tuesday, January 12, 2010

First quilt finish of 2010!

Over the weekend, I finally completed the Project Linus quilt that has been basted since last October.

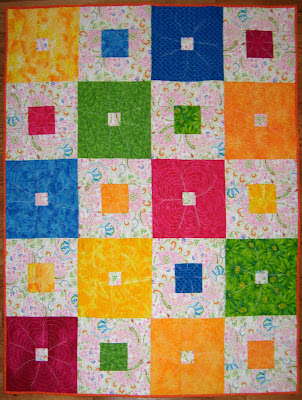
Garden Squares quilt, front
The design comes from a tutorial offered by Amanda Jean of crazymomquilts, Elia's Quilt. (I'm missing her blog already! *sniff*)

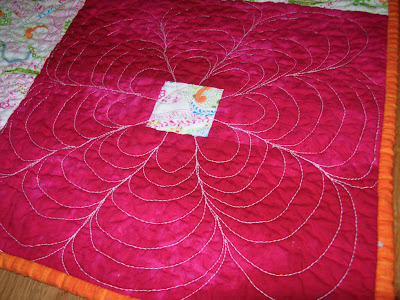
Garden Squares quilt, quilting detail
I had a lot of fun trying out a new quilting design on this one. It is from Leah Day's blog, 365 Days of Free Motion Quilting Filler Designs, and is called "Super Daisy." My daisies are far from perfect (or consistent... the flowers have anywhere between 5 and 8 petals), but I think they are fun and I feel like I learned a lot from doing them. I'm excited to try some more of her designs in the future. She's got some great alternatives to the just a plain ol' stipple!

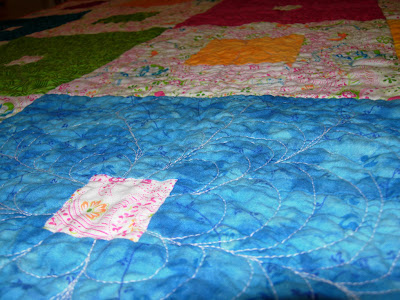
Garden Squares quilt, textural view
After I washed/dried the quilt, it crinkled up quite nicely. My friend Evelyn commented that she was really surprised at how soft the quilt was, considering all of the dense quilting. The batting is Hobbs Heirloom 100% Organic Cotton.

Garden Squares quilt, binding
Another new trick I learned in making this quilt is machine finished binding. Wanting to get the quilt finished up in time for the Project Linus workday, I used the binding tutorial from Red Pepper Quilts (fabulous, fabulous tutorial!), and was really happy with the results, especially considering this was my first attempt. It will take a little bit of practice before my bindings are as pretty and clean as Red Pepper Quilts's. But I'll definitely be using this technique in the future.

Garden Squares quilt, back view
The back is a print that I've had in my stash for a few years. I think I still have another 4 yards, so it will probably make another backing appearance in the future.


And, of course, the label. In some ways, it seems kind of weird that I put a label on my donation quilts. But I feel a connection to the quilts I make, as well as pride. I think that if I were ever to receive a quilt from an organization like PL, it would be kind of neat to have a little insight into its origins. And so I label. But I try and keep it simple.

I finished the quilt just in time for the January Project Linus workshop and was able to turn it in then. Woo hoo!

Sunday, January 10, 2010

Jane Stickle Quilt: E-8

Jane Stickle block E-8Block number/name: E-8 “Mama’s Maze”

Date completed: January 8, 2010

Number of pieces: 33

Notes on block: So this block isn’t perfect, but I feel okay with that. In fact, I rather like it. And that is a little weird to me. But, hey, I’ll go with it! Part of it is that I just love this green print. I’m pretty sure it’s Thimbleberries, but I don’t have a selvedge to confirm that.

I did some calculations, and determined that if I continue to make 2 blocks a week, all of the blocks will be done in 31 weeks. Wow!!! That’s less than a year! It’s almost too difficult to fathom. I’d better start getting these blocks put together.

Saturday, January 9, 2010

Greenpiece month 2, part 2

These were actually made a few weeks ago, but I didn't get the embroidery completed on the applique block until just yesterday.

Here is pieced block number 4:

Greenpiece, pieced block 4
I really like these!

Here is applique block number 4:

Greenpiece, applique block 4

Simple and sweet.

Now I'm all set for the next set of blocks!

Friday, January 8, 2010

Oh, my...

The temptation is great. Mighty, in fact. Her first quilt along was just so awesome.


I'm not sure if I'll be able to resist. But I'm trying.

Thursday, January 7, 2010

A little at a time

Over the last couple of nights, I've been plugging away at quilting the Project Linus quilt that has been sitting, basted, since the beginning of October.


Inspired by Leah Day, I'm trying something new. It's taking longer than I anticipated, but I think it looks fun. I'm also definitely expanding my skills, so that makes the additional time extra worth it.

Anyway, 12 blocks down, 8 to go!

Wednesday, January 6, 2010

Jane Stickle Quilt: E-7

Jane Stickle block E-7Block number/name: E-7 “Bread Basket”

Date completed: January 4, 2010

Number of pieces: 39

Notes on block: I think I went about this block the wrong way. I decided to go ahead and piece it all, not really realizing exactly how many inset seams were actually involved. I’m less than thrilled with the result. It doesn’t look bad, but I know I could have done a lot better had I used some appliqué along with the piecing. Looking at it kind of drives me crazy now, but I know that once I’ve done a few more blocks, the frustration will fade from my memory and this will become yet another happy little block.

Tuesday, January 5, 2010

Jane Stickle Quilt: L-13

Jane Stickle block L-13Block number/name: L-13 “Harvest Moon”

Date completed: January 3, 2010

Number of pieces: 12

Notes on block: I loved the prep for this block! It involved cutting out 5 squares and chopping them into quarter-square triangles. So quick! Of course, the block itself took a bit longer… as in the entire extended version of The Two Towers (or about 3.5 hours). I’m really happy with my work on this one. I did the appliqué using the freezer paper on top method, and was really worried about lopsided circle syndrome. But it managed to stay all happy and round. Yay!

Monday, January 4, 2010

A little gift

Yesterday, my son and I attended a friend's 3rd birthday party. This toddler is quite the artist and scholar (he is already able to write out the entire alphabet and numbers!), so a coloring wallet seemed like a perfect gift for him:

Nathan's coloring wallet, outer
Have I mentioned how much I love this pattern? So awesome.

Nathan's coloring wallet, inner

And I've already received an email back from his mom, telling me how much they love it. Yay!

Sunday, January 3, 2010

Snip. Sew. Send. January

January is my month for the Snip.Sew.Send. virtual quilt bee! This means it is my turn to send out my block requests and fabrics.

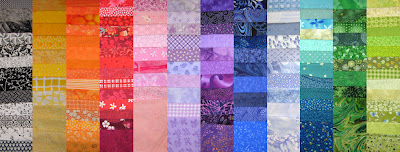
Since I'm having a baby in April, I thought it would be fun to make a baby quilt. We aren't finding out the sex of the baby (I tell you, the suspense is killing me!), so I'm going with a sort of gender-neutral color scheme: rainbow!

These are my fabrics:

fabrics sent to SSS ladies
I've sent a different color grouping to each participant, and have asked that they include fabrics from their own stash if they are so inclined.

I've requested they create 9.5" log cabin blocks. They can be traditional or they can be wonky-- I'm looking forward to some variety.

As for potential layout, I'm kind of torn between a couple of options.

log cabin quilt A
This one appeals to me because of the open center. I could to some kind of applique, or a spiffy quilting motif. But, it is a big expanse of white for a baby quilt. So I may end up trying something simpler like this:

log cabin quilt B
We'll just have to wait and see how I feel when the blocks are all here!

I found some pretty nifty pictures in flickr and a couple of other blogs that really inspired me to go in this direction. Check them out if you get a chance, because there is some beautiful work:

Rainbow Cabins
Rainbow Block Quilt
Wonky Log Cabin Rainbow Scrap Quilt
Color Wheel Quilt
Wonky Log Cabin Inspiration mosaic

Woo hoo! I can't wait to see some rainbow blocks!