The
Blossom Bag was the September project for Jem Jam's
Style Stitches Monthly Bag Challenge.

This is a bag I've been looking forward to making. My mother-in-law (who gave me my copy of
Style Stitches last year for Christmas) pointed to this bag as being her favorite in the book. So I knew right then that I needed to make it for her! I even picked out fabric for it a few months ago (extra notable because this is also the first project in the book that I've gone out and bought fabric for-- everything else I've made using my stash).
However, despite all of my enthusiasm, September was just not much of a crafty month for me (as my dearth of blog posts attests). But last week, I was finally ready! The preparations were mighty-- I think I spent nearly two hours just cutting out all of the pieces. Then I spent nearly two hours applying all of the interfacing. Then I spent about five hours putting it all together.

I chose to do the handbag style, with the shorter handle length. I also chose to use a regular quilting-weight cotton instead of the recommended decorator-weight. Following
Natalie's advice, I decided to go ahead and double interface all of my exterior and lining fabrics in order to simulate the heft of a dec-weight. It was a lot of interfacing. But it really seems to have worked.

Natalie also said that though she loved her bag, she was finding that it was already showing signs of wear on some spots, probably due to the lighter-weight fabric. With this in mind, I went ahead and added some purse feet to at least help with that on the bottom. Also based on her recommendation, I plan to Scotch-guard the bag.

And here's the back of the bag. I love the handle details in this bag. They weren't too complicated to make, but measuring to ensure even placement is definitely something I would recommend taking the time to do.

This is a view of the side. It was a little tricky sewing the side in, due to the thickness and inflexibility of the Peltex. But lots of pins and just taking it slow got me through it just fine.

In putting the bag together, I ran into two main challenges. The first one: the zipper pouch. If ever a section needed an illustration, it was this one. I swear those instructions were on crack. She approached this zipper differently than every other one she has presented in the book thus far. But, similar to the other methods she has offered up thus far, this one is convoluted and far more difficult than it needs to be. Frankly, even after having done it, I am still wondering if I actually did it correctly. But it does work. If you decide to make this bag, I would highly recommend using a different zipper approach (
this one, from Bree of
My Crafty Crap, looks pretty promising-- I definitely plan to try it!). I think I'm officially declaring myself DONE with Amy Butler zipper instructions.

The other major challenge? The last step wherein one is supposed to bartack through the side panels in order to hold the dividers in place. So THICK! Ugh. My machine managed it, but I had to take off the foot and go super slow to make it happen (many thanks to Tori at
James Family Blog for sharing that fabulous tip!). Thank goodness-- because hand stitching that would have been painful (literally, I think).

And here I am with the bag. Should I decide to make one for me at some point, I'll definitely do the longer straps. I'm a shoulder-bag kind of girl.
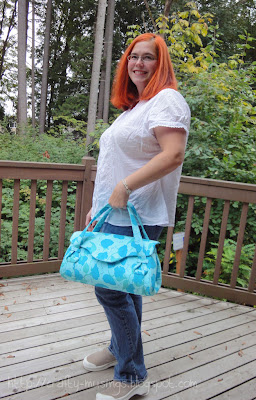
This view gives a little better perspective on the actual size of the bag. It really is a great size.
If you want to make one of your own, or even just get a taste of what an Amy Butler pattern is like, Sew, Mama, Sew! has a
FREE Blossom Bag pattern download.


