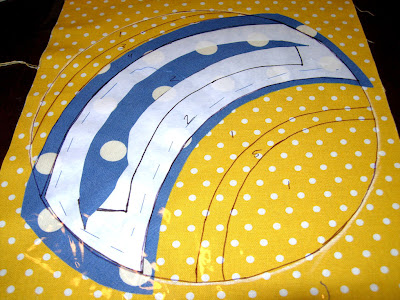
Since the pattern was designed for fusible applique, I needed to set it up to do hand applique (because I like hand applique). I used a lightbox and traced to reverse the pattern and then numbered it in the order that I wanted to stitch stuff down. Next I traced all the pieces onto freezer paper and prepped my fabric. I then traced a vinyl overlay to help me with placement of my pieces.

Here you can see that I traced the overall shape of the ball (the white line) onto the main ball fabric. I used this line to have a guide both for piece placement and for the overlay. I placed the vinyl and positioned my first piece. Then I removed the vinyl and basted it in place (I'm in the process of basting it the above photo).

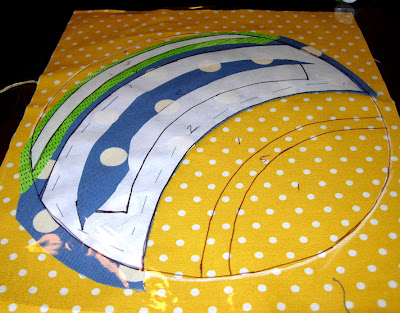
I put the vinyl back on top to check my work (to make sure nothing moved during basting).

Here I'm positioning the next piece (the green one at the top). You can see that I've already appliqued the edge of the blue piece.

I continued in the same manner (position, baste, stitch) until all the pieces were done. It's hard to tell in my poorly lighted picture, but everything is lining up pretty nicely.
After all that, I was pretty intimidated at the thought of just cutting out and appliqueing the shape onto the background fabric (because it's a circle, because there are lots of seams). So I decided to try something different, inspired by a technique for circles that I saw on The Happy Zombie's blog.

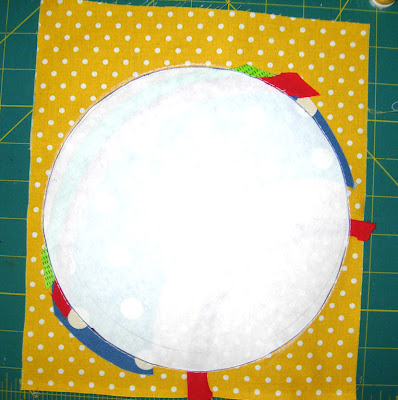
I traced the circle onto freezer paper and ironed it to the right side of my piece (I removed all the basting stitches and freezer paper from the previous applique work). Then I used my sewing machine and basted around the freezer paper shape so that I would have a reference line on the wrong side of the fabric.

I removed the freezer paper and then pinned the piece onto a plain piece of solid fabric (I just used Kona cotton) wrong sides together. (You can see my basting stitches in pink.)

Then I stitched with a normal stitch length just inside of the basted line, all the way around the shape. I backstitched when I got all the way around to secure my stitching.

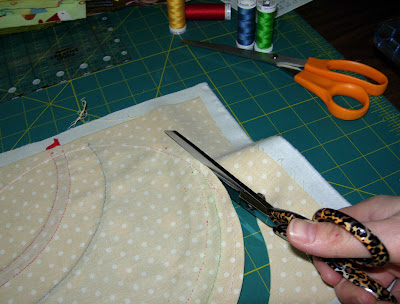
Then I cut out the shape, eyeballing the seam allowance (about 1/4").

I cut a slit in the solid fabric, being very careful to not cut the applique. And then I turned it all right side out, using my handy-dandy that purple thang to help push all the seams out and get the shape right.

After a press, I had a little ball shape ready to stitch onto the background fabric. Except that I forgot to do the appliqued stars. Doh! Fortunately, I didn't have any problems doing it after the fact. But it was definitely inconvenient.
The finished block:

You can't really tell in this picture, but because of the circle technique I used, the shape actually is kind of dimensional and puffs up from the background. The finished block looks pretty cool, I think.


I am totally impressed! That turned out great!
ReplyDeleteVery cool! Good for you. :)
ReplyDeleteThat is so cute :) Also, thanks for showing me how you use the vinyl. You mentioned it in a previous post and I did not quite understand. Thanks!
ReplyDeleteSo cute! Thanks for sharing your technique.
ReplyDeleteI think it is pretty cool too. Great lesson too. Thanks for sharing it.
ReplyDeleteYour play ball is out of this world! Seriously... it's just too cute. Love it! And love you for the shout out!
ReplyDeleteWow. Really Wow. I hate curved piecing. This looks great.
ReplyDelete