So, last spring I decided to take on the position of president of the PTA at my sons' school. The job really ramped up in early August, and since then-- I have pretty much found myself with a nearly full-time unpaid job. Crafting fell by the wayside. Like WAY by the wayside. While it just hasn't been in me to blog at all over the last few months, I have managed to make a few things:
A Concord Tee from Cashmerette Designs:
LOVE this design. I've purchased fabric for two more.
A cute, swingy dress from McCall's 6957:
Check out that stripe matching under my arm where no one can see it! But I know it is there. I don't think this is supposed to be a high-low hem (at least, not according to the line drawing), but that's how it ended up, despite the fact that I did a 1.25" swayback adjustment. It's fine though, because I like it.
An unintentionally sexy top from McCall's 6963:
I think the lowness of the drape is a result of the FBA I did. It is definitely a date night kind of top!
Some wizard vests (from Simplicity 8023), robes (from a lovely pattern from the SewingPatternPixie available through Etsy), and wands (no pattern there):
The accessories-- ties, scarves, glasses, Gryffindor patches, white button-down shirts, toad-- were all purchased.
I can't even get over my boys. They are awesome. And they just. keep. growing.
I also managed a few holiday gifts, including some Kismet Trinket Boxes from Sew Sweetness. (LOVE this design!!! These are seriously so fun to make!)
These are all the medium round size, measuring about 4.75" tall. I put little treats in them and gifted them to teachers and friends.
Finally, I also made some maxi-pads and panty-liners of my own design.
I feel like I should note that I do not generally make a habit of giving feminine hygiene products to my friends/family. My sister-in-law specifically requested these. :P
Relative to my usual output and craftiness... the last six months has been a serious dry spell, creativity-wise. PTA has kind of been all-consuming, leaving very little energy for anything else.
So! My new mantra starting a couple of days ago is "Life Balance." I am going to make a conscious effort to be present with my family, make my home a better place to be (cleaner, more organized), while at the same still doing my PTA job and also taking better care of myself by eating better, making time to exercise again (I miss running!), and plan dedicated crafty creative time-- including, hopefully, a little blogging. No problem, right? But, if I am conscious of these things, maybe it will help me to make better choices along the way. We'll see how it goes.
Hope you have had some wonderful holidays and I wish you a joyful start to 2017!
Saturday, December 31, 2016
Hiatus
Labels:
2016 finishes,
Cashmerette,
Concord,
gifts,
Halloween,
holidays,
Kismet Trinket Box,
M6957,
M6963,
pads,
S8023,
sewing,
The Boys
Friday, July 15, 2016
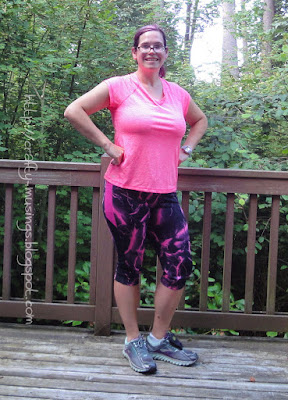
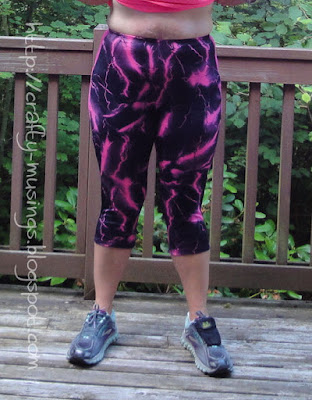
Pink lightning capris (because lightning makes you run faster)
This was actually my first-ever activewear project (finished before the Jalie skort I blogged about earlier this week), but I didn't actually work out in them until this morning when I took them out for a run.
These are the capri length leggings from the Fehr Trade Duathlon Shorts pattern. I've paired them with an ill-fitting (but cheap) top I picked up at Macy's. (Note to self: need to work on making some activewear tops that actually fit!)
For my first attempt at activewear, I figured I couldn't go wrong with Fehr Trade as I have only read positive things about instructions and fit for all of her designs. Sure enough, the instructions were great! Very straightforward and clear throughout. The fit is pretty good as well. Based on my measurements (32" waist, 42" hips), I went with the Medium. They aren't super tight-- there is actually some looseness at the top of my thighs in back which is a little weird, but also fine... I guess I was expecting a bit more compression. Other than that, I feel like they are great all around.
The pink fabrics are from an activewear binge from Fabric Mart last December, both nylon/Lycra blends. The bit of black is some activewear jersey (92% Poly/8% Lycra) I picked up from Fabric.com.
I LOVE the rise in these and the elastic at the waist. Very comfortable and nothing moves.
My one wish is that the side pockets were a bit wider so that I could stash my phone in there if I wanted. And without any elastic or anything at the top edge to help secure it better, I'm not sure I'd trust to put much in the pockets.
As for how they felt-- very comfortable! There was no funky rubbing or anything. Everything stayed put. I'm excited to try them at my next HIIT workout-- I think they'll be great for that too. These are going to get a lot of wear!
Monday, July 11, 2016
Jalie Skort
It took a few months, but I am finally using some of the activewear fabric I picked up last December:
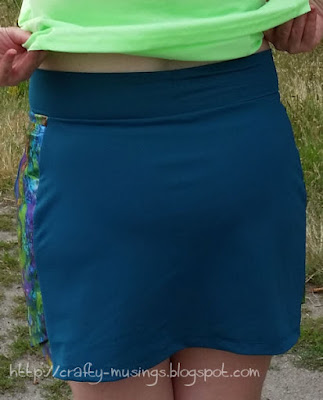
First up is Jalie 2796, the Multi-Sport Skort:
This is my first time using Jalie, and I am really impressed with the drafting and the instructions. The line drawings are particularly well done and offer very clear illustrations of the written steps. I wish though that the drawings and instructions were together... I was having to flip back and forth between the two. But now that I've made them once, I probably wouldn't even need the written instructions-- the drawings would be sufficient.
Based on my measurements, I cut a "W" for the waist and graded out to the "X" for the hips downward. I think the skort fits pretty well-- nothing felt overly tight or loose. I used my regular sewing machine and stitched all of the seams with a narrow zig-zag followed by serging them. I used my coverstitch for all the hems and the pocket.
I went for a run in my new skort yesterday (thus all the sweaty pics) and found them to be pretty darn comfy.
I love that they give the coolness of shorts and that the skirt covers all of the lumps and bumps (which are very evident in the pics of the shorts above). So awesome!!!
Bonus: my Galaxy S5 actually fits in the side pocket! I ran with my phone and it was great-- no bumping or jostling-- it totally stayed in place.
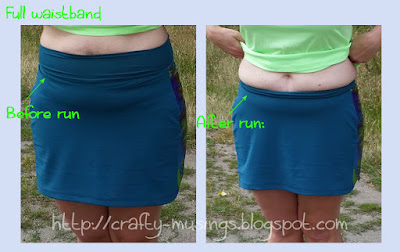
I used the full (wide) waistband and found that as I ran, it just ended up curling over on itself. I'm not sure if that is because I really need a bigger size, or if that is just what happens since there is no elastic helping to stabilize it. It wasn't uncomfortable and definitely still felt secure (i.e., my skort wasn't going to fall off or anything). But I am considering using the low waistband option next time.
The other thing was that after a few minutes of running, the shorts crawled up my legs. While it wasn't annoying enough for me to stop and tug them back down in front of random peeps on the road, it did feel weird. Near the end of my run (when I got to a quiet street with no people), I tugged them back down and after that, they actually stayed in place. So maybe my sweat helped somehow? Anyway-- I'm on the hunt for a solution. Melissa of Fehr Trade suggests in her Duathlon Shorts pattern instructions to try "silicone sock paint" to help the shorts stay in place, so I'm going to start with that and see how it goes.
Tuesday, July 5, 2016
Remakes!
Now that school is out, I've managed to do a bit of sewing. Yay! I started with a few re-makes.
I started with another rendition of Kwik Sew 3513:
Here I've got the top tucked in so you can see the foldover waistband.
I loved this the first time I sewed it up, and my love remains constant. It is a simple, straightforward, and effective design! I again made a size Medium. My only change was to add 5" to the length in order to make it into more of a maxi-skirt. The fabric is a Maggy London ITY knit from Fabric Mart.
The aqua top that I'm wearing with the skirt is another remake of the Maria Denmark Kirsten Kimono Tee. This is the third one I've made (version one | version two). This time I used a poly/lycra jersey knit in a pretty Caribbean blue from Fabric Mart. This is the Large with a 1" dartless FBA (Maria Denmark offers a friendly tutorial for no-dark fronts). Such a fabulous design made even more so because Maria Denmark offers it as a FREE pattern when you sign up for her newsletter.
And here is another Kirsten Kimono Tee:
So the only remarkable thing about this rendition is that I somehow managed to cut two of the same piece... I put back in the photo above, but looking at it now in comparison to the aqua one, I think maybe I cut two fronts? (It was really hard to tell because I also messed up in cutting the neckline a bit... sigh.) Anyway, I didn't have enough fabric to cut a new back. While it definitely doesn't fit quite right, it actually is in fact wearable. Phew! The fabric is another ITY knit from Fabric Mart.
All of these pieces are now in regular rotation in my wardrobe. Tried and true!
Thursday, June 30, 2016
Twinsies: Stars on a Cloudy Day
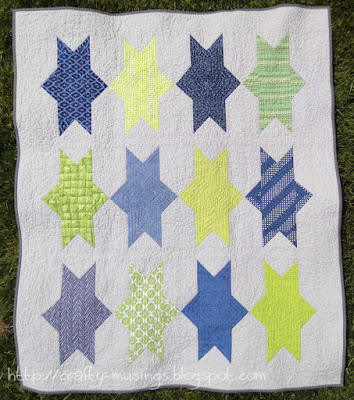
Here is the second of a pair of quilts I recently gave to a friend who had twin boys:
Like the other quilt I made, this design is from the It's Sew Emma Patterns book, Fat Quarter Style, and is called "Sparklettes." Since I put the stars on a grey background, I named my rendition, "Stars on a Cloudy Day."
Again, I used fabrics from my stash and used Seahawks-inspired colors. This is the Crib size (finishing at about 40.5" x 47.75").
The quilting was all done using Aurifil Mako 50/2 in Dove (#2600-- a soft grey). I'm not thrilled with how the stars turned out-- but they are at least all relatively consistent, so I like to think that all the funkiness looks intentional.
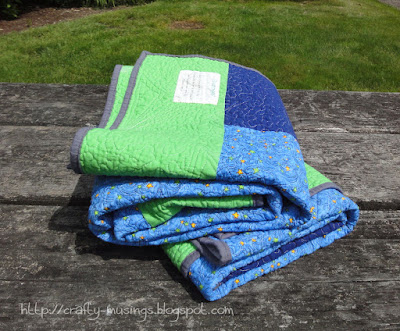
Gotta love a scrappy back! I've had that sky blue star print in my stash for at least 15 years now. It is so good to finally put it to use!
And the label.
I really wanted each quilt to be unique but still similar and I am really happy with how they pair together.
My friend was so happy to receive them. I think these quilts will get much love from her boys.
Wednesday, June 29, 2016
Twinsies: Firecrackers
I recently completed a pair of quilts for a friend who had twin boys last fall and I finally managed to gift them this month! In this post, I'll share the first of the two, which I call "Firecrackers."
The design is from the book, Fat Quarter Style, by the fabulous folks at It's Sew Emma Patterns. It is called "Plume"-- but I went with "Firecrackers" because after I quilted them, the grey parts made me think of little explosions. The pattern is great-- very clear and accurate instructions throughout. I love that the book gives size options, too! This is, appropriately enough, the Crib size (finishing at about 40.5" x 50.5").
The fabrics were all from my stash. Since I didn't know if mama had picked out any colors or anything, I went with a Seahawks palette. I felt confident that would be a safe bet.
The quilting was all done using Aurifil Mako 50/2 in Dove (#2600-- a soft grey). Again, I found myself inspired by Angela Walters' Craftsy class, "Dot-to-Dot Quilting," and I employed her techniques to quilt the grey areas. That Angela Walters is so dang awesome! I find myself continually inspired by her work and teachings.
Scrappy back for the win!
And a label.
Next post, I'll share quilt number two!
Tuesday, May 24, 2016
A wallhanging for springtime
It took a couple of years, but I have finally completed my Edyta Sitar wallhanging, from her book, Seasonal Silhouettes.
This is the April design. Hand applique, with a bit of embroidery (the centers of the purple flowers) and one bead (for the robin's eye). My only other change to the pattern was to piece the background. The completed wallhanging is about 18" x 22".
I really need to find myself another applique project. I do love applique.
I machine quilted it using Aurifil thread in a couple different colors... I can't remember which ones though. Doh! (The perils of waiting so long to blog about a project!)
I finished quilting and binding it last fall. The label reflects that date. I put it on before I realized I forgot the hanging tabs. Oops!
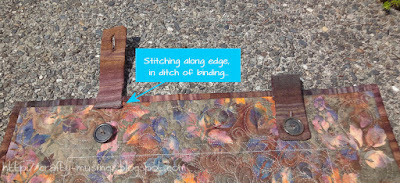
So, it sat around for a few months until I got motivated last week and added the hanging tabs and buttons. I took a strip of fabric, folded it lengthwise (right sides together) and stitched around one short edge and the long edge. Then I turned it right-side-out, added a buttonhole on the finished end, and then stitched it to the back of the quilt, trying to keep my stitching right in the ditch of the binding.
Since I couldn't actually use it until I got the hanging tabs on there, I am calling this one a 2016 finish.
"Spring Showers" now resides in my hallway. At least, it does for now... I still have visions of having a lovely collection of seasonal wallhangings to switch out. :)
Thursday, May 19, 2016
Chevron Appleton
I think this is it! The last unblogged project from 2015!
This is my Appleton Dress from Cashmerette. It is a classic wrap dress. I stitched it up a couple weeks before Christmas using a happy ITY chevron print from Fabric Mart.
If you haven't heard about Cashmerette patterns yet, they are designed for curvy ladies, size 12 and up, with cup sizes going up to H. No FBA required!!! Woo! My rendition is a size 12, G-H cup with 3/4-sleeves. The only alteration I made was to chop 4" off the hem.
The instructions were straightforward and everything went together without a hitch. And I love the result! I feel so pretty when I wear this dress. Sexy, even! That V-neck is no joke... it is deep. And, while it is secure, I have to be very careful about which bra I choose, as anything with a wide bridge ends up peeking out after a few minutes. Fortunately, I have one bra that works pretty well. Of course, a cami is always an option as well, and would lend to a bit more modesty in general. I haven't tried that approach yet though.
I love this dress. I've been eyeing other potential fabrics, but haven't found the perfect one yet. Hopefully, soon! I'd love to make a short-sleeved one for summer!
Tuesday, May 17, 2016
Sit & Stitch Pincushion
This is yet another completed project from last year (only a couple more left, I swear!).
It is the "Sit & Stitch Pincusion" from Cindy Taylor Oates (of Taylor Made Designs). My mother-in-law gave me the pattern for Christmas. I was so smitten with it, I jumped in and finished one that weekend.
Shopping my stash, I found a happy array of fabrics and and then got to work.
I did a couple things differently than the pattern suggested based upon the supplies I had on hand:
The whole thing came together in an afternoon.
It is designed to drape over the arm of a chair or couch. I think it is going to be perfect next time I'm downstairs doing some stitching in front of the television! (Note to self: find a project to work on in front of the tv!)
It is the "Sit & Stitch Pincusion" from Cindy Taylor Oates (of Taylor Made Designs). My mother-in-law gave me the pattern for Christmas. I was so smitten with it, I jumped in and finished one that weekend.
Shopping my stash, I found a happy array of fabrics and and then got to work.
I did a couple things differently than the pattern suggested based upon the supplies I had on hand:
- Used woven interfacing (Pellon SF101) rather than the Pellon 808 called for in the pattern.
- I made my bias binding the old-fashioned way as I didn't have a bias making thingy of the correct size.
The whole thing came together in an afternoon.
It is designed to drape over the arm of a chair or couch. I think it is going to be perfect next time I'm downstairs doing some stitching in front of the television! (Note to self: find a project to work on in front of the tv!)
Subscribe to:
Comments (Atom)


