So, it doesn't quite fit me the same as it does him (my head is a little bigger), but you can kind of see that it sits in the middle of the back of my head. What you can't really tell from my lovely self-portrait is that it also poofs out in the back like a country bonnet. Not so cool looking on a little dude. It was also kind of tight around his face as well. Now, this was not entirely a surprise, as I had read in multiple critiques on Pattern Review that the hat ran small. I actually added some width when I cut out the Large size, just to be safe. But, I did not realize that it ran small in length as well, and I did not add for that. Ugh.
Here's the hat before any alterations:

So I was completely stressing out about having to re-make the cursed hat (which I had already had to take apart once because I put the eyes on the back of the head instead of on top... the perils of late-night sewing!). But then one of the other preschool moms said to me, "Why not just cut out a crescent and attach it to the bottom?" Shazzam! That gave me the inspiration I needed.

I took my patterns and added about 2.5" of length to them (not at the bottom, but a little higher, to make sure that extra length would be added in the face area as well as in the back). I cut out the bottom section of those patterns and then cut my fabric.

I basted a line where the new seam would be and chopped off the bottom of the completed hat, leaving a 5/8" seam allowance.

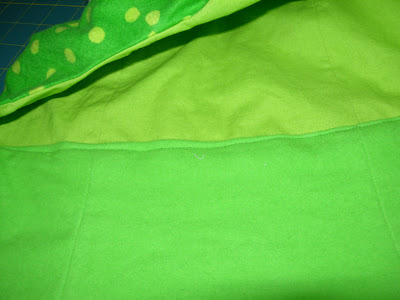
Next I stitched the new pieces together just as I had done in making the original hat. Then I stitched the outer to the lining right-sides-together but was careful to fold down the seam allowance on the lining (pictured above).

I turned it all right-side-out and pressed. Then I stitched the outer layer of the new bottom section to the original top, being careful to not stitch through the lining.

Then I used the uber-fabulous double-sided water-soluble tape to hold the lining to the seam. I wanted it secure to ensure that when I did the topstitching on the outside, that the stitching would catch the lining and fully enclose the seam.

It's not pretty-- but it's on the inside (where no one is going to see it), and it worked!
And here's the new and improved (lengthened) frog hat:

And, just so you can get an idea of how it fits now:

So much better! And (big bonus!) I didn't have to re-make it all from scratch!
Of course, the real trick is going to be keeping it on the Boy's head for pictures and trick-or-treating!


Nice fix!
ReplyDeleteGreat job and improvisation. I often think Simplicity does not actually test their patterns to see if they fit real kids. Last year I had to add a zipper to get the outfit over Myra's head.
ReplyDelete/cheer :) I bet that was stressing you out, good job.
ReplyDeleteGenius!
ReplyDeleteNicely done! I have such a hard time with patterns like this. Give me a nice flat quilt block any day...
ReplyDeleteAwesome! I love that little crown. You know, we really need to get the kids together in their costumes - the princess needs a frog to kiss. :-)
ReplyDeleteOh my goodness, the things we do for our children. You are so smart to figure out something totally different. I think I would have just thrown in the towel. Great job!
ReplyDeleteHave fun trick or treating! Be safe.