So cute!!!! That's what I thought when I saw the free pattern from Wee Wonderfuls for Pointy Kitty. I knew that someday, I would need to make one.
Initially, I had thought to give this as a gift to one of our baby friends turning one. But as I stitched and saw how it was coming together, I realized that it really isn't a good baby toy. Indeed, it is a much better adult toy! And I have just the right person in mind who just so happens to have a birthday in a couple of weeks. Yay!
The tutorial was pretty tricky for me, as I have little experience with plush. The pattern is simple enough, just four pieces, but the directions were pretty brief. I was doing fine until I got to the point where one is supposed to begin handstitching seams shut. Then I started to get confused about which seams (all? just part of some?)it was not at all intuitive for me. I ended up stitching everything closed, thus resulting in a kitty body and a faceless kitty head. I think this was right, but I'm still not entirely sure. Then I had to figure out how to blindstitch the head onto the body. I'd never blindstitched anything that wasn't flat. The head and body were definitely dimensional. Suffice to say, my stitching wasn't the prettiest on the neck.
The next challenge was the face. I started with the nose and attempted a blanket stitch as was suggested in the instructions. This just didn't worka combination of the thread being too thick, my stitching being quite horrible, and my being clueless as to how to go about doing it when all I could access was the right side of the fabric. So I decided to glue it. Out came the Unique Stitch and I glued the eyes and nose. Then I felt really lame. So I got out some regular thread and did a running stitch around the nose. Yay! It worked! So much better!!! I then sewed the buttons on the eyes (again, tricky since I could only access the right side). By the time I got to the stripes on the head, I was feeling much more confident about my stitching. I decided against stripes on the back (just thought they would overwhelm the delicate pink kitty). Finally, I attempted a little face-- but it just looked icky, so I took it out and decided Pink Pointy Kitty could be the inscrutable one.
With this first attempt under my belt, I have a much better understanding of the pattern and know I can do better. I foresee more Pointy Kitties in my future. So cute!
Monday, March 31, 2008
Sunday, March 30, 2008
Dear Baby Jane: B-1
Block number/name: B-1 “Batchelor Buttons”
Date completed: March 30, 2008
Number of pieces: 5
Notes on block: This week I bought some mylar circle templates. The closest-sized mylar circle was 1/8” bigger than the block circles. But, after trying to cut out my own freezer paper circles (I just am not good at cutting circles out), I decided to go ahead and just do the buttons at a bigger size. The technique was a new one for me. I followed the tutorial from Susan Brubaker Knapp. The product I used was different than hers, but it worked pretty well, I think, even if my circles aren’t perfectly round (but I think next time, I can do even better). I then appliquéd the circles onto the background and trimmed away the fabric underneath so it won't show through.
Though I like how the block came out, I can’t help but compare it to the book, and I start thinking my buttons are too big. But then I think to myself, they’re my buttons and it’s going to be my quilt. So, the big buttons stay.
Saturday, March 29, 2008
Shop-Hop-A-Rama!
Yesterday and today I continued on the Tri-Country Quilt Shoppe Festivaland I managed to make it to all 13 shops on the hop! I'm so glad I was able to do it. I got to visit a bunch of great shops and I now have all the block patterns, so I can create my own wonderful "Garden Stroll" quilt. Each shop featured the same 13 blocks in a quilt and it was very inspiring getting to see how each quilt was different, not only in the fabrics used, but in the settings, the embellishments, and finishing. Of course, I failed to take any pictures, but you can check out one version on Fabric-Etc's Blog.
And, there was much purchasing of stuffs:
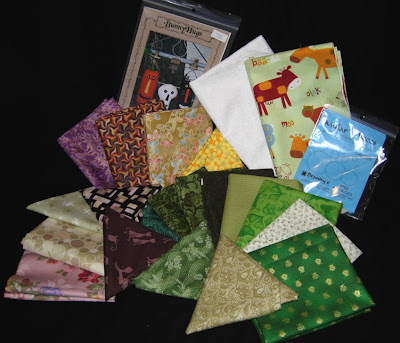
Our first stop yesterday was at The Needle & I in Everett. I've visited this shop pretty frequently as it's conveniently just down the street from where the boy has his Kindermusik classes every week. I like how bright and open it is. They have a nice selection of current fabric collections, and always seem to have a wonderful array of samples. After lunch, the boy and I headed to Arlington and the Quiltmaker's Shoppe. The samples there were just amazing, and it looks like the classes they offer are pretty cool and truly cater to quilters of all levels (and it's the first store I've been to that actually offers a Baltimore Album quilt class)(I wish I lived closer!). Our last stop of the day was Aunt Mary's Quilt Shop in Smokey Point It is located in a pretty non-descript strip mall, but stepping inside is like entering another world. Bright, warm, full of vibrant colors, contemporary fabrics, and super-fun samples hanging throughout.
Today was a solo adventure, as Keith and the boy decided to spend some quality time together at home. So I made my way north to the final six shops. My first stop was at Tangled Threads in Lynden. I have to say that this was the most welcoming shop I visited in this hop. As I walked through the door, I was immediately greeted with a big smile and hello and a brief introduction to the store (they had shop hop specials and games going on). Everyone there was really excited to be participating in the hop and had such enthusiasm and fun energy. Just what I needed after a long drive. The next shop was just a few blocks away, Calico Country. Their focus seemed to be on traditional fabrics and styles. The last Lynden stop was Folktales. This was the first shop I've been to in the area that is really focused on traditional and folk designs. It was a very different experience than any of the other shops. But the samples were gorgeouslots of stitchery, wool, and handwork. They also featured my favorite rendition of the shop hop quilt.
The Bellingham shops were next. At Lynda's Quilting and Needle Art I found a friendly staff and a nice array of fabrics. They actually sort their fabrics all by color, as opposed to grouping by collection. Sometimes I find it hard to visualize outside of a collection when everything is grouped together (because they just all go so perfectly together!), so it was just a nice change to have such an integrated experience. Next up was Fabrics-Etc. They carry both quilting and fashion fabrics, and I love that their store samples reflected that. Since I'm both a quilter and a sewer, it was extra fun getting to see the garments along with the quilts. The final shop on the hop was Fourth Corner Quilts. This might have been my favorite stop on the hop. The store focuses primarily on the contemporary and modern styles and collections. But mainly what I loved about it was how the fabrics were displayed. Coordinating bolts were staked and draped down the sides of the bookcase displays in a waterfall effect that was both beautiful and a great showcase for the designs. They also had round displays where the fabrics were actually draped from the boltagain really showcasing the wonderful prints in a way that just being wrapped on a bolt can't compare to. They had a section dedicated to Amy Butler, another to Kaffe Fassett, another dedicated to Asian prints, and many more. And every section featured a number of samples and patterns. Lots of juicy inspiration to be had. It's probably a good thing that it's so far away.
I enjoyed this hop. But overall, it felt as if the shop hop was an afterthought for most of the shops as opposed to a main event. I miss the Bluebonnet Patchwork Trail Shop Hop that I used to do in central Texas every year. Maybe it's a Southern hospitality thing, but on that hop, the shops really seemed to get involved and excited (offering specials, demonstrations, trunk shows, and drawings, in addition to a shop hop quilt), and every single one offered refreshment and treats. Still, I got to visit a bunch of shops I'd never been to before, and I had a good time. I look forward to next year and seeing how it develops.
Thursday, March 27, 2008
Shop hopping
Today, the boy and I embarked on the first ever Tri-Country Quilt Shoppe Festival. We visited four quilt shops today. I'm hoping we can visit three more tomorrow, and then try and get to the rest on Saturday.
I love shop hops not only because it's a fun excuse for getting out and seeing some of the area (yay, road trip!), but also because it offers the opportunity to check out a bunch of different quilt stores with the added incentive of free stuff. This particular hop is offering a block pattern at each shop, which can be combined together to make a beautiful quilt. Mostly though, I enjoy visiting each shop and learning how each is special and uniquethe fabrics (though there is a lot of overlap here), the styles, the displays, and the miscellaneous offerings (local artists, crafted items, services, etc.). It never ceases to amaze me how many ways people find to differentiate their stores. I also find it pretty inspiring, as I someday dream of opening my own quilt shop.
After lunch, the boy and I drove to Anacortes. (This was good, because it was a nice long drive and the napless wonder finally took a rest.) Our first stop was The Quilt Shop. As soon as we walked through the door, who should I see standing at the front counter but a friend I haven't seen in more than four years... crazy!!! I enjoyed browsing through their wonderful array of batiks and bright contemporary prints. My friend and I spent a little time catching up at the back of the store before heading out together to the next shop. A couple blocks away was Fabrics Plus. It's a small store, but they pack a lot in there! The boy was entranced by the rick-rack display at the back of the store. I really wish I had taken a picture.
With fond farewells to my friend, the boy and I had a snack and then headed off to Mount Vernon and Calico Creations. They had a nice array of reproduction prints and current fabric collections. The shop is also in a very nice space with lots of room between the displays (good for a little boy to move about in without causing too much trouble).
Back to the car, and then a drive through the snow(?!!) to the last stop today: Cotton Pickins' in Stanwood. This store really seems to focus on traditional styles. There were lots of reproduction prints, Thimbleberries, and feedsack-style printsan interesting dichotomy there because the shop just moved into a brand new building with very modern architecture. But I could kind of tell they just moved-- the walls were probably filled in the previous space, but this one is huge, so it looked a little bare. It will be interesting to see how they grow into and use the space in the future.
Of course, I did not leave the shops empty-handed:
Hmmm... which one doesn't really belong? It's the one that the boy picked up and started chewing on. :P
Wednesday, March 26, 2008
Dear Baby Jane: B-3
Block number/name: B-3“Mirror Image”
Date completed: March 25, 2008
Number of pieces: 8
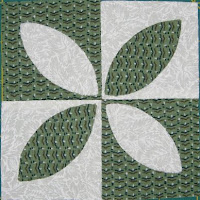
Notes on block: I was feeling pretty intimidated by this one. I’ve machine pieced plenty of curved pieces, but hadn’t ever handpieced any. And, for whatever reason, the handpiecing on this one worried me.
There was also a false start on this one. Anina (very wisely) suggested that extra seam allowance be added to each of the outer edges of the block, to allow for wonkiness and so the block could be trimmed down to perfect size at the end. I did this, but then also added to the curvy pieces (oops!). This meant that the first corner I put together had a crescent that was ½” bigger than the other piece. Crazily, I got them to fit (though it was rather wonky). I was even thinking I’d keep it, and then promptly trimmed off the seam allowance on one side—rendering the corner unusable. Apparently a do-over was just meant to be.
After the initial snafu, the block went together without a hitch. And handpiecing curves? Not so scary anymore. :)
Saturday, March 22, 2008
Dear Baby Jane: D-3
Block number/name: D-3 “Jason’s Jacks”
Date completed: March 21, 2008
Number of pieces: 2
Notes on block: I started this block and then found myself just staring at the thread I was using. I kept thinking that the thread was too dark. I ended up picking out about 2" of stitching and went and found new thread in a lighter color. I really dislike double work. On the bright side though, I feel as if my appliqué skills are continuing to improve. Still haven’t mastered the art of the point, but I think they look a little more on the pointy side this time around. I’m finding myself really beginning to enjoy hand appliqué. So much so that this last week I was eagerly anticipating what the next appliqué block would be. For a girl who has felt so machine-oriented for so long, this has caught me rather by surprise.
I worked on this block as I was “watching” a movie: Elizabeth: The Golden Age. This may have been a mistake, since I suspect the best aspect of the movie were the costumes, and I would only really look up every so often. Oh well.
Friday, March 21, 2008
Easter basket
Having nearly run out of thread for my reversible embroidery quilt class quilt, I made a trip to Keepsake Cottage Fabrics yesterday afternoon. So I bought some thread... and then I saw the way-too-cute Easter fabric right by the cash register and just had to buy a yard. But I don't feel too horrible because inspiration struck:
Since the boy is going to a neighborhood Easter egg hunt on Sunday, it seems as if a basket is a necessity. And how could I resist that bunny fabric?
I'm really happy with how it turned outand pretty proud too, because it's my own design! :) I enjoyed making it, so I think another is in my future. Another baby friend has a birthday in a couple of weeks, and I think a basket with a couple goodies might just be the perfect gift.
Thursday, March 20, 2008
I can't be stopped!
As if I need another craft. But when I saw C's holiday scrapbook that she created for her son, I decided that I have to have one too. It's just a little 8" by 8" book designed to feature Santa pictures and Christmas lists or other miscellaneous memories. So, essentially, for each year there's Santa picture on one page and a facing page to place a wish list or whatever. She built it so that the pages are all designed and ready to goget picture/list, stick on page, you're set.
Since the boy's Santa picture from this last Christmas (his first) is still just kind of sitting out, leaning against a frame (not even in one), the idea of having a permanent home to keep and display it really appealed to me. But I don't know how to scrapbook. Scrapbooking is a great, mysterious thing. C graciously has offered to guide me and some of the other moms in my PEPS group in creating our own Christmas scrapbook. She sent a supply list today, and I couldn't wait to procure the necessary stuffs (especially since JoAnn's is having a sale right now):
So, sometime in the next few weeks we're all going to get together at C's and do this thing. And I can't wait!
Wednesday, March 19, 2008
Dear Baby Jane: A-6
Block number/name: A-6 “Uncle Homer”
Date completed: March 18, 2008
Number of pieces: 9
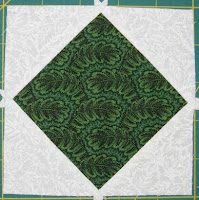
Notes on block: Gah! Just after writing about my last block and my confidence with seams… This block finished at about 5 1/8” for me. Fortunately, I found my trusty 5” Dear Jane square ruler and was able to square it up and trim it down pretty evenly (unlike my last attempt at trimming down, without said ruler). I really love this green fabric. I didn’t even realize I had it until I was thumbing through my stash, looking for a new background fabric. Happy surprise! And this is my first block using a different background as well. Not that anyone is likely to notice but me, since it is such a subtle change from the other background. But I really like the idea of mixing up the background fabrics—or at least, using variations of the same type of white-on-natural. This might partly be because I don’t have enough of that original background to do the whole quilt. It was another one of those moments where I thought, “I’ll get started and if I like it, I’ll buy more!” Since I didn’t really even get going on the quilt until 4 years later... well, so much for that idea.
Friday, March 14, 2008
Dear Baby Jane: A-7
Block number/name: A-7 “Dad’s Plaids”
Date completed: March 14, 2008
Number of pieces: 8
Notes on block: I don’t know what it was about this block. Technically, it didn’t seem like it would be too bad—straight seams, no weird shapes... but yet, I had a very difficult time with it. Not so much with the sewing (though I really need to learn how to do better appliqué points), but with the prepping. Anina’s block turned out so beautifully, and I really loved the way she utilized her directional print (just as Jane Stickle did in her original block). I wanted to replicate that. And it felt as if it took forever! I think I spent close to an hour prepping this block. Which, as I’m writing now, doesn’t seem like that long, but yesterday—when I was feeling overwhelmed and when I was actually doing it—felt like a very long time indeed.
Last night was Bunko. It was my first hosting gig. So nervous! But, after lots of over-preparation and a couple glasses of wine, it was a lot of fun. Once everyone left, I was able to start work on my block. I think it was about midnight when I started basting. (Another first—I’d never basted before, but after seeing how it worked in Anina’s example, I gave it a try. It worked really well). I had to stop right around 2 because I couldn’t see past all my yawning. At that point, I was three leaves down, one to go (plus a few straight seams). I was able to complete it pretty quickly tonight after Logan went to bed. I think it turned out pretty well.
I’m feeling really proud about my seaming, because it ended up at 5” square and I didn’t do any marking. All of those hexes I’ve been piecing have really given me some great practice! But I definitely need to research how to deal with appliquéing outward points… they just aren’t as, well, pointy as I’d like them to be.
Thursday, March 13, 2008
So many projects...
Once I get motivated, apparently I have no self control at all. I currently have my quilt class, my Dear Baby Jane project, my Grandmother's Flower Garden project, the fairy quilt that still needs to be basted and quilted, and my Journey to Light quilt (I'm not even sure I should count this one since it's been more than a month since I've made a block). And, to top it off, I have a bucket of freelance work I've accepted that will likely fill up a good chunk of my free (sans boy) time. So now the question is: how am I going to keep it all going? Because I really want to keep on working on all of them.
Feeling a little overwhelmed at the moment. However, this has not stopped me from prepping the next Dear Baby Jane block: A-7 "Dad's Plaids." And now I must exercise self-restraint while the boy naps and get some cleaning done. Hopefully, I'll get some time to sew tonight after Bunko.
Monday, March 10, 2008
Dear Baby Jane: D-13
This is one of the three blocks already complete prior to starting anew on this Dear Baby Jane journey. Here's my block journal entry for it from 2004:
Block number/name: D-13 "Field of Dreams"
Date completed: 9/29/2004
Number of pieces: 5
Notes on block: 9/28/2004 This is one of the two first blocks I've chosen as a starting point (the other is L-8). I've printed if off onto freezer paper and am going to try piecing it by hand (eep!). There's no real rhyme or reason as to why I picked these twopartly because they seem do-able, and partly because I wanted to kind of randomly pick blocks throughout the quilt. I haven't decided if I want to use the Stickle layout, but I feel like that may be the way I want to go. I don't want my quilt to be the same as hers, but in some ways I kind of do feel that way. I guess we'll see.
9/29/2004 Got home from work tonight and jumped in on the block. Cut out the pieces, traced my seams and then jumped in. I'm finding that I don't know much about needles (though I have a bunch), and am struggling to find one that feels good. Anyway, I put it all together and now I have a finished block! It's not quite 5" x 5" (more like 4 7/8" x 4 7/8")but pretty close, and I feel pretty good about it considering it's my first one!
Sunday, March 9, 2008
Dear Baby Jane: C-9
Block number/name: C-9 Jane’s Tears
Date completed: March 8, 2008
Number of pieces: 5 (or maybe 2)
Notes on block: I say "maybe 2” because I used reverse appliqué on this block. I started with two pieces of fabric layered together, and just cut through the first. But because there are four separate sections that I had to sew, I feel like I can still say 5. Anina suggested that reverse appliqué would work well in this block, particularly if one wanted to use a dark background, and light-colored tears, and so that’s why I gave it a shot. She was right! It did indeed work very well.
I almost want to re-name this block “Restful Day.” Keith took care of the boy in the morning and let me sleep in. I woke up just as the boy was going down for his nap. So there was quiet in the house, and I got to sit on the couch in my pjs and sew. I completed the block, and then later in the afternoon got to have a much anticipated (and long-awaited) date night with Keith. It was a restful and wonderful day.
Friday, March 7, 2008
Dear Baby Jane: B-13
Block number/name: B-13 Four Corner Press
Date completed: March 7, 2008
Number of pieces: 9
Notes on block: Yesterday, via the Sew, Mama, Sew! blog, I found Dear Baby Jane: A Quilt Journal—a woman embarking on her own Dear Jane journey, and who invited others to join with her through her blog. How cool is that? It’s been nearly 4 years since I made my last block (and I only ever managed to complete 3). Her plan is to do two a week. My enthusiasm and desire to make this quilt has been rekindled. I promptly went and cut out my first block and completed it in the wee hours of the morning.
I handpieced, and it turned out pretty well, except that it ended up about 5 1/8” square instead of 5”. I went ahead and trimmed it down a little, though I suspect that may have been a mistake. I think the sashing between blocks will accommodate small size variations like that. Ah well, next time, I won’t do it. And next time, I won’t decide to trim at 1:30 in the morning. :P
Even after four years, I’m unsure what I want to do. But I’m just going with my initial instinct and staying with the greens and the cream-on-cream for the moment. Sometimes, a two-color Dear Jane quilt sounds really appealing. Other times, I'm just not sure. I really like the way Jane Stickle used color in her quilt, trip-around-the-world-style. But for nowgreen is good.
Dear Jane
Back in 2004, I started a making blocks for my own version of Jane Stickle's 1863 quilt, known popularly as the "Dear Jane" quilt. I managed to complete three blocks before somehow getting distracted and losing my way. Then yesterday, Sew, Mama, Sew! featured a link to a new blog, Dear Baby Jane. Anina is embarking on her own Dear Jane journey and has started a blog and invited others to join her. Suddenly, my own Dear Jane juices are once again flowing! Even better, she only began this weekso I'm not even that far behind! Woo hoo!
I promptly sent her an email asking if I could join in and take the journey with her and the others. And then I went and cut out and sewed my first block.
When I made my blocks way back when, I actually created a journal page for each one and wrote a bit about the making of the block. Seeing those pages now is so cool! And so I am going to continue that tradition, but not only on paper, but also on my blog. Anina requested that people who have already completed some blocks wait to post them until she posts each one. So I'll wait and post my original entries as we get to them.
Hopefully, keeping up with Anina and the others will help me to stay motivated.
Thursday, March 6, 2008
Class: Reversible Embroidered Quilt
Last night was the first class in making a "Reversible Embroidered Quilt." The class is at Bernina Northwest. Unfortunately, it's a little ways from where I live and traffic was not my friend, so I got there a half hour late. On the bright side though, the instructor was very understanding and welcoming. :)
After going to class, I'm even more excited about this project. Many of the techniques are new for me, and I'm anxious to see how it all comes together. The project is a large crib/small lap size quilt, made in a quilt-as-you-go process. This will result in a reversible quilt, with both front and back having blocks and sashing.
I've only ever tried one other quilt-as-you-go project (my African Bargello quilt, pictured above), and I was not thrilled with the results. But this class is featuring a version of the technique that works on a block-by-block basis, as opposed to piecing the quilt together on top of a completed back—so I won't have the same issues with dealing with the awkwardness of piecing on a big ol' background, or with funky folds appearing as I sew.
I'll be using my embroidery machine to do the quilting (it is the "reversible embroidered quilt" after all). I'm also looking forward to doing a binding by machine (I've always used handstitching to finish my bindings).
Another nice thing is that we have 2 weeks between the first and second class meeting. Having this extra time will be very helpful. Now I just have to finalize my fabric selections and get going!
Wednesday, March 5, 2008
Learning is fun!
Yay! I'm signed up for a class! Can you tell I'm excited? This will be not only the first class I've taken since the boy came along, but the first since we moved back to the Northwest (September 2006).
I really enjoy taking classes. In the past, I just liked having a reason to get out and be social. I've always been kind of a hermit homebody, and having a purpose really helps get me motivated and out of the house. Since the boy came along, I've really been that way. Sure, we go out to our various activities and mom's groups, which is great. But those groups are more for him, and not me. Though I get some social interaction, it's always tempered with the constant supervision and (especially lately) chasing down of the boy. So really, it's kind of pseudo-interaction as it is nigh impossible to have any kind of sustained conversation.
Anyway, not only will this get me out of the house, but I'll also get some much-desired social interaction with like-minded crafty people. Woot! As a bonus, the class I'm taking is on a technique I've not used before, so I'll no doubt learn some stuff too! That's the other reason I love taking classesthe learning aspect. Even in classes where I'm not necessarily learning new techniques, I always pick something up; it might be a tip, a hint, an experience with a new tool, or even something completely out of left field. But there's always something.
First class is tonight!
Subscribe to:
Posts (Atom)