I don't have the earliest design drawings, but these were the last ones. My goals:
- Echo the organic symmetry of the print fabric (which was also captured so beautifully by Kris in her flying geese border).
- Use the designs of the print fabrics to inspire the shapes that I would use.
- Utilize some of the open space left in Kris's border to help create a sense of flow from hers to mine.
- Make it look cool.

I did it on freezer paper since that was the only paper I had that was big enough. Once I had it all drawn out, I used it to trace freezer paper templates for all of the leaf and flower shapes. I also created lots of bias tape to use for the vines. This was my first time trying out a continuous bias creation technique (I used a tutorial from Make It Modern and a video tutorial at Erin Compton Design as my guides-- both were super-helpful). It was a little bit labor-intensive, but it worked really well and I didn't have to cut a large diagonal swath from Anne's fabric-- I only had to cut off a small chunk (I think I used 1/3 yard). And there is a ton of bias left over (whoops!). So I guess if anyone else decides they want to do vines, some will be ready for them!

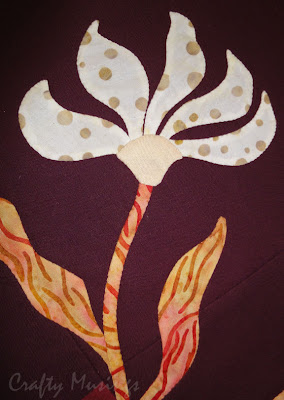
I started by reverse appliqueing the centers of the bulb-flowers.

Then I needleturned all of the leaves and the other flowers to the background. Next I added the vines. Lastly, I added the base of the white flower and the bulb-flowers at the ends of each vine.
This was my first time designing and executing an applique border and I definitely learned a couple things.
- Don't use so many points! There were a lot of pointy-points in my design-- the leaves, the ends of the bulb-flowers, the petals on the white flowers... I'm not sure what I was thinking there as I'm not very good at executing pointy points. But, they got done (albeit, they maybe aren't as pointy as I'd originally intended).
- Create the border wider than needed and then trim down after completing the applique. I didn't do that, and my border is a little wavy because I pulled the fabric a little tight at some spots as I worked. It shouldn't cause a problem for Zonnah (who is adding the next border and has mad skillz), but I'll definitely keep it in mind for future projects.
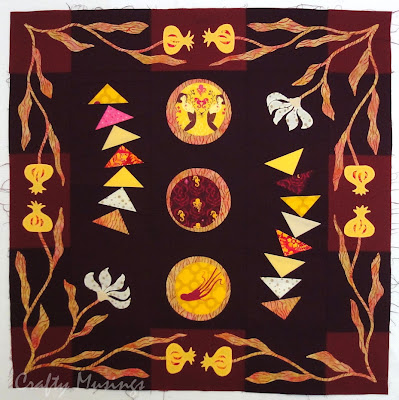
And the big reveal:

Yay! I think it turned out pretty cool. Hopefully, Anne will like it too.


Okay, Robin. You have outdone yourself yet again! I am literally blown away by this. I am so in love with what you did and how it tied into Kris' flying geese. This is just beyond anything I would have ever dreamed of and I'm in love with it! Thank you SO much.
ReplyDeleteTruly amazing! It's incredible to see how you turned a shell of a concept into something spectacular. Your applique looks great. Congrats!!
ReplyDeleteWow. You and your applique skills are A-M-A-Z-I-N-G! I can't get over how well you designed the applique. Just amazing!
ReplyDeleteFab, fab, fabulous!!!!!!!!
ReplyDeleteO EM GEEEEEEE! You really outdid yourself this time. you did a wonderful job!!!
ReplyDeleteWowee! that is totally cool! Excellent job. I think she will like it a lot.
ReplyDeleteYou captured it beautifully! When I saw the hand drawn All I could think was they looked like under water!! Well hello they are!! LOVE it!! I think the elements compliment each other very nicely!!
ReplyDeleteIt arrived safe and sound :) I was blown away seeing it in real life! I think I know what I am adding and I hope it does your flowers justice :)
ReplyDeleteOh, and even my husband liked what you did. I don't get comments very often about the quilts so you should feel pretty special :P
A wonderful addition of applique and one of your own design to boot!
ReplyDelete