I finally took down my nativity quilt! (Please don't judge me... I just didn't have another quilt to replace it, so I didn't want to take it down and stare at a blank wall all year.) It has now been replaced by this:
This much more seasonally appropriate little wallhanging was made from a pattern by Pieces of My Heart called, "Crazy Jack." It was super quick and easy to make. The front is made entirely from one charm pack of "Pumpkins Gone Wild" by Sandy Gervais (it used 44 charm squares plus a little extra for the nose).
After making the front, there was one charm square remaining. I used it to make the label. I was able to pull the binding and backing from my stash. You can get a glimpse of the backing behind the label above. It is a fun Michael Miller print.
Here it is on it's spot on the wall. The hanging rod is fixed, so a regular sleeve wouldn't work. I added three button tabs to the top edge of the quilt to use for hanging.
A couple of nights ago, Keith and I carved up our pumpkins. Mine was inspired by "Crazy Jack." So I had to take a picture:
Happy Halloween!!!
Sunday, October 31, 2010
Friday, October 29, 2010
Blogger's Quilt Festival: Autumn House
Last month, I finally completed "Autumn House," a BOM quilt from Bunny Hill Designs! Woo hoo! I've been super excited to share the finished quilt with y'all, but decided to wait until Blogger's Quilt Festival for the big "reveal."
The BOM subscription from Shabby Fabrics was a Christmas gift from my awesome husband. I started as soon as the first block arrived in January 2009. All of the blocks are hand appliqued. The top was finished in January 2010. But I didn't manage to quilt it until last month.
This is my first completed hand applique quilt, and I was really, really nervous about messing it up by quilting it. I spent a long time working out a quilting plan. I spent some time practicing. Then I finally just took a deep breath and did it.
I started with straight lines, outlining the blocks and the borders. Then I outlined all of the appliques. Next I focused on all of the details in the appliques (the pumpkins, doors, roofs, etc.). I did the background quilting next, starting with cross-hatching in the center block.
I was initially going to cross-hatch 5 blocks, but after finishing the center block (shown above), I was done. Holy cow, not only was it time consuming, but it was hard! So, I tried a couple other things with the remaining blocks.
In blocks 1, 3 (shown above), 7, and 9, I used a curly-cue motif.
In blocks 2, 4, 6, and 8 (shown above), I did the leafy-viney motif.
Lastly, I completed the borders. I quilted the inner border with a leaf pattern. Then I did the outer border with vines and a little pumpkin at the bottom that was inspired by Lynn's beautiful quilting.
Almost all of the quilting (straight lines, outlining, backgrounds, borders) was done using King Tut 40 weight thread in a pretty variegated color, "Sands of Time." I quilted the details with Mettler 50 weight in colors to match the area I was quilting.
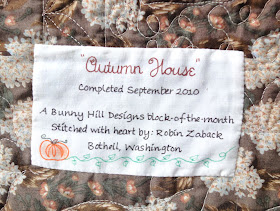
And, here's the label I created for it. There's a peek at the backing too. It is an old Moda print I had in my stash.
I am so proud of this quilt. Thanks so much for taking time to visit and letting me share it with you!
Thursday, October 28, 2010
Gnome baby!
Unlike his big brother, Little Bear had no opinion about what he wanted to be for Halloween (he is only 6 months old, after all). So I decided that he would make an excellent little gnome.
I couldn't find a gnome pattern, so I winged it. I started with a pair of overalls made using a pattern in the Kwik Sew book, Sewing for Baby. It's a great book full of baby basics. The pictures are dated, but the patterns are timeless and the directions are easy to use and follow.
I used the overall pattern in size 6-12 months, and shortened them by about 3" (though I probably could have left them a little longer). They were really easy to put together and fit really well. How fun is that plaid corduroy print?
The hat was inspired by some gorgeous hats I saw on Etsy by Swirly Hats. I used McCall's 5253 for the base of the hat, and then drafted my own top. I stuffed the swirl to help it keep its shape. The hat is a little big, but it still looks pretty darn cute.
For the little shoes, I modified the fabulous Cloth Shoe Pattern from Stardust Shoes. It took me a few tries to figure out how to make them work and to get the shape right, but it was worth the trouble. I used a faux suede-backed sherpa for the sole, and a fuzzy fleece for the upper-- so they should also keep his feet nice and warm for trick-or-treating. I'm a little in love with the gnome shoes.
Happy gnome baby!
Wednesday, October 27, 2010
Blue Kitty!
This is the first year that Big Bear had an opinion about what he wanted to wear for Halloween. Yay! His request: a blue kitty.
My son loves stuffed animals. He has one particular favorite that he has dubbed "Yellow Kitty" (which, as you might expect, is a cat and is the color yellow). His favorite color is blue. This, I suspect, is the genesis of his request for a blue kitty costume.
Of course, I was more than happy to oblige!
I used the kitty pattern included in Kwik Sew 2711. Kwik Sew patterns are awesome! The instructions are clear, concise, and they are sized really well. I made an XS. The only adjustments I made were to shorten the legs 3.5" and also to cut about 12" off the tail (which was very, very long).
Big Bear loves it! He has even asked to wear it around the house. Yay! In the picture above, he is demonstrating his "Meow!" for the camera (and he is holding the "inspiration" kitty). The ears in this pattern are rather on the big side. My husband suggested BB looks more like a mouse than a cat. But I argued that mice have round ears, not pointy ones. So there!
BB actually chose the fabric himself. I was a little worried about working with the Cookie Monster blue fur, but it was no problem at all (though it did shed some). The hook-and-loop closure in the back is very handy and makes for easy in-and-out.
All we need to do now is add some whiskers to his face. Then we'll be all ready for a trick-or-treating extravaganza!
Tuesday, October 26, 2010
Results...
I used Random.org to choose the winner...
I used the paid service though, so I'm afraid my screenshot doesn't include the winner (since it is done with email addresses and I don't want to just put those out there). But, rest assured, the drawing was truly random.
And the winner of my 501st Post Giveaway is...
Rachel!
Congratulations, Rachel! I'll be contacting you about your gift certificate shortly.
And thank you to everyone who took time to enter and celebrate my 501st post with me. Y'all rock! :)
Monday, October 25, 2010
One Thing, One Week Challenge :: 4 Success!
I'm not quite done yet-- but I've accomplished enough that I think I can call this week's challenge a success.
The challenge: COSTUMES!
I finished Big Bear's costume, and have nearly completed Little Bear's (just needs hemming and buttons).
Here is BB's:
BB wanted to be a "blue kitty" this year. Well-- it is definitely blue! He tried it on this morning and loves it! Yay!
I'm afraid I don't have time to share much more at the moment. But I plan on writing a more detailed post about the costume later (once I have a little more time to sit at the computer).
Also-- today is the last day to enter my giveaway! I'll announce the winner tomorrow. Woo hoo!
Saturday, October 23, 2010
Jane Stickle Quilt: BLC
Block number/name: BLC “Goshen”
Date completed: October 22, 2010
Number of pieces: 70
Notes on block: I think this block has the distinction of having the most pieces of any in the quilt. Fortunately, it wasn’t difficult piecing—just time consuming. And the end result looks so cool!
Only 6 blocks to go!
**In case you haven't done it yet-- there's still time to enter my 500th post giveaway!**
Thursday, October 21, 2010
Jane Stickle Quilt: LS-7 & LS-8
Block number/name: LS-7 “Sally’s Steeple”
Date completed: October 17, 2010
Number of pieces: 14
Notes on block: Pretty! And it was fun to watch this one come together. I used the freezer paper/starch technique for the appliqué.
Meanwhile, I’ve also been putting together some chunks:
It is a lot of fun seeing this quilt start to come together.
Block number/name: LS-8 “Northern Lights”
Date completed: October 19, 2010
Number of pieces: 17
Notes on block: I’m so glad I chose a dark fabric for this block. It has a great look to it. I used freezer paper/starch for prepping the melons and the center triangle. The tiny triangles were done freezer paper on top and finger pressed.
And now the left side triangles are complete!
And, in case you missed it-- there is still time to enter my giveaway!
Wednesday, October 20, 2010
One Thing, One Week Challenge :: 4
It's that time again-- and it couldn't have come at a better moment!
One word:
COSTUMES!!!!
Apparently external motivation is required to get this one going (as evidenced by the last 5 nights spent in front of the television). My procrastinating ways seem to be getting the better of me here.
Here's hoping that this week's challenge will give me that little extra push I need!
Tuesday, October 19, 2010
501!
Can you believe that this is my 501st post? Crazy!
I started this blog back in January 2008. My goal was to use it as both a motivator and a journal of my craftiness.
Blog as Motivator: I figured that I would be more likely to follow up and actually finish things if I put it out there to the world at large that I was doing something. Accountability and all that. It has been nearly three years now, and I think I can safely say that it is working. I'm actually finishing things!
Blog as Journal: I'm not a journaling type of girl. I've tried keeping a diary, and have never been able to make it work. I've tried scrapbooking, and found it is just not my thing. But a blog? This has been working for me. It has been really valuable to record things as I do them, changes I make, and tracking my progress on projects. Not only does it help keep me focused, but it has become a resource for me as well. I find myself looking back to jog my memory about techniques, changes, timing of projects (as in: how long did it take me to finish that one?), and more. And it is fun to just take a walk down memory lane sometimes.
I love my blog. It's not fancy, but it serves my needs. And it is an amazing bonus that I have readers to give me encouragement, advice, and that little extra push. I feel so fortunate that you take time to visit, read, and comment.
Readers: You rock!!!
Seems like a good time to have my first giveaway!
Leave a comment on this post for a chance to win a $25.00 gift certificate to one of my favorite online quilt shops, the Fat Quarter Shop*!
Here are the rules:
- One entry per person, please.
- All entries must have a valid email address. (Unfortunately, I can't really give a gift certificate to "anonymous" or "email address unknown".)
- No entries after Monday, 10/25/2010.
- A winner will be chosen randomly and announced Tuesday, 10/26/2010.
Thursday, October 14, 2010
Festive fall fun!
Today the boys and I visited the pumpkin patch with our preschool friends. Lucky for us, the weather was gorgeous.
Big Bear pretty much picked the first pumpkin he saw. I swear, it is becoming impossible to catch this boy a.) looking at the camera and b.) smiling. It's like he has a sixth sense to look away and/or frown whenever the camera is pointed in his direction.
The pumpkin patch was a lot of fun-- there was a petting area with farm animals, a hay maze (with a big slide at the end), tractors, a hay ride, ice cream, a playground, and (of course) a fabulous pumpkin patch. After just a couple hours, we were beat!
And there's even a picture of me and Little Bear-- a rare event! (Thank you, Danielle!)
Meanwhile, in crafting land, I've been busy working on costumes.
The cutting is complete (yay!), so now I can start doing the fun stuff-- the actual sewing!
Jane Stickle Quilt: K-6
Block number/name: K-6 “Ann’s Folly”
Date completed: October 13, 2010
Number of pieces: 37
Notes on block: My last center block. Wow. I realize I’m really nowhere near the end as there’s lots of putting together to do (not to mention quilting!), but finishing all these center blocks makes me feel like I’ve really accomplished something. It’s kind of cool.
Sunday, October 10, 2010
Jane Stickle Quilt: K-5
Block number/name: K-5 “Passing Through”
Date completed: October 10, 2010
Number of pieces: 12
Notes on block: Tonight was an inadvertently epic feast night. I got the October issue of Cooking Light in the mail this week and immediately found some recipes that I wanted to eat. Since my in-laws were planning on coming to dinner tonight, I thought it would be a great opportunity to try those recipes. I started cooking at 2. We ate at 6. Holy cow! That was not the plan. But, it was really, really tasty. On the menu:
So, tonight after the boys went to bed, I just needed to sit. Costumes will have to wait another night.
In other news: Look at this pretty block! It is happy.
215/225—only 10 blocks to go!
Date completed: October 10, 2010
Number of pieces: 12
Notes on block: Tonight was an inadvertently epic feast night. I got the October issue of Cooking Light in the mail this week and immediately found some recipes that I wanted to eat. Since my in-laws were planning on coming to dinner tonight, I thought it would be a great opportunity to try those recipes. I started cooking at 2. We ate at 6. Holy cow! That was not the plan. But, it was really, really tasty. On the menu:
- Roasted Butternut Squash Risotto with Sugared Walnuts-- creamy, butternut squashy, cheesy goodness.
- Buttered Green Beans and Mushrooms-- best. green beans. ever.
- Roasted Breast of Chicken with Pinot Noir Sauce-- the sauce truly brought the chicken to a whole new level.
So, tonight after the boys went to bed, I just needed to sit. Costumes will have to wait another night.
In other news: Look at this pretty block! It is happy.
215/225—only 10 blocks to go!
Saturday, October 9, 2010
Jane Stickle Quilt: L-12
Block number/name: L-12 “Sally’s Pride”
Date completed: October 8, 2010
Number of pieces: 27
Notes on block: I can’t believe I did as well as I did with those triangles! They are itty-bitty.
I feel like I’m on a little bit of a roll with my Stickle blocks lately. I think the excitement of getting to the final blocks is really driving me to get them done. But Halloween is ever-looming, and I really need to start on those costumes. So I may have to take a break for a bit as these blocks are way too distracting.
Thursday, October 7, 2010
Jane Stickle Quilt: J-5
Block number/name: J-5 “John Jacob’s Windmill”
Date completed: October 7, 2010
Number of pieces: 13
Notes on block: Every time I look at the name of this block, that one song runs through my head:
John Jacob Jingleheimer Schmidt,
That's my name too.
Whenever I go out,
The people always shout,
There goes John Jacob Jingleheimer Schmidt.
Dah dah dah dah, dah dah dah
I guess there could be worse songs on repeat in my brain.
After the 53-piece monster block, this one came as a nice relief. I pieced all of it. The inset seams weren’t even bad.
Counting down: only 3 center blocks left to go! (And now I have another song running through my head...)
Wednesday, October 6, 2010
Fallin' off the wagon
I have a list of priorities. I have an over-abundance of ongoing projects. I know there are things that I should be doing instead. But sometimes, my creative spirit just craves the excitement of something new and different.
This is my new project on Monday:
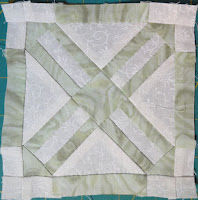
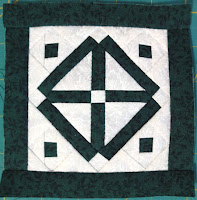
This is my new project now:
Festive, fun and fast! I'm thinking I'll be able to get this one finished up pretty quickly. It is just what I needed to get me in the happy Halloween spirit.
This is my new project on Monday:
This is my new project now:
Festive, fun and fast! I'm thinking I'll be able to get this one finished up pretty quickly. It is just what I needed to get me in the happy Halloween spirit.
Tuesday, October 5, 2010
Jane Stickle Quilt: I-13
Block number/name: I-13 “Sweet Harmony”
Date completed: October 4, 2010
Number of pieces: 53
Notes on block: 53 pieces… sheesh! This one took me 3 nights to finish. At least it was rather straightforward, piecing-wise. And it is a nifty-looking block. In fact, I really like the look of this one a lot.
It is starting to become more challenging trying to pick fabric for each block at this point. I have a big pile o’ green fabric, and not many blocks left to go. Choosing the perfect fabric becomes an agonizing decision—but agonizing in a fun way. :)
Sunday, October 3, 2010
Jane Stickle Quilt: BR-10
Block number/name: BR-10 “Nicholas’ Diamond”
Date completed: October 2, 2010
Number of pieces: 26
Notes on block: I really enjoyed working on this one. At first glance, I thought there were lots of inset seams, but upon closer inspection, not a single inset seam was required. Happy dance!
Only 6 triangles to go!
Yesterday the boys and I drove up to LaConner to check out Quilt Fest 2010. This year, quilts from The Applique Society were featured. There was some seriously gorgeous eye candy and tons of fabulous inspiration. I really wanted to go slower, but with two little ones, that just wasn’t in the cards. No photography was allowed, so I went ahead and purchased a show DVD so that I can really take my time and check out all of the fabulous quilts. As a bonus, I ran into my long-time friend Louise, who actually co-chaired the show. She was understandably busy, but was still able to take a little time out to chat and say hello, which was awesome.
I wish we could have made it to the museum exhibits, but it had already been a long afternoon of travel and walking about. Even so, I could not be happier. The boys were awesome quilt show companions. Both of them had great attitudes and I could not be more proud. I’m a pretty lucky mama!
Saturday, October 2, 2010
Jane Stickle Quilt: L-10
Block number/name: L-10 “Nan’s Naiad”
Date completed: October 1, 2010
Number of pieces: 45
Notes on block: This block was definitely a challenge. Inset seams, bias edges, tiny little appliqué triangles... It didn’t help that I also pieced in the inner parallelograms the wrong way and didn’t even realize it until I had already completed the entire center section. I wasn’t about to go back and re-do it all, so I left them, and let the iron help me press them into submission. Astoundingly, that actually worked. In the end, this a pretty darn cool-looking block.
Can you even believe I only have 5 blocks left to make in the center? It kind of blows my mind.
Friday, October 1, 2010
Pinwheel Flowers
Quilted? Check! Edges finished? Check! Label? Check!
My Pinwheel Party Quilt Along quilt, "Pinwheel Flowers," is complete. Woo hoo!!!
I started by quilting arcs inside each of the pinwheels. This was actually really challenging for me as my presser foot kept getting hung up in the center of the pinwheels (where there was a lot of bulk). So they aren't as neat and tidy and consistent as I would have liked, but after tearing out a number of attempts, I finally just decided to persevere. I'm really happy that I decided to go for it.
In the colored squares, I did some free-motion flowers. Then I stippled all of the background up to the outermost border. All of the colored areas are quilted in variegated thread (King Tut #916, "Mummy's Dearest") and the background stipple is in white (Mettler #2, 40 weight). I just love all of the wonderful texture resulting from the stippling.
After I finished all of the edges, I went back and did a little flower vine in the final border area in the same variegated thread that I used in the colored areas of the quilt. I had thought about just continuing the stipple, but decided that the flowers had a little more fun and whimsy to them. I used the variegated thread so the vine would stand out on the white background. It is not perfect, but I think the little flower vine turned out pretty cute.
Here's the label and a little peek at the backing fabric. The backing is nothing special, just something I pulled from my stash. It doesn't exactly match the front, but I think it works well enough.
It is a very bright and happy looking quilt! Mmmm... prairie points. Love 'em!
Many, many thanks to the fabulous Anina for hosting this wonderful quilt along. It is such a fun design and was a lot of fun to make. I'm really looking forward to giving this one to baby Abigail. I think she and her mama are going to love it.