While there is definitely sewing going on here, and even finishes(!), I seem to be having problems actually taking pictures of my stuff. I even made a Halloween costume for me, but failed to get decent pictures. So there is a bit of a backlog at this point. Hopefully, I'll start catching up soon! Anyway...
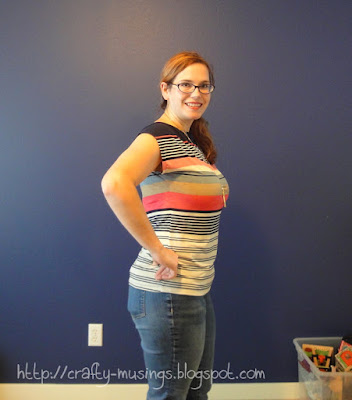
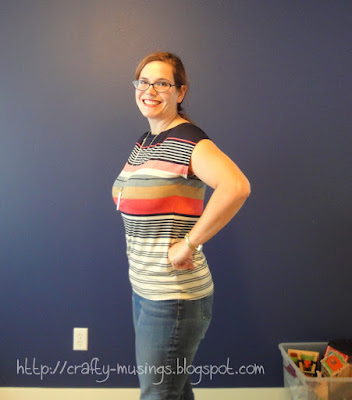
At the beginning of October (as a sort of Halloween costume sewing warm-up), I sewed up a couple of tops. This was the first:
The fabric is a Misty Stretch Slub Jersey Stripe Pink/Multi, 96% Poly/4% Lycra ITY knit I picked up from Fabric.com last year. I was initially thinking it for a skirt, but it is a pretty thin, drape-y knit that seemed better-suited to a t-shirt (i.e., I didn't want to have to do a lining). Enter the MariaDenmark Kimono T-Shirt pattern (which is currently a free download when you sign up for her newsletter). Note that there are no seam allowances included in this pattern. I arbitrarily decided to add 3/8" seam allowances.
I made a quick and dirty muslin of the size Large a few months ago (no pictures of that) and determined I wanted/needed to do an FBA. Conveniently enough, MariaDenmark even has instructions for doing a dartless FBA.
I think it worked pretty well! I really like the way this fits on me. And, while not perfect, I am definitely pleased with the stripe matching I managed. I made sure to stabilize the shoulder seams with some nylon stay tape and also used a knit fusible stay tape along the neckline. I used my coverstitch machine for the hems.
Love it!!! I have been wearing this top every week since I completed it. I definitely want to make more and have my eyes peeled for potential fabric candidates.
Thursday, November 19, 2015
Monday, November 9, 2015
Halloween 2015: Jay from Ninjago
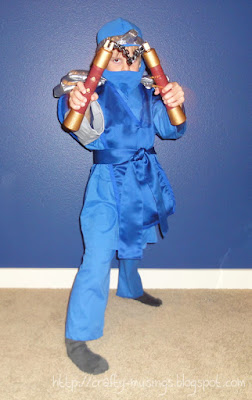
This year for Halloween, Little Bear decided he wanted to be the character Jay from Lego Ninjago. It was a pretty appropriate choice for him, as he is into all things Lego and ninja right now (he is even enrolled in a Ninja Zone gymnastics class!).
This costume was pretty straightforward. I used Simplicity 1037, using views A, B, D, and F and made the size 4. I was really pleased with the fit-- I measured him and everything fits very true to size (a pleasant surprise compared to some of their adult patterns!).
A couple things to note about the pattern: It does not include any instructions/advice for the additional ties (arm/wrists and legs) pictured on the cover. That wasn't a big deal (and I ended up not using them), but I was fully expecting them to be included somehow as they are pictured. Also, the instructions for finishing the tabard piece (D) are pretty lacking... I fudged my way through the suggested bias binding, but it is far from pretty. But, you know, galloping horse and all that. (Thank goodness!)
The only modifications I made to the pattern were to add shoulder armor to the tabard and then create the headband (both self-drafted). I was pretty happy with how the shoulder armor turned out, but the weight of the armor pieces pulled the tabard backward (making them appear to be shoulder-blade armor-- doh!). So I added some velcro to the underside of the tabard shoulders to connect with the top of the robe shoulders in order to help hold everything in place. It helped some, but the fix was no match for my active ninja boy! He could easily defeat the velcro with all of his jumping-crouching ninja moves. But for trick-or-treating, it worked fine.
This was a fun costume to make.
And I know he is happy because he has asked to wear it every day since I finished it!
Sunday, November 8, 2015
Halloween 2015: The Purple General
Hope you had a fun and happy Halloween! I know it was a week ago, but I still want to document my costume work for this year. I'll start with the most complicated of the costumes made, The Purple General.
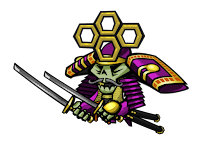
The video game of the year for Big Bear has been an indie game called, Skulls of the Shogun from 17-Bit.
One of the characters is a purple shogun, and that's what he decided he wanted to be. Mama did her best to make it happen:
This was a pretty involved costume! I used the character art and also found some pictures of traditional samurai and shogun garb to guide me. I ended up working in layers:
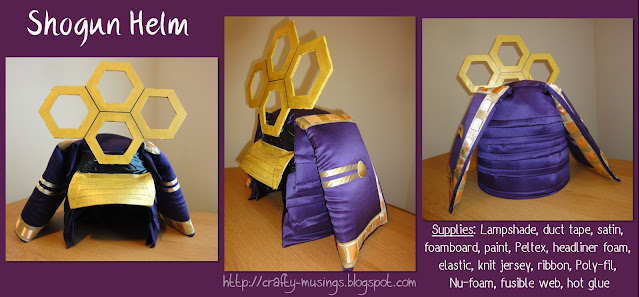
The helm seemed like the most important part to me, so that is where I started. It took a full week, 2-4 hours a day, to put it together. Supplies included the lampshade (and special wire cutters to cut it), black spray paint, duct tape, satin, foamboard, acrylic paint, Peltex, headliner foam, elastic, knit jersey, ribbon, Poly-fil, Nu-foam, fusible web, and (of course) some hot glue. There was also quite a bit of sewing involved in piecing the various parts.
Here's a picture of the inside. You can see the chin strap and the foam headliner I used to pad his noggin from the lampshade support crossbars at the top. And lots of duct tape.
I wish I had thought to take pictures in process, but in the thick of creation and problem-solving, pictures tend to be very far from my brain.
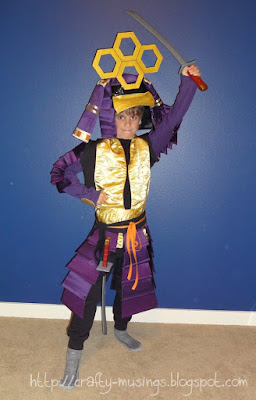
Thankfully, all of the disparate pieces came together in a pretty cohesive way and resulted in a very happy Purple General:
Worth it!
The video game of the year for Big Bear has been an indie game called, Skulls of the Shogun from 17-Bit.
One of the characters is a purple shogun, and that's what he decided he wanted to be. Mama did her best to make it happen:
This was a pretty involved costume! I used the character art and also found some pictures of traditional samurai and shogun garb to guide me. I ended up working in layers:
- Black t-shirt and sweatpants-- purchased,
- Bolero jacket with armored arms-- Butterick 4385 with self-drafted armor plating,
- A sash around the neck and a wide brocade belt-- Simplicity 1037,
- An armor-plated skirt-- self-drafted, and, last but not least,
- The helm-- a lampshade base and a LOT of modification.
The helm seemed like the most important part to me, so that is where I started. It took a full week, 2-4 hours a day, to put it together. Supplies included the lampshade (and special wire cutters to cut it), black spray paint, duct tape, satin, foamboard, acrylic paint, Peltex, headliner foam, elastic, knit jersey, ribbon, Poly-fil, Nu-foam, fusible web, and (of course) some hot glue. There was also quite a bit of sewing involved in piecing the various parts.
Here's a picture of the inside. You can see the chin strap and the foam headliner I used to pad his noggin from the lampshade support crossbars at the top. And lots of duct tape.
I wish I had thought to take pictures in process, but in the thick of creation and problem-solving, pictures tend to be very far from my brain.
Thankfully, all of the disparate pieces came together in a pretty cohesive way and resulted in a very happy Purple General:
Worth it!
Subscribe to:
Posts (Atom)


