Saturday, April 30, 2011

Style Stitches Monthly Bag Challenge: Beautiful Balance Checkbook Cover

Style Stiches
This month's Style Stitches challenge project was the Beautiful Balance Checkbook Cover. It is actually one of the projects in the book I was most looking forward to making.

Beautiful Balance Checkbook Cover, outside open view
I spent a lot of time trying to decide what fabrics to use, and am pleased with how well my choices came together. I just love that leaf print! Though the book suggests using home dec weight fabric for the project, I used regular quilting cotton. I am very thankful I made that choice! There was a lot of bulk to stitch through at some points (particularly with the flap), and my machine was a little ornery about it. I don't think home dec fabric would have worked for me.

Beautiful Balance Checkbook Cover, inside view
The instructions on this were straightforward for the most part. The illustrations were also pretty helpful, though I got a little confused about Figure 2, wherein topstitching on either side of the center seam is illustrated, but is not mentioned in the instructions anywhere in the lining instructions. So I went ahead and did the topstitching after creating my lining. As it turns out, that topstitching actually is the last step of the pattern, completed after the entire cover is put together. Ooops. So, mine has four lines of topstitching on the inside instead of two. It was a good lesson in making sure to read through all of the directions before starting! But I still say that topstitching shouldn't have been represented in the Figure 2 illustration.

Other than that little hiccup, it was smooth sewing.

Beautiful Balance checkbook cover, profile view
I was really hoping to use this as more of a wallet. But the snap placement suggested in the pattern results in a tight close such that not much more than one's checkbook can fit in there. You can see how tight it is by the way the flap is pulling up in the profile picture above. If I were to do it again (and I might at some point), I would wait to put the flap snap in until the after whole wallet was constructed (between steps 8d. and e.), so I could better control the fit of the finished piece . It will be kind of a pain to insert it after turning, but I think it would yield better results. I also would probably add some additional pockets to hold cards (as I've seen done in a few other versions of this project).

Beautiful Balance Checkbook Cover, closed view
This was a quick project to put together. I was able to get it done in a single evening. Overall, I'm really happy with it. Though it is not a perfect wallet, it is a very functional (and stylish!) checkbook cover, and already has a home in my purse.

Thursday, April 28, 2011

Some Denyse Schmidt lovin'

In the first round of the Once 'Round the Country round robin bee, I got to work on this lovely block by Kris:

Kris's center block
Along with the block, she sent a beautiful stack of fabric, all cuts from Denyse Schmidt's recent Hope Valley line of fabrics. GORGEOUS!!!! Kris also offered a little bit of direction, requesting "simple shapes and white space."

The block was kind of on the small side, only 8" square, and I was having a hard time envisioning it as a central focus for a quilt. So my approach became one of enhancement: I wanted to make the block stronger and even more of a focal point.

my attempt to design around Kris's block
I printed a picture of the block and started drawing. The look I was happiest with was the one that sort of worked as an extension of the original block, echoing the shapes along the outside. My drawing was a little on the busy side, so I simplified it to create:

Kris's block with my added border
I am so pleased with how it turned out. Hopefully, Kris will be too!

Tuesday, April 26, 2011

Birthday Bear!

Today is Little Bear's first birthday!!!

To celebrate, we had a little family party on Saturday.

There were cupcakes, of course.

birthday cupcakes
These are vanilla cupcakes with chocolate buttercream, ala Joy the Baker. Yum! (Especially the buttercream... mmmm....)

birthday bear eats cupcake
Little Bear seemed to enjoy them as well. Nom nom nom...

And there was also a special birthday hat, made by mama:

mama and her little bear with hat
It's another Reversible Bucket Hat by Betz White. I used a cute zoo animal print on one side, and a poly/cotton denim on the reverse. This is my third version of this hat. I love this design!

I can hardly believe how quickly the time has flown.

First Birthday
Happy Birthday, Little Bear!!!

With love,
Mama

Sunday, April 24, 2011

Hoppy Spring!

Just in time for Easter, I finished a festive little wallhanging. I call it Hoppy Spring!

Hoppy Spring, front
I picked up the pattern and fabric kit last from Tangled Threads in Lynden, Washington, during last year's Tri-County Shop Hop. The All Ears pattern is by Castilleja Cotton. The kit included all of the batiks; I added the black bead eyes, the little button noses (only 1/8"-- itty bitty!), and the fleece tails.

Hoppy Spring, bunny
It was a quick and easy fusible applique project. I love the little egg-shaped bunnies. So cute.

Hoppy Spring, quilting detail
I even attempted some feathery quilting!

Hoppy Spring, label
And, for once, I thought to attach the label before I did the quilting-- so now it is nice and secure.

And now it's time for a little bit of egg hunting.

Happy Easter! :)

Wednesday, April 20, 2011

Hop to It: "Fleur Delight"

It took a couple weeks, but I finally finished appliqueing my next block in Edyta Sitar's Hop to It quilt.

Block 2: Fleur Delight

Hop to It: Block 2
Notes on this block:
  • The background I used in this one is actually the wrong side of a printed fabric. I loved the look of the basket-weave, but didn't like how dark the design was on the right side of the fabric. So I flipped it over and it ended up being just what I wanted. Woo hoo! I flipped down the upper right corner of my block in the picture above so you can see what the right side looks like.

  • I used plastic bias bars to create the stems.

  • Karen Kay Buckley's Perfect Circles were employed for the pink "flowers."

  • Needleturn applique with freezer paper on top was used for everything else.

Now I have to figure out what block I want to do next!

Tuesday, April 19, 2011

Cupcake-y goodness

Maw Bell Designs Frosted Cupcake PincushionFor their February Pincushion Club kit, Shabby Fabrics sent the pattern and fabrics to make the "Frosted Cupcake Pincushion" from Maw Bell Designs. Right away, I was all excited about it. Then I read the instructions and found that the pattern also required "1 small (2-1/2" high x 3-1/2" wise) plastic margarine container." Unfortunately, I'm not a margarine eater and it is pretty rare that I buy anything in a container that size. Determined not to run out and buy margarine just for the sake of getting the little plastic tub, I waited. It took a couple of months, but I finally got two containers roughly that size-- one from the aforementioned Greek yogurt and one that actually held paper baking cups (it seems I had to make real cupcakes before I could make pretend ones! Ha!). Finally, I was ready to make my cupcakes!

my finished cupcake pincushions
Overall, the instructions were pretty good-- straightforward, with helpful illustrations throughout, and everything made sense. I do have a couple of comments/hints though for anyone who decides to give the pattern a whirl.
  1. After putting the cupcake body together and turning it all right side out, the instruction is to "stuff firmly with fiberfill." I did this and (as Big Bear so kindly pointed out to me) my cupcake looked like an egg. I found that I needed to take out a bunch of the stuffing before it could fit in the little plastic tub and look cupcake-like.

  2. When trying to gather the bias strips to make the "frosting," I kept pulling out my basting threads by accident. Gah! On the third time, I figured out that if I took a few normal-length stitches at the beginning, before switching to the longer basting stitch, it anchored the thread just enough so I didn't have that problem.

  3. My cupcakes kept slipping out of their plastic tub bases. In order to keep my cupcakes held together, I went ahead and hand stitched the top edge of the completed "baking cup" to the side of the cupcake, thus keeping everything in place.

All-in-all, this was a fun and easy pattern (and pretty quick to make, too!). And now I have a couple of very cute little cupcakes!

Monday, April 18, 2011

Romper boy!

Woot! I'm on a sewing roll right now. Last weekend, it was some cute tiger overalls. This weekend it was a new romper.

Inspired by Christina's review, I immediately procured a copy of the Spring 2011 issue of Ottobre Design. Ottobre is a magazine focused on kids' fashion and includes patterns to make all of the featured clothes. A single issue usually includes 30-40 different designs. It is an amazing value! The downside: the patterns have to be traced (because there are multiple designs printed on a page, and they all overlap one another), and the instructions are generally minimal. But I was feeling brave, and loved the idea of having a bodysuit that actually covers Little Bear's cloth diaper-clad bum. So I went for it.

New Star Bodysuit, front and back views
The design is called the "New Star Bodysuit," and I made it in a size 74 cm (which seems to be about equivalent to a 9 months size). LB is 11 months old and about 20 pounds, and it fits great. The romper has a little bit of length to the legs, which allows for full coverage of the diaper area. It's a pretty cute look, too.

LB standing in his new romper
The fabric is an organic cotton knit I bought from Near Sea Naturals, back when Big Bear was a baby. Ahem. It has been sitting in my stash for quite awhile now. I'm glad I am finally using it.

My one previous attempt at an Ottobre pattern didn't go so well, so I was initially worried. However, I ended up being pleasantly surprised at how easy the instructions were to follow on this one. I especially appreciated the directions on how to do an edge finish with knit binding-- they worked like a charm!

romper neckline closeup
I even broke out the dreaded coverstitch machine to do the double topstitching at the neck, legs, crotch, and arms. It's horrible, I know, but I really do feel trepidation whenever I even think about using it. I think I need to find a shop that can offer me a lesson or two on it, build up my confidence some. My stitches aren't perfect on this project, but at least they don't look bad on the outside and I'm definitely happy that I gave it a go.

And look! I remembered to do a label (with size information written on the back). Yay!

snap closure
I used my SnapSetter tool to attach the snaps and it worked really well. (And it was much easier than snap tape!)


This crawling action shot really shows the great, full bum coverage. Really, I think this is just a fabulous design. I need to make more!


Happy romper boy!

Tuesday, April 12, 2011

Tiger boy!

Folktales is a fabulous quilt/stitchery shop in Lynden, Washington. On a recent visit there, I saw a store sample of Jackie Clark Designs Baby Overalls pattern. Frankly, it is not a pattern I would have otherwise given a second glance. But the sample garment was so cute and nicely made that I ended up purchasing the pattern, fabric (flannel for both the overall and the lining), and even the snap tape so I could make a pair for Little Bear. I got them stitched up this weekend!

front and back views of my Jackie Clark Designs baby overalls
It is a pretty basic overalls design, fully lined with button tabs at the shoulders and snap-tape leg closure. The pattern includes options for either a ruffle bottom or patch pockets, offering options both girls and boys. Little Bear is 11 months old now(!) and weighs about 19 pounds, so I made a Large (18-22 lbs.). It fits him pretty well.

LB standing in his new overalls
I love the fact that the overalls are fully lined. It means that I can roll up the hems and still have a pretty, finished look. Not to mention they are nice and cozy with the soft flannel inside and out.

The instructions were very basic (as in minimal, not easy). For anyone with sewing experience, I don't think this would cause much of a problem, as it is a simple design. However, the pattern seems to be marketed toward quilters (I've only seen it for sale at quilt shops), and most of the quilters I know are not sewists. I really think beginners would have a tough time with the lack of clarity and detail in the written instructions and supporting illustrations. I feel like I have a fair amount of sewing experience under my belt, and even I had some head scratching moments as I went through them.

Head scratcher #1: The interfacing. The cutting instructions have you cut 4 for use on the tabs. It is a shaped piece that only fits with tabs on the overall/lining front pieces. However the illustration shows interfacing on both the front and back pieces. I spent more time than I should have trying to decide what to do. In the end I decided to use the shape of the piece as my guide and only apply it to the front overall and lining tabs. If I had it to do again, I'd probably cut additional interfacing for the back tabs as well to better support the buttons.

Head scratcher #2: The snap tape. OMG. The snap tape. I've been kicking myself that I didn't take pictures of the shop sample I saw, because I'm really curious how they did it. The instructions offer very little in the way of guidance on this step. I even spent some time looking about on the internet, hoping to find some tutorial or something to help me know if I was going about it the right way or not. I'm still not sure if I did it right, but it worked, even if it isn't pretty.


Here you can kind of see how I ended up doing it. As per the instructions, I pressed back the crotch/leg seam allowances (to the inside on the front, and to the outside on the back) and laid the snap tape over the pressed edges. On the back, I used my zipper foot to stitch on either side of the snaps, enclosing the seam allowance. On the front, I used my zipper foot and stitched one edge, but then hand sewed the other edge down (because I didn't want two lines of stitching visible on the outside).

LB sitting down... check out that snap tape!
When LB sits down, you can see the snap tape peeking out at the hems. Next time, I'll definitely think to finish the ends of the snap tape better (I just used fray check on mine), and I'll work to get snaps positioned at the bottom of each of the hems. On these, the snaps ended up a little above the hem and there's some gaposis and a good inch of unsightly snap tape.

Another note on instructions-- they don't tell you to make buttonholes or attach buttons (and the pattern pieces don't even have them marked). I found an addendum on the designer's Web site that illustrates the button/buttonhole placement.

I pretty much followed the pattern as written, with only a couple of exceptions. First, I added topstitching to the top edge of all of the pockets. I just thought that helped give the pockets a more finished look. And second, I overcast the edges of the leg openings. I found it a little strange that the instructions had me finishing all of the other edges (the ones that wouldn't be showing because they were all encased between the overall and lining), but the legs were not addressed. Maybe it was because they're supposed to be hidden in the snap tape? I dunno. But I went ahead and overcast mine before applying the snap tape.


The pattern comes with a little puppy outline that one can embroider on the front pocket. I decided to design and use a little tiger embroidery instead.

overalls label
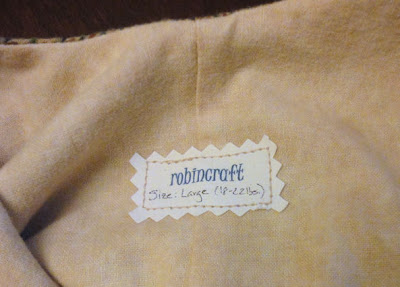
I'm also pretty proud of myself that I thought to put a label in them! I never did this when I sewed baby clothes for BB, and now that those items are getting handed down to LB, I'm finding that I can't remember what size they are. This time I got it written on the label so it is easy to tell. Yay!

When I posted a review of these to PatternReview.com, I gave the pattern a "Mediocre Pattern" rating. I feel like that is a little harsh, but it was the best fit of the options they listed. I mean, the design is super cute, but the instructions leave a lot to be desired.

LB looking super cute in his new overalls!
Though the pattern directions were sorely lacking, I am definitely happy with the finished overalls. Super cute!

Saturday, April 9, 2011

Easily distracted...

...or what I've been working on this week:

My next Hop to It block:

prepping Hop to It block 2
I got it all prepped and have started appliqueing.

A little bit of embroidery:

tiger head
This is going to be the front pocket on some overalls for Little Bear.

A spring wallhanging:

working on bunny embellishment
Now I'm waiting on some buttons before I can go on to the next step. Maybe I'll even finish it before Easter!

Block exchange blocks:


Nice and simple... she even had the strips pre-cut and ready to sew.


Sometimes, I feel like I must have crafting A.D.D.

Wednesday, April 6, 2011

Playtime: the tricycle

Woo hoo! Another block for my American Jane "Playtime" quilt complete!

Playtime: the tricycle
I really enjoyed working on this block, and I'm very happy with how it came together. I was nervous because of all of the curves and ovals (because the oval shapes meant I couldn't use Perfect Circles!). I ended up doing needleturn on just about everything (except for the one little yellow circle on the front wheel, where I did use the Perfect Circles technique). Basting well and just taking it slow and steady allowed for some smooth needleturning. I did cheat a little and embroidered the black circles on the wheels instead of appliqueing them, because they were just too tiny.

If I didn't think my cat would eat them, I would add some hanging ribbons up on those handlebars. How cute would that be? But yeah. I would definitely be tempting fate there.

Progress so far:

Playtime progress: up to and including the tricycle

Only one block to go!

Tuesday, April 5, 2011

Tracing up a storm!

You remember all of those fabrics I bought on shop hop a couple weeks ago? The ones I said I had a plan for? Well, most of them are for sewing projects (as opposed to quilting). So I spent some time this weekend tracing all the patterns I want to use.

a big pile o' traced patterns
Since I was tracing one, it seemed to just make sense to trace a whole bunch. I wasn't looking forward to it initially, but it ended up being a pretty calm and relaxing process. Of course, now I have to actually use all those patterns and start cutting fabric. Ugh. That is definitely NOT my favorite process. But the sooner I do it, the sooner I can get to the fun part: sewing!