Monday, February 28, 2011

Style Stitches Monthly Bag Challenge: The Reversible Everyday Shopper

I finally got a little time in the sewing room this weekend. Woo hoo! The project on deck: the Reversible Everyday Shopper from Amy Butler's Style Stitches. It is the February bag for JemJam's Style Stitches challenge.


It is a happy robot bag!

Reversible Everyday Shopper, outside views
This is the outside view, front and back.

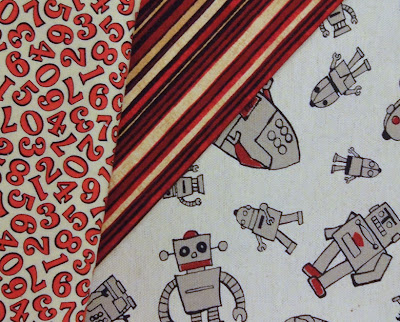
I just love the canvas robot fabric. It is awesome. And its heavier weight works really well for the bag. The pattern actually calls for two decorator-weight fabrics. But when I bought the robot fabric, the coordinates I picked were quilting-weight. I decided to use both of them anyway. I didn't have much of the stripe, so it is just used as an accent. For everything else, I used the number print. Numbers just seemed appropriate for robots (though I suppose if I wanted to be really cool, I would have found one with just 0s and 1s).

Reversible Everyday Shopper, inside views
And here's the reverse side.

I did make a couple of changes to the design (in order to incorporate more of the 3rd print), including a small pocket on the inside of the bag and adding contrast bands to the the big pockets.

The instructions for this bag were clear and concise. I think it definitely fits the "easy" rating ascribed to it in the book. If not for the massive time-sink involved in applying interfacing to every single piece, it would be a pretty quick project. But because I used quilting-weight cotton for some the bag, I definitely felt like that was a step I couldn't skip.

Like the Cosmo bag, this one is HUGE. But I think it is going to make an excellent library book bag.

Big Bear with big bag
Bonus: Big Bear likes it too!

Friday, February 25, 2011

Once 'Round the Country

A few of us who participated in the Snip.Sew.Send. virtual quilt bee have joined up again for more fun. This time, we're going Round Robin style, Once 'Round the Country!

Each of us is making a center block. Over the course of the bee, everyone will add borders to each of the center blocks. By the end, each of us will have a completed top. I'm so excited about the possibilities!

I had a tough time deciding what direction I wanted to go with my center block... modern? traditional? intricate piecing? applique? I finally ended up with this:

happy pink and orange Dutch Rose block
It is a take on a pattern sometimes called "Dutch Rose" or "Carpenter's Wheel." The traditional version involves lots of diamonds and inset seams. I went for a simpler version using half-square triangles using a pattern from McCall's Quilting to make my 12" block. It's not at all my usual thing (if I could even be said to have a usual thing). But I definitely love how it turned out!

fabrics for round robin
My fabric palette consists of a selection of fat quarters from Patty Young's Sanctuary collection from Michael Miller as well as an array of coordinating Kona solids (1 yard of Snow and 1/2 yard each of the others). Seriously bright and happy. Definitely pink and girly. With orange! I'm obsessed with orange lately.


stack o' fabric
I have no plan for this, no direction to give. I'm just going to trust in the creativity of Zonnah, Adrienne, Anne, and Kris and see where their whims take it. It is going to be so exciting to watch it grow!

Thursday, February 24, 2011

Happy pincushion!

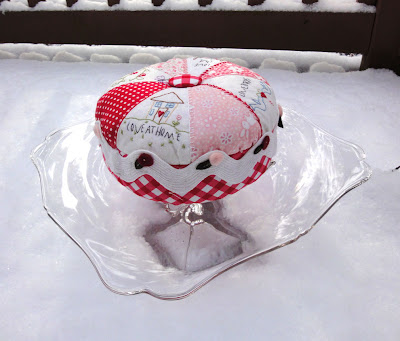
I recently completed the first project in the Shabby Fabrics Pincushion Club, the Love Pinwheel Pastry by Sandra Workman of Pine Mountain Designs.

Love Pinwheel Pastry pincushion, side view
It is a HUGE pincushion! It could act as a doorstop. But I love it!

The kit that Shabby Fabrics put together was great. It included everything but the crushed walnut filling (which I found at a local feed store). The cake stand it is sitting on once belonged to my Grandma Francis. I love that cake stand. I need to find a smaller one to use as my pincushion's permanent home (because it really does deserve to sit on a pedestal!).

Love Pinwheel Pastry pincushion, top view
I'm pretty slow at embroidery so it took a few nights of stitching, but by the end I felt like my skills were definitely improved. And I just love all of the embroidery details. Pretty, pretty! The pattern was great because in addition to providing clear, step-by-step instructions, it also included how-to diagrams for all of the required stitches. Both convenient and helpful!

Love Pinwheel Pastry pincushion, yet another view
Yay for my new happy pincushion!

Friday, February 18, 2011

Jane emergency!

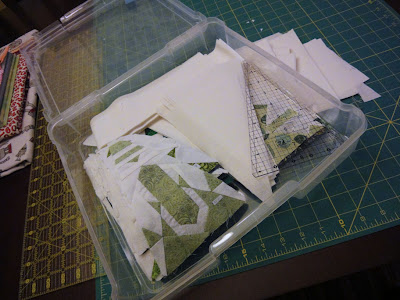
a pile o' Jane triangles
Last week, I cut the long strips for my scallop border and 46 triangles. Then I ran out of fabric. Eeeeeppp!!! I was seriously freaking out. The boys and I made a little road trip to the shop where I bought the fabric. I bought it in 2008, so I wasn't expecting them to have it, but hope springs eternal. Alas, not unexpectedly, the fabric was no longer available. So I was left feeling sad and depressed for a few days.

After having had a little time to mourn my lost vision of 56 matching triangles, I am now feeling pretty darn good about my new vision of 46 matching triangles and 10 funky ones. I like that it is going to have a little randomness. Yay, for happy accidents!

Monday, February 14, 2011

Birthday treat!

My birthday was on Saturday, the 12th. I'm 37 now! Yikes! Time just flies by with little ones around, I swear.

In addition to a fabulous birthday lunch with my boys at our favorite local restaurant, I got to take an all-day class on Sunday to learn about hand quilting at The Quilting Loft. Woo hoo!

Our instructor, Laurie Shifrin, took time to teach us her methods for both lap quilting and hoop quilting. And the all-day format meant that we got lots of great practice at both. I really appreciated her attention to ergonomics and comfort when quilting, too. Laurie was a great teacher.

We didn't work on a "project"-- rather, we created a practice piece. She asked us to choose contrasting thread so we could really see what we're doing. Of course, I chose green. And boy, you can definitely see what I'm doing, in all of it's uneven and funky-looking glory.

hand quilting practice
I have taken a couple of hand quilting classes in the past, but I never felt like I "got" it before. This time, I'm feelin' it! I've still got a lot to learn, but am really excited to get going and do some hand quilting. Now I really need to finish my Jane quilt!

Friday, February 11, 2011

Holding back

Although I'm excited about making the next bag in Amy Butler's Style Stitches, the Reversible Shopper, I've been holding back. You see, I finally bought some of the woven fusible interfacing AB suggests using in the bags. I'm excited because I think it will make my bags better and more sturdy. But I've been unexcited at the need to pre-treat the interfacing (as recommended by AB and others).

The woven interfacing is 100% cotton. Not pre-treating could lead to some bad results down the line, what with shrinkage and the potential for warping and bubbling of the exterior fabrics of the bag. You can't pre-treat in a machine because any agitation could cause the glue to slough off. It has to be done by hand. From everything I've read, it is definitely worth the effort. So I knew I needed to do it.

Today I finally bit the bullet and did some pre-treating:

interfacing hanging up to dry
All it took was a hot water tub dunk and now a drip-dry. Not so bad after all! (Ahem, maybe I shouldn't mention the fact that the weight of me trying to get the interfacing to hang evenly actually tore the bar from the wall and broke a chunk off the end... but it missed my head, I was able to put it back up, and there was only minimal cursing involved! So that's still a success, right?)

Here's to some bag-making excitement!

Tuesday, February 8, 2011

Hop to It: "Garden Guest"

Applique!!! Oh, my gosh. It feels so good to be doing applique again. I think my last applique-focused block was back in August or September (not counting Jane blocks... but they're so tiny, they just aren't the same). Hand applique is just a happy thing for me.

Hop to It: block 5
The BOM group I'm in decided to start with block 5 of Edyta Sitar's Hop to It quilt, "Garden Guest," because it looked to be the easiest of the twelve-- a good warm-up block.

Techniques used:
  • Plastic bias bars to create the stems. I tried using the Clover bias maker, but was just having too many problems getting my bias strips even and happy. Though using the bias bars involved more prep work, in the end they were definitely easier to manage, particularly since there is a seam in the long stem (silly me decided to create bias with only a fat eighth of fabric... but I just couldn't not use what I had already determined to be the "perfect" stem fabric).

  • Karen Kay Buckley's Perfect Circles for the "flowers." They work so well!

  • Needleturn applique with freezer paper on top for everything else.

I'm excited to find out what block we'll be doing next!

Saturday, February 5, 2011

Style Stitches Monthly Bag Challenge 2011: February's Bag


For this month's Style Stitches Monthly Bag Challenge, we're making the second bag in Amy Butler's book, the Everyday Shopper.

Once again, I've shopped my stash for fabrics:

farbics for my Everyday Shopper bag
I picked these up a couple of years ago, intending to make a different Amy Butler bag (the Weekender). Since I have yet to get around to doing that, I figure using them for an alternative AB design is okay. I think they'll make for a fun book bag!

Friday, February 4, 2011

A bit slow around here

Sickness has definitely bogged down this blogger. Ugh! I spent most of my evening stitching time last week either sleeping or on the couch doing nothing. And with all that tiredness, blogging fell by the wayside as well.

But-- now that I'm recovered and after attending my monthly quilt guild meeting last night, I'm feeling reinvigorated and full of quilty inspiration again. Woo! The meeting was really great because our featured speakers were from Camp Korey, one of the charities that my guild supports. They came and talked to us about what they do at camp and how they use the quilts we make for them. It was really cool and inspiring. Hopefully I'll be able to make time for some more charity quilting soon!

Another bit of inspiration for me came from Carrie P., of A Passion for Applique. She recently wrote about how she was having a tough time finding time to sit down and craft for any length of time. So she started an experiment: how much would she be able to accomplish if she could just sit down for 30 minutes? Frankly, to me that sounded like not enough time to do anything. But she was able to accomplish a lot in that time. It was pretty cool! So, I tried it the other day.

While Little Bear napped and Big Bear played some Angry Birds (his new favorite game), I sat for 30 minutes to see what I could accomplish.

Hop to It bunny progress
I made some happy progress on my first "Hop to It" block! I had the pieces prepped already, so I was able to sit down and start appliqueing. I managed to get the ear and then half of the bunny body sewn down. Not too bad-- and definitely more than I thought I'd be able to do!

This was a good reminder that I don't always need to have big chunks of time to get things done. Those little bits add up too. It's a freeing thought for me.