This last weekend was the annual Western Washington Quilt Shop Hop. I honestly didn't think I'd get to participate at all this year. But my husband, knowing how much I enjoy trekking about to shops, really encouraged me to do it... so much so, he even volunteered to come along and carry the baby!
So, papa, the boys, and I all got into the car and managed to visit four shops on Saturday. Not much compared to some people, but it was a fabulous little road trip for the four of us.
We started at Keepsake Cottage Fabrics to pick up our "passport", as it is closest to our house (and one of my favorite shops). Then we packed back into the car and drove to Anacortes, a little more than an hour away. First we stopped by Fabrics Plus where my older son (who shall henceforth be referred to as "Big Bear" or "BB") picked out a couple of buttons for himself, and where I found some super-soft Flurry in yellow to make a blanket for the baby (who shall henceforth be referred to as "Little Bear" or "LB").
We stopped for lunch at a local cafe and then headed down the street to The Quilt Shop. While we were there, I ran into my longtime friend Louise. We've known each other for about 14 years, and since moving back to Washington state (nearly 4 years ago), the only times I've seen her are when we bump into each other at quilt shops-- usually during shop hop (though we do keep tabs on each other via Facebook). It was so awesome to see her and do a little catching up.
Finally, we headed off to Arlington and the final shop of the day, The Quiltmaker's Shoppe. They were featuring a couple of gorgeous raffle quilts. One woman selling tickets was asking a couple of shop-hoppers if they were interested in purchasing any raffle tickets. BB heard from across the room and then, in a very loud voice, responded "Yes!" Fortunately, papa had some cash and was able to make good on our boy's affirmative. BB was thrilled to receive his very own ticket stub. How awesome would it be if he won!
We stopped at a little bakery across the street from the shop for some yummy treats and then headed home. It was about a 6 hour adventure, and were all tuckered out by the end.
Overall, I was pretty good (having to chase around a toddler prevents too much actual shopping):
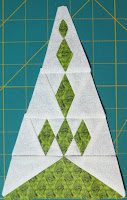
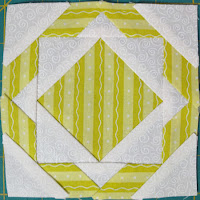
Despite having only 24 blocks to go (and more than enough fabric), I can't seem to stop buying greens for my Stickle quilt.
Monday, June 28, 2010
Sunday, June 27, 2010
Jane Stickle Quilt: F-9
Block number/name: F-9 “Autumn Aster”
Date completed: June 26, 2010
Number of pieces: 13
Notes on block: As I took the last stitch in this block, the baby awoke. Perfect timing! Once again, I used the freezer paper and starch technique I learned at the last guild meeting. I’m so pleased with the results! Placement of the pieces was a breeze, the points are relatively sharp, and the shapes are all pretty consistent. Woot!
Saturday, June 26, 2010
Gettin' my Pinwheel Party on!
Lately I'm finding that late afternoon is a good time to visit the quilt mines. That seems to be a time when the baby consistently naps, and when my older son is happy to play on his own for a bit. (I really need to find some better monikers for my sons... I don't want to use their actual names for privacy reasons, but I can't really go around calling my older son "The Boy" anymore, as there is another boy now. Hmmm...) Anyway, I've been using some of my afternoon quiet time to continue work on my Pinwheel Party quilt. I'm going to give it to my neighbor's soon-to-be-born baby girl. They are planning a "Meet the Baby" party in early August. With that as my goal for finishing, I'm feeling very motivated to get going on this project.
Block 9:
I just love that big block of orange in the center. Mmmm... orange.
Block 10:
Block 11:
This might be my favorite of the bunch. I love how the different colored pinwheels sort of join together in the center.
Block 12:
Woo hoo! All of the big blocks are complete! Now I'm focusing on getting all of the tiny sashing pinwheels put together. Hopefully, I'll have a top soon!
Friday, June 25, 2010
Jane Stickle Quilt: TR-6
Block number/name: TR-6 “Carla’s Candle Flame”
Date completed: June 24, 2010
Number of pieces: 22
Notes on block: At the June quilt guild meeting I heard a speaker talk about her method for machine appliqué. It is essentially a freezer paper and starch method that can be used just as easily to prep pieces for hand appliqué. I gave it a try on this block and am really happy with the results. That tiny melon looks so regular and truly melon-like compared to previous ones! Though I’m lazy at heart and still prefer needleturn as my appliqué technique of choice (as there is very little prep work involved), I have to say that this new method is awesome for those itty-bitty regular-shaped pieces, or for a set of pieces that need to be uniform in size/shape. I’m definitely planning on using it again in the future (in the next block, in fact!).
Wednesday, June 23, 2010
Greenpiece: Applique block 13
Initially I was going to talk about all of my recently completed Greenpiece applique blocks in one post. But I actually have enough stuff to say about number 13 that makes me think it will be better to break it up a little. Anyway, on to the block!
Applique block 13:
This isn't the "real" block 13. The design for block 13 in the Moda quilt is nearly identical to applique block 4, just with the leaves oriented a little differently. An enterprising lady in the Moda Greenpiece BOM group at my local quilt shop decided that she didn't want to have two of pretty much the same block in her quilt. So she asked her junior high aged daughter to assist her in designing a replacement block that would fit the look and feel of the quilt. Her daughter came up with this awesome little mushroom design and drew it out for her mother who then shared it with the rest of the group. How cool is that?
I took advantage of her generosity and used her mushroom block. I'm pleased with how it turned out, though I worry that maybe it is a little complicated compared to the other blocks in the quilt. Maybe I should have left off the dots on the mushroom caps? On the other hand, they're pretty subtle, so I think the block will still work. And I love that they'll help make my quilt just a little bit different from the original.
Tuesday, June 22, 2010
Jane Stickle Quilt: M-4 & RS-13
Block number/name: M-4 “Stepping Stones”
Date completed: June 21, 2010
Number of pieces: 49
Notes on block: It wasn’t until after I started stitching this one that I realized how many pieces are in this little block. In any case, it took a long time for me to put together. This is also one of the only blocks I’ve done so far that required a partial seam (around the center square). And it seemed so sweet and innocent when I was cutting!
Block number/name: RS-13 “Marlene’s Pirouette”
Date completed: June 22, 2010
Number of pieces: 21
Notes on block: Last night was a really productive stitching evening for me. While we watched television, the baby slept on papa’s lap and I got to sew (our new favorite show is Arrested Development… so funny!!!). I finished M-4, nearly completed this one (I appliquéd the tiny triangles this morning), and got a good start on the next one (TR-6). So now I’m nearly caught up again. Yay!
This is block number 199 for me! It seems like a good time to share a progress report:
Saturday, June 19, 2010
Greenpiece catch-up
The monthly meeting for the Moda Greenpiece BOM at my local quilt shop was on Thursday. It gave me some extra motivation to try and get caught up again. I'm happy to say that I'm up-to-date on my blocks. Woo hoo! It seems I am having difficulty managing to sit down and blog lately. In order to create a higher probability of me actually being able to write and publish this post, I'll share the pieced blocks today and the applique blocks in another post.
Pieced block 8:
Pieced block 9:
Only one more pair of pieced blocks to go!
Pieced block 8:
Pieced block 9:
Only one more pair of pieced blocks to go!
Friday, June 11, 2010
Jane Stickle Quilt: BR-9
Block number/name: BR-9 “Sue’s Garden”
Date completed: June 6, 2010
Number of pieces: 18
Notes on block: This block was pretty intimidating, but Anina’s approach worked like a charm. I just extended the tops of all of the “curved” section pieces by 1” to make sure I had enough room to appliqué the arches. And because they were all extended by exactly the same amount, I had no problems with matching while hand stitching the seams.
We seem to be falling into a routine of sorts in the evening lately. About three nights a week, Keith takes charge of the baby, holding him and giving him cuddles so I can stitch (or go to bunko, or quilt guild, or other). Then on the other evenings, I focus on the baby and Keith plays Monster Hunter (his video game of choice lately). Some evenings, we share the baby duties and watch some television together (like Glee!!! I so need to see the season finale again!). It feels like we’re balancing things pretty nicely right now.
Gratuitous picture of my baby boy:
Looking at him just makes me smile. :)
Wednesday, June 9, 2010
Happy pants dance!
My older son (age 3) needed some new pants. He wears cloth diapers. Apparently, after age 2, most clothing companies seem to assume that either all boys are potty trained or that they all wear super-thin disposable diapers, because finding pants that will fit over the cloth diaper bulb has become increasingly challenging. Then add this to the fact that it is nigh impossible to buy pants at this time of year (it seems that one can only purchase pants from about July through January... then it's all shorts, all the time).
So I decided to try and make him a pair of pants (keep in mind, my last attempt at pants did not work out so well). During the baby's naptime the other day, I managed to sneak into the sewing room for a couple hours and put a pair together.
So quick and easy! I used Kwik Sew pattern 3211 in a size T4. I actually started by making a muslin to make sure they would fit over the diaper bulb. The muslin (which I did indeed make out of muslin) seemed to fit well, if a little loose. I figured since I was using denim for the real thing, that the thickness of the denim would compensate for the looseness. As it turns out, these are a little on the big side (oddly enough, they fit looser than the muslin did), but not so large that he can't wear them.
I also made a couple modifications to the pattern. The pattern includes some funky knee pleat inserts. I left those out. And then I added the pockets (I took them from another pattern, Simplicity 2907). I also shortened the pants by about 1". Then I also decided to break out my machine embroidery attachment and add some airplane flair using a design from Designs by Juju (it is in the "Things That Go" applique set).
That was pretty exciting as I do not make use of that attachment nearly as much as I should (considering how much it cost). Doing this little bit of embroidery really makes me want to make use of it more often. So I count that as a good thing.
Here's a back view:
And here is a very happy boy, wearing his new pants:
And, best of all, he LOVES them!
Saturday, June 5, 2010
Jane Stickle Quilt: LS-1
Block number/name: LS-1 “Nancee’s Fantasy”
Date completed: June 2, 2010
Number of pieces: 26
Notes on block: Thank goodness for Anina’s fabulous instructions! I handpiece instead of foundation piecing by machine, but doing it in the sections she suggested and then appliquéing the center was a great approach. Though I’m happy with the results, I was really hoping that this block would end up looking a little more dramatic than it does. I chose a really gorgeous ombré fabric. Unfortunately, the ombré was really gradual and maybe too subtle to show up in a block this size. It is darker at the bottom and lighter at the top, so it’s not a complete fail. The contrast is just not as exciting as I had hoped.
Friday, June 4, 2010
Jane Stickle Quilt: L-11
Block number/name: L-11 “Caitlin’s Rose”
Date completed: May 29, 2010
Number of pieces: 21
Notes on block: It was nice to have an evening of cutting and stitching. Yay for a sleepy baby boy! I got three blocks prepped and managed to get this block completed. And now we’re all caught up on our recorded television, too!
Date completed: May 29, 2010
Number of pieces: 21
Notes on block: It was nice to have an evening of cutting and stitching. Yay for a sleepy baby boy! I got three blocks prepped and managed to get this block completed. And now we’re all caught up on our recorded television, too!
Thursday, June 3, 2010
Snip. Sew. Send. May
I was excited to find some time last week to go into the quilty room and actually use my machine! It gave me a chance to make my May Snip.Sew.Send. blocks for Rebecca. She asked for pinwheels inside a non-wonky log cabin. She sent an array of fabulous greens for me to work with.
I enjoyed making it so much, I had to make a second...
It was hard to send these off, as I really love the look of them. But I did keep one of the scraps of leftover fabric to use in my Jane Stickle quilt. That definitely made it a little easier to give them up. :)
I'm really excited to see how Rebecca puts these together as all of the blocks I've seen so far look so cool!